File imports
The following geometric exchange formats are available for model geometry imports:
.step.iges.brep.gds
The following mesh file formats are also supported:
.msh.nas
To import a STEP file:
- Select
Edit modelto enable model editing. - Select
+next to Geometry elements and chooseImport file. - Select a STEP file.
- Build the file import.
You can enable clean up of detached entities or change the offset of the imported model in the import settings.
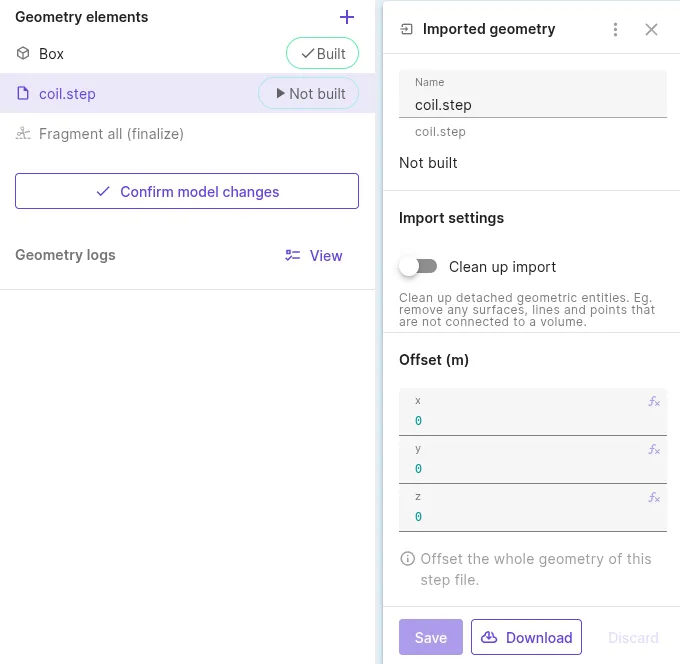
Finalize model creation by selecting Confirm model changes.
To import a GDSII file:
- Select
Edit modelto enable model editing. - Select
+next to Geometry elements and chooseImport file. - Select a GDSII file.
At this point the GDSII file content is parsed, but a 3D model is not yet created.
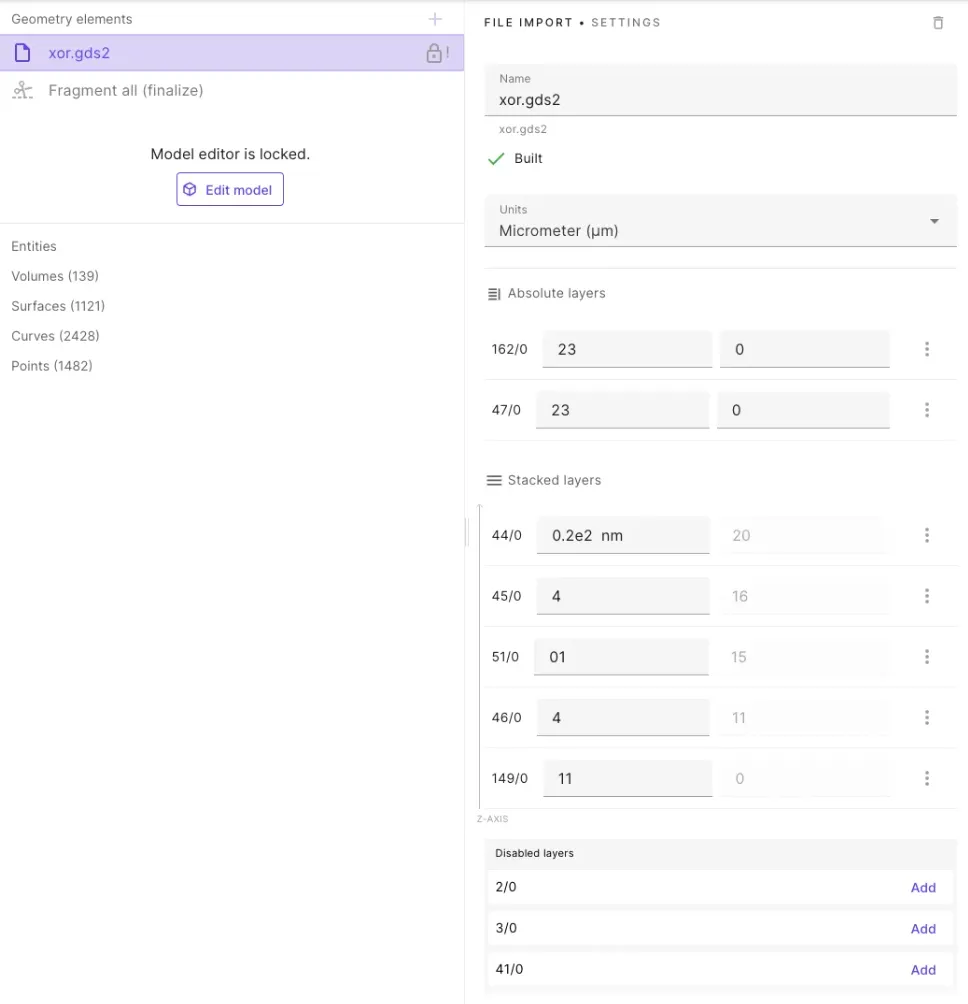
To create the 3D model, perform the layer stackup:
- Select Units for layer thickness.
- Layer thickness units can be overridden for any layer by providing units after the thickness value, like
0.2e2 nm.
- Layer thickness units can be overridden for any layer by providing units after the thickness value, like
- Add all layers you want to use in the model from the bottom up.
- Enter thickness for each layer.
- Select
Saveand build the import.
Finalize model creation by selecting Confirm model changes.
Layer stackup: stacked layers
Section titled “Layer stackup: stacked layers”By default, all layers are added as relative stacked layers starting from level 0 on the Z-axis. Each new layer is stacked on top of the previous one. Stacked layers can be moved up and down in the layers list after they are added.
Layer stackup: absolute layers
Section titled “Layer stackup: absolute layers”To define cut-out layers or layers that span across multiple levels, use absolute layers:
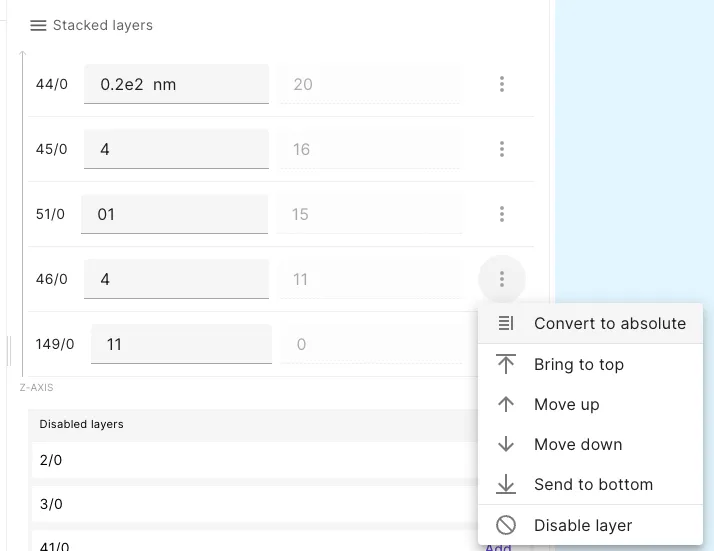
- In layer settings, select
Convert to absolute. - Enter thickness and start position on the Z-axis.
NASTRAN
Section titled “NASTRAN”When exporting a NASTRAN mesh file from COMSOL, use the following export settings:
| File extension | Data to export | Field format | Units |
|---|---|---|---|
.nas | Domain elements | Large | Meters [m] |
| Boundary elements | Export as second-order elements | ||
| Geometric entity information |