Introduction to Quanscient Allsolve
Projects
Section titled “Projects”The Quanscient Allsolve home view shows the overview of your projects. This is where you can view and manage all the projects you have access to.
- Search for projects: Search by name or description to easily find projects that match specific keywords.
- Filter the list of projects: The project list can be filtered by project physics or used labels.
- View and edit project details: Access a project’s details by clicking the three dots on a project card. This is where you edit general details, such as project sharing and labels.
- Access projects: Navigate to a project by clicking on the project card. This is where you set up and run your simulations.

Filtering the list of projects allows you to find what you’re looking for quickly. You can configure the list to only show projects that are in full script mode.
Additionally, you can filter the list to only show projects that have been created with specific physics. This filter is an “OR” filter, which means that it will show all projects that have any of the selected physics.

Creating a new project
Section titled “Creating a new project”To create a new project:
- Select
+ Create new projectin the home view. - Fill in project details and permissions on the Create new project dialog.
- You are moved inside the project. The geometry options dialog opens.

Uploading a geometry file
Section titled “Uploading a geometry file”- Browse and select a file under Upload a geometry file, or simply drag your file on to the geometry options dialog.
- The model view opens with your imported model. The model volumes, surfaces, curves, and points can be viewed under Entities in the Common sidebar.
- You can edit the model Offset or choose to Clean up detached geometric entities by selecting the imported geometry under Geometry elements.
Confirm model changesto finish editing your geometry.

Modeling a geometry in Allsolve
Section titled “Modeling a geometry in Allsolve”- Under Create a geometry, select a shape such as sphere, box or cylinder as a starting point.
- The model view opens. Add other shapes and operations, or import files through
+next to Geometry elements. - Build your elements in the left sidebar and
Confirm model changesonce your model is finished.
Skipping model generation
Section titled “Skipping model generation”- Under Start without geometry, select
Skip model generation. - Your project launches without a model. Add variables to your project under Definitions in the Common sidebar.
Top-level controls
Section titled “Top-level controls”The Quanscient Allsolve project view is split into 3 sections:
- Geometry
- Physics
- Simulations
In general, each section corresponds to a stage in the simulation workflow.
The separate Common sidebar is found on the top right of the project view.
Below is an overview of features included in each section, along with an image of the section view. Section navigation i.e. top-level navigation is found on the top bar of the project view.
Geometry
Section titled “Geometry”In the Geometry section, you can:
- Import geometry files to load in your model.
- Add and edit Geometry elements to create your model.

Existing geometric entities can be viewed under Entities in the Common sidebar.
For further details about working with geometries, see the dedicated page Geometries.
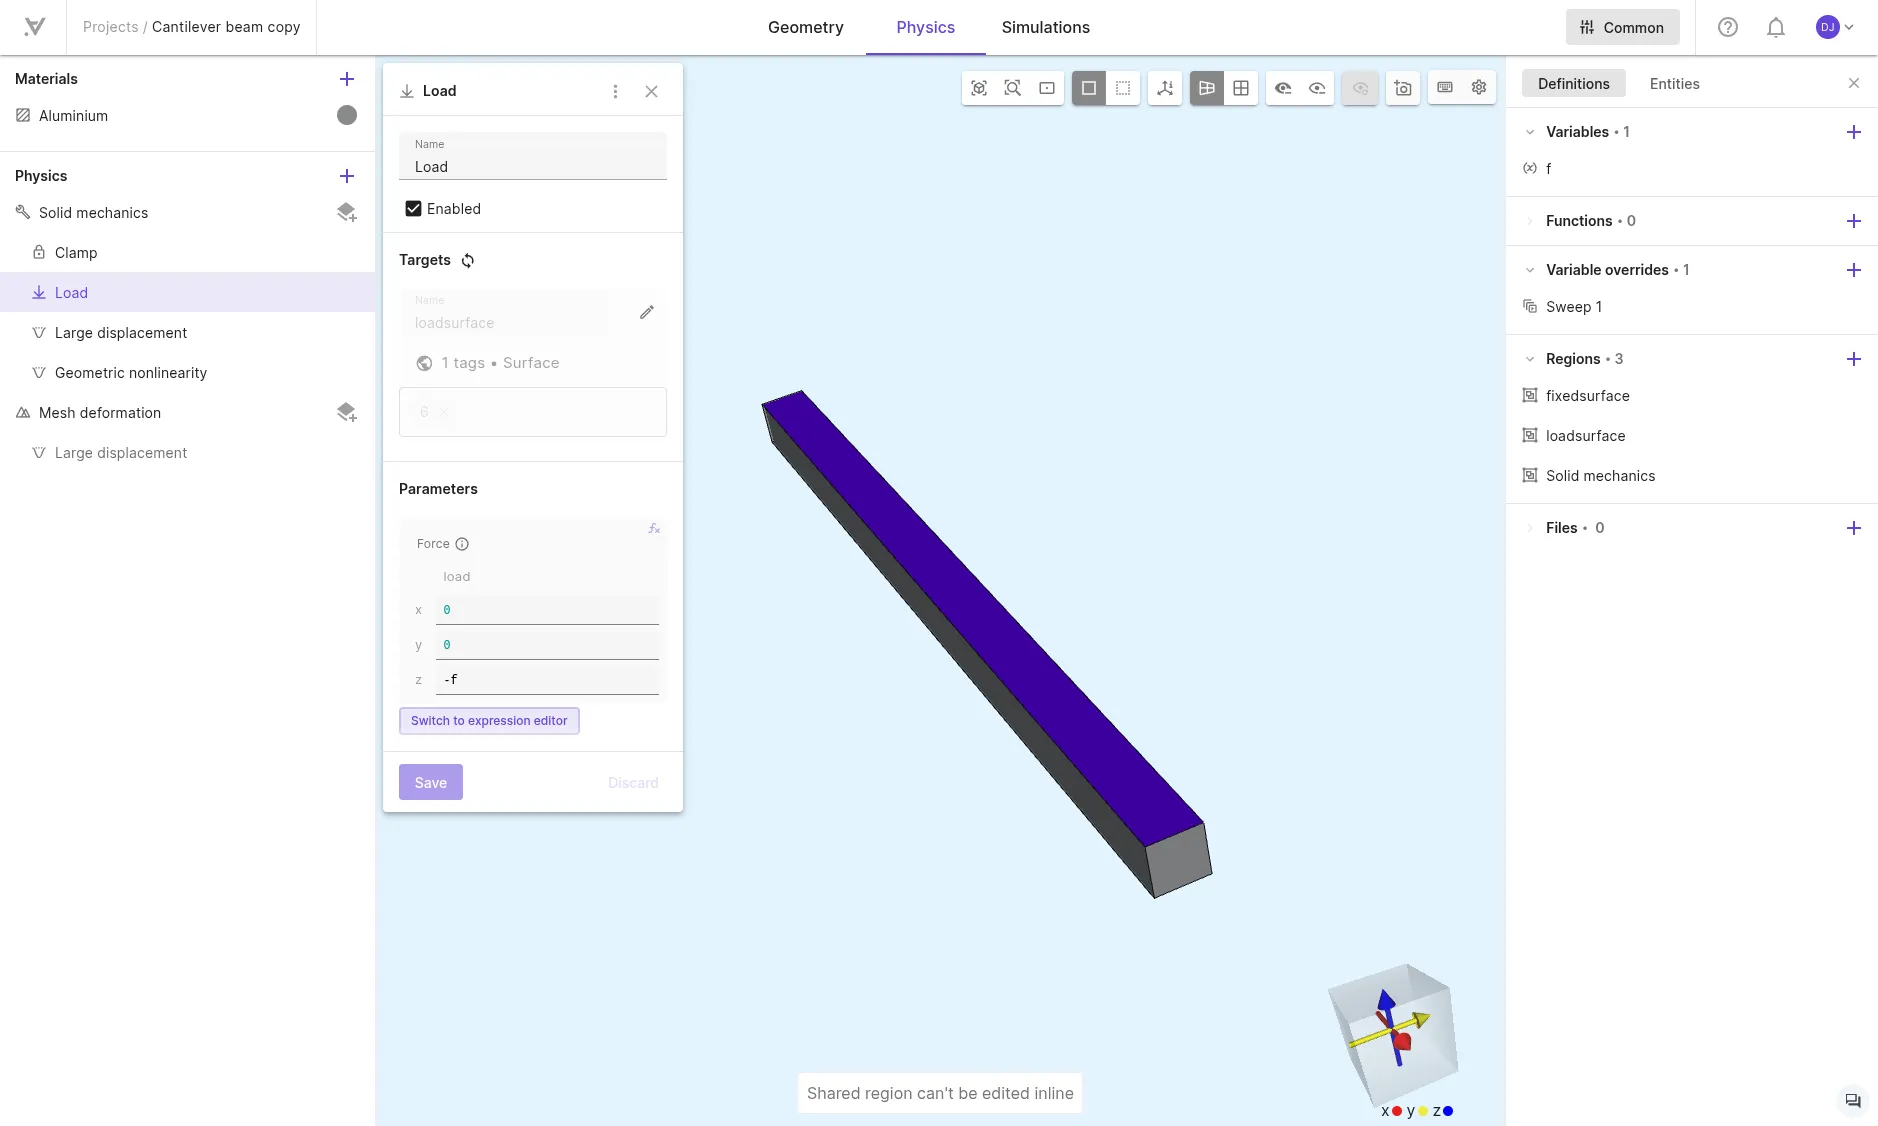
Physics
Section titled “Physics”In the Physics section, you can:
- Add Materials to your model and edit material properties.
- Add Physics and define physics interactions, such as boundary conditions or couplings.
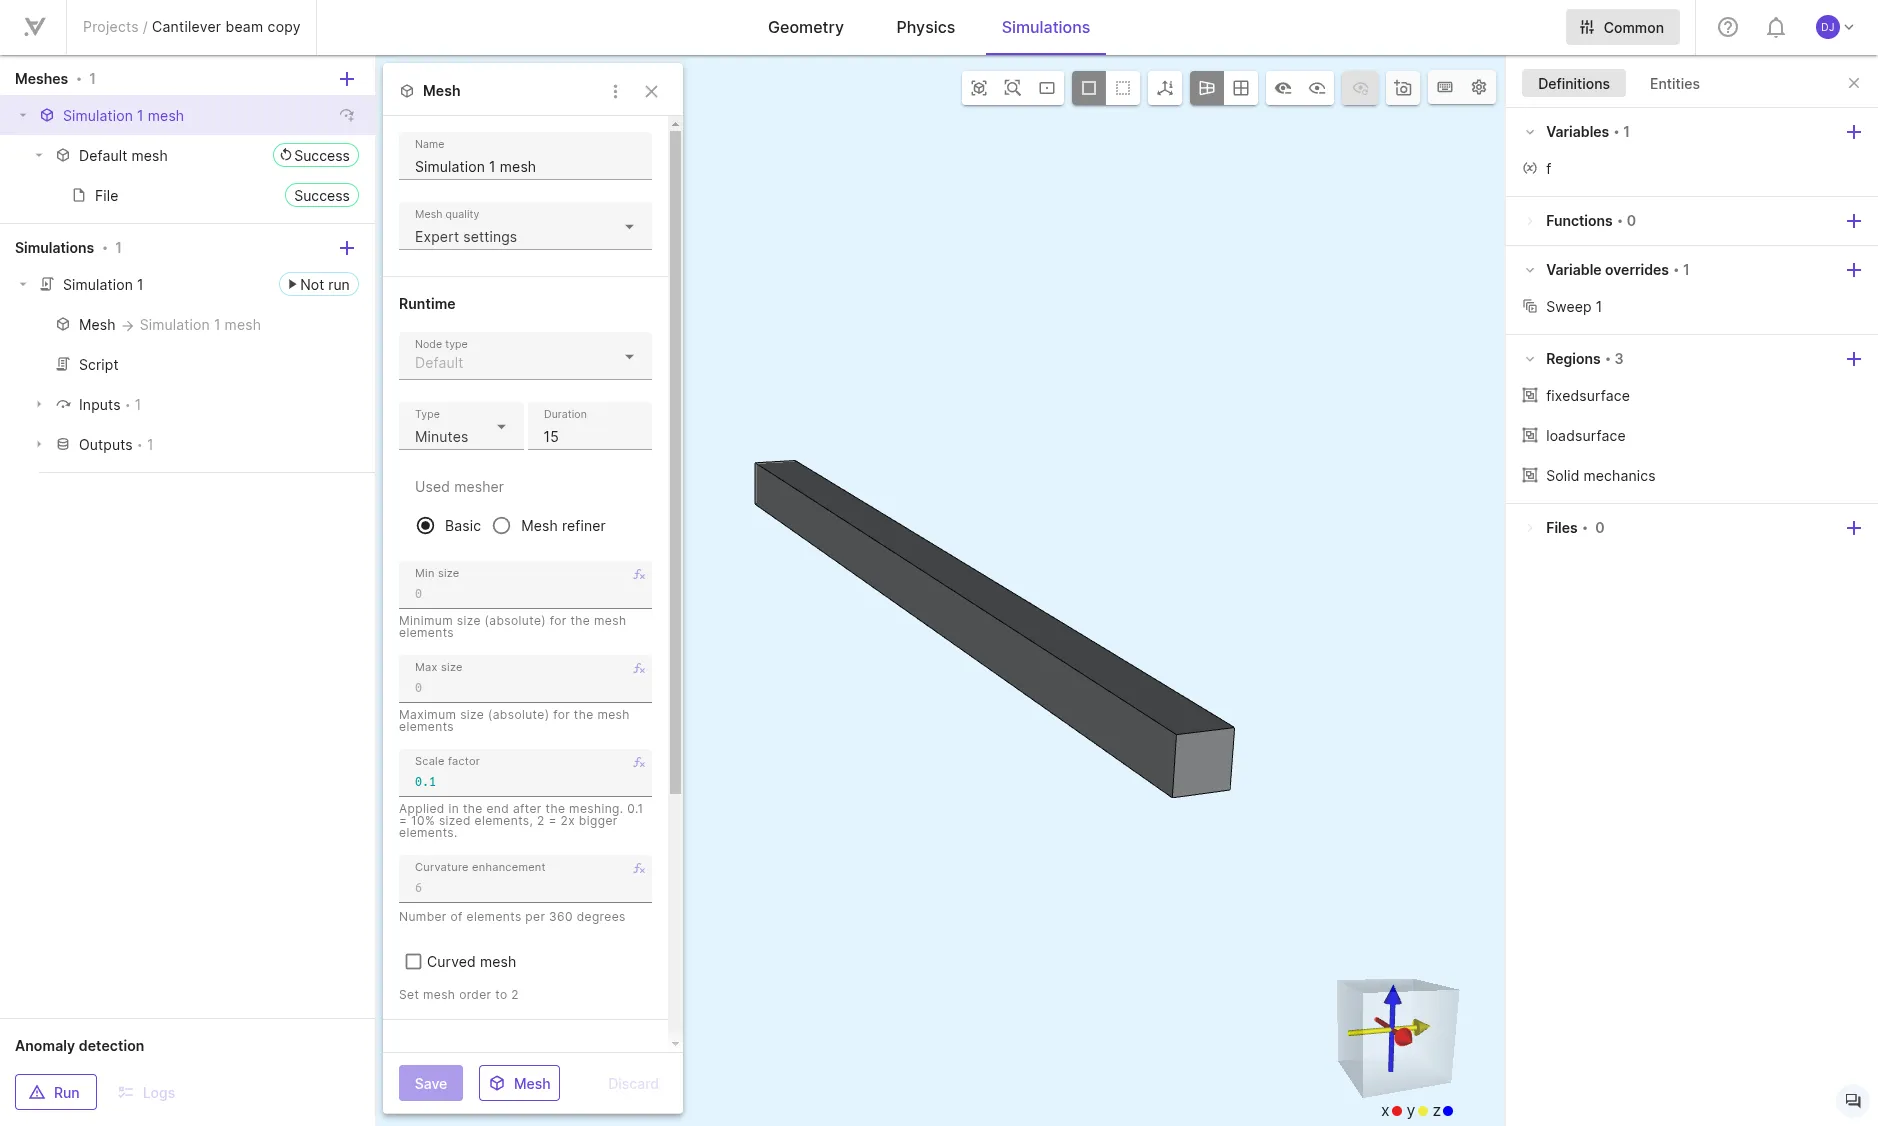
Simulations
Section titled “Simulations”In the Simulations section, you can:
- Create, customize and preview Meshes.
- Run Simulations.
- Plot and visualize simulation outputs.
- Run Anomaly detection to verify your setup.
For more details, see Simulations and Meshing.
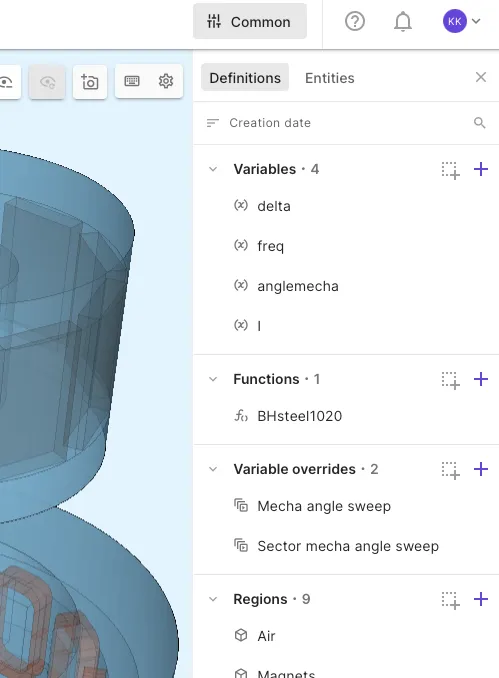
Common
Section titled “Common”In the Common sidebar, you can:
- Define Variables and Functions.
- Define Variable overrides
- Define Regions.
- See Regions.
- Import Files.
- View geometric Entities.
Model view controls
Section titled “Model view controls”The model view controls are found in the top edge of the model view just under section navigation.

The model view controls from left to right are:
- Reset view (Shift+R): Center and adjust zoom to make the full model visible.
- Zoom to area (Shift+B): Draw an area to zoom to.
- Set focal point (Shift+C): Specify a point on the model to set camera focal point.
- Opaque model (Shift+N): Surfaces on the model are opaque (you cannot see through them).
- Translucent model (Shift+M): See through surfaces on the model.
- Show axes: Fit axes around the model to see scale in meters.
- Camera projection - perspective: Areas closer to the camera seem bigger.
- Camera projection - parallel: Everything on the model is of actual size.
- Useful for zooming into very small details.
- Hide volumes (Ctrl+Shift+H): Click on a volume in the model to hide it.
- Keep Shift pressed to hide multiple in a row.
- Hide surfaces (Shift+H): Click on a surface in the model to hide it.
- Keep Shift pressed to hide multiple in a row.
- Clear hidden: Show all volumes and surfaces again.
- Screenshot: Take a screenshot of the model (without background) and download the image.
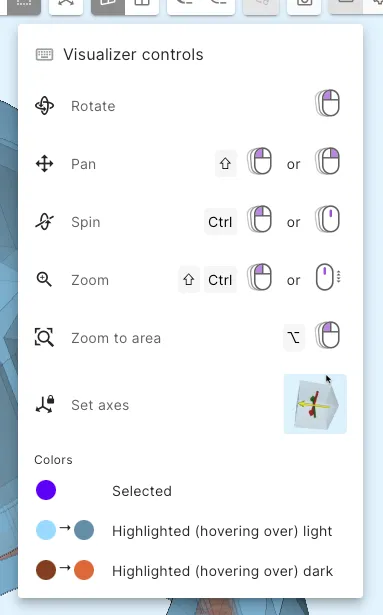
- Visualizer controls: Bring up the visualizer controls tooltip.
- Visualizer settings: access other visualizer settings.
- Hide/show curves of hidden surfaces.
- Edit background color.
Camera
Section titled “Camera”The model view camera can be rotated, panned, spun and zoomed with the mouse. Check the camera control keys from Visualizer controls in the top right of the model view.