
Regions
Regions in Quanscient Allsolve are sets of geometric entities that let you reference and group parts of a geometry — for example, to assign materials or define boundary conditions. A region contains entities of a single dimension only: volumes, surfaces, curves, or points. You cannot mix dimensions within one region.
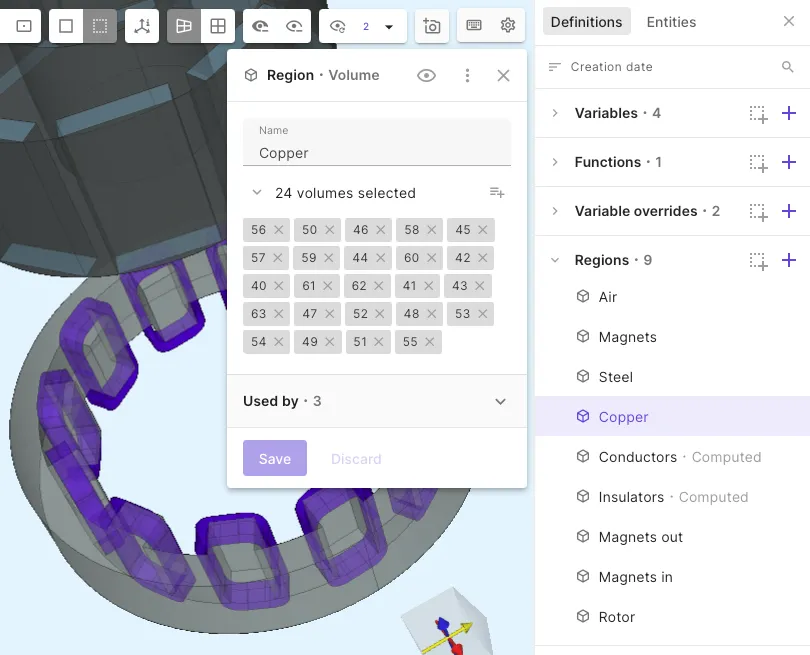
To create a region, select + next to Regions in the Common sidebar. Choose a region type (Volume, Surface, Curve, …) and select entities on the model.
A material target region can also be shared, making it reusable elsewhere in your project.
In the video, a new region called Surface is created by selecting 3 surfaces on the propeller model. Then, aluminium is selected as a material for the propeller, and the Aluminium region is shared to the project.
Entities & tags
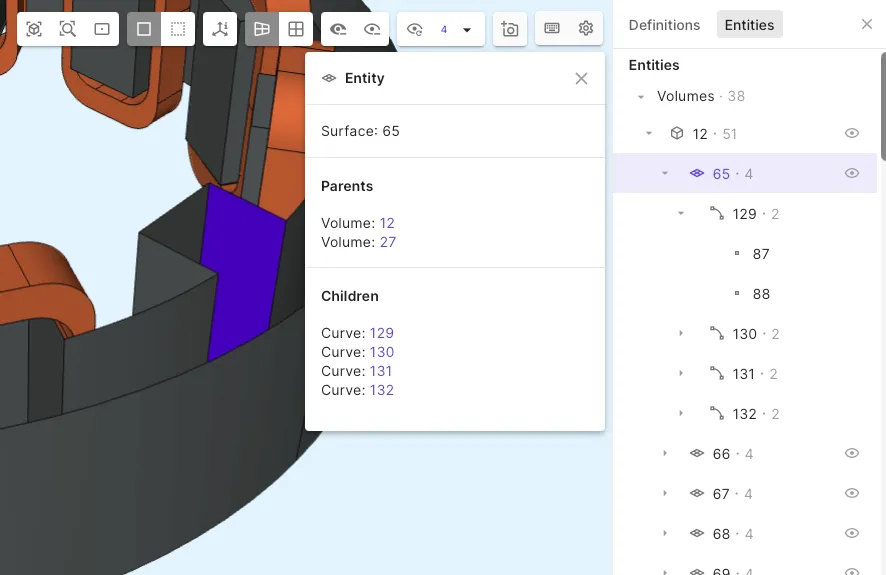
Section titled “Entities & tags”3D models in Quanscient Allsolve contain four types of geometric entities: volumes, surfaces, curves, and points. Each entity has a unique identifier called a tag, always a positive integer. Tags are used to identify and reference entities within Allsolve.
Each dimension has its own running sequence 1, 2, 3, …, so a point, a curve, a surface, and a volume can each carry tag 1.
View entity tags in the Entities list, where you can also toggle the visibility of volumes and surfaces.
Computed region
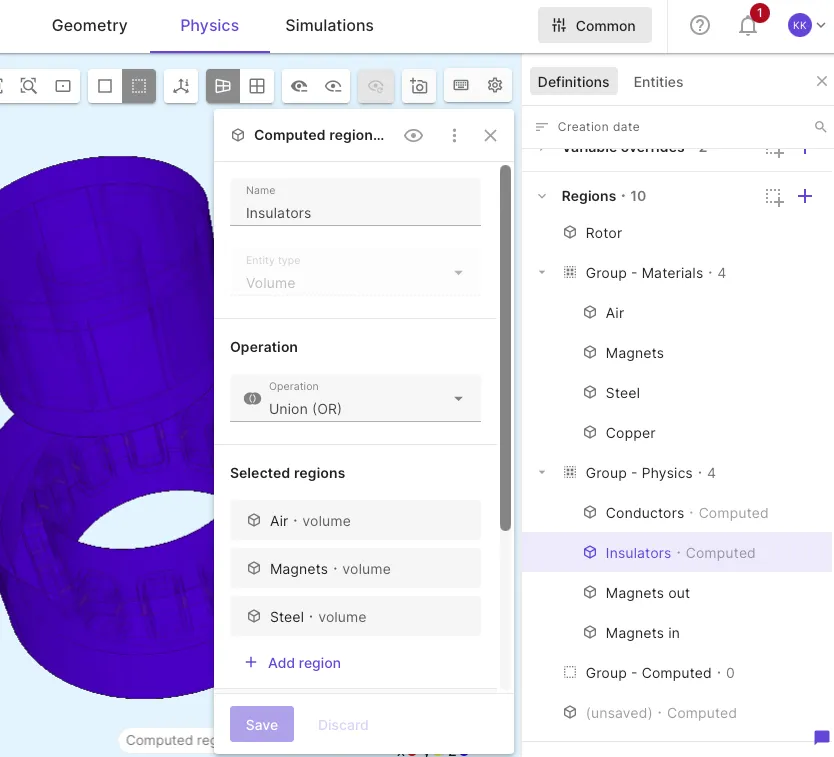
Section titled “Computed region”A computed region applies boolean operations to existing regions to create a new region. This reuses regions you have already defined, avoiding manual repicking. This is especially useful in complex geometries with many entities.
The following operations are available:
Union (OR): The union of all the added regions.
Intersection (AND): The intersection of all the added regions.
Difference (A-B): The difference between the two added regions A and B.
Symmetric difference (XOR): The entities present in exactly one of the added regions. This equals the union minus the intersection of all the added regions.
Complement (NOT): The complement of all the added regions — every entity in the geometry that is not present in the added regions.
Boundary: Picks all outer entities of selected dimension from all the selected higher level entities in a region. An entity is considered to be a boundary when it is not shared with any other entity. For example, get the outer edges of a set of surfaces.
: Boundary intersection: A single operation that performs boundary operation on the entities of selected regions and then computes the intersection of those. For example, get the boundary surface shared by two physics domains.
The chosen Entity type determines whether the computed region contains points, curves, surfaces, or volumes.
Rule selector
Section titled “Rule selector”The rule selector is a streamlined way to create a region. It can be used to pick volumes, surfaces, curves or points. Use it when picking many entities by hand would be laborious. The following selectors are available, individually or in combination:
Attribute
Section titled “Attribute”Geometric entities in Allsolve are given attributes with which to reference them. For Allsolve-native geometries, all entities are given at least the attribute name - the name you gave to the entity when building it. Geometries imported as a STEP file for example can have other attributes as well.
To pick with the attribute rule selector, choose Attribute and Value from the list to select all entities that match. To pick all edge curves on a box, for example, use the name attribute of the box.
Minimum size
Section titled “Minimum size”Select all entities whose X,Y,Z size exceeds the defined minimum.
Maximum size
Section titled “Maximum size”Select all entities whose X,Y,Z size stays within the defined maximum.
Bounding box
Section titled “Bounding box”Select all entities inside a bounding box, defined by two corner points with coordinates Min X, Min Y, Min Z and Max X, Max Y, Max Z.
To assist with selection on the last three of these selectors, use the Pick similar tool. Pick one or more similar entities to autofill the X,Y,Z values for Minimum size, Maximum size, or Bounding box.
Pick with rule
Section titled “Pick with rule”When creating a new region or selecting targets for materials, physics interactions, etc., there is an option to select entity tags through the Pick with rule tool.
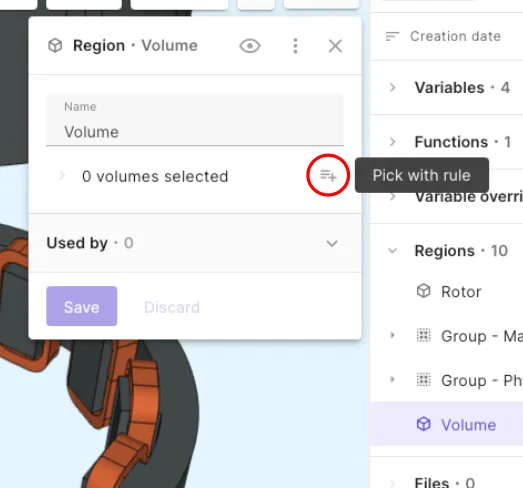
The Pick with rule tool has 3 sub-tools inside it:
- Entities - Select entity tags on the entities list.
- Text - Type tag IDs as plain text.
- Range / Interval - Select range / interval to pick tags.
Entities
Section titled “Entities”The Entities sub-tool opens an entities list in the pick with rule pop-up window.
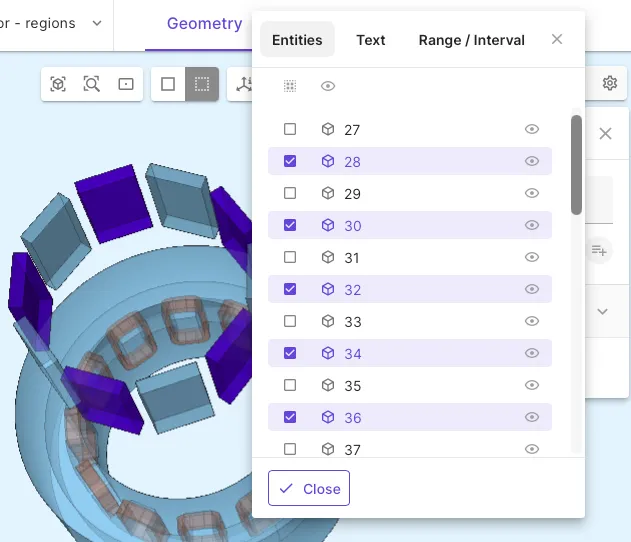
Pick entities on the list by selecting tick boxes for each entity.
The Text sub-tool opens an input field, where you can type tag IDs as plain text.
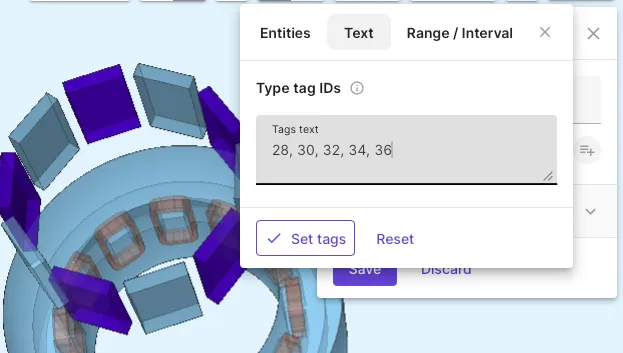
Separate tag IDs with commas , or sequences of consecutive tags with hyphens -.
Range / Interval
Section titled “Range / Interval”Use the Range / Interval sub-tool by giving Start tag, End tag and Interval.
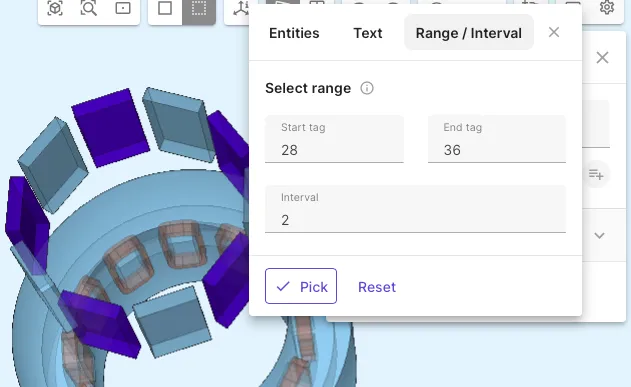
Here, for example, Start tag = 28, End tag = 36 and Interval = 2 picks five tags: 28, 30, 32, 34, 36. This is exactly the same as typing 28, 30, 32, 34, 36 in the Text sub-tool or selecting these 5 tags in the Entities sub-tool.
Mass rule create
Section titled “Mass rule create”The Mass rule create tool is a parallel to Rule selector -> Attribute. It lets you pick an attribute and create a region for every value, en masse. Regions can be created in any dimension - volume (3), surface (2), curve (1) or point (0).