
Getting started
This page covers installing the SDK, setting up credentials, and running your first script. For a catalog of example projects, see the examples README in the SDK repository.
Installation
Section titled “Installation”The SDK requires Python 3.10 or newer. Install it with pip in a virtual environment on your platform of choice.
Linux / MacOS / WSL
Section titled “Linux / MacOS / WSL”These steps use a standard Python virtual environment and pip.
Prerequisites
Section titled “Prerequisites”- Python 3.10 or newer (often preinstalled on Linux and macOS; use your package manager or python.org if needed)
Step 1: Choose a working directory
Section titled “Step 1: Choose a working directory”Clone the SDK repository or create a working directory for your own scripts.
Step 2: Create and activate a Python virtual environment
Section titled “Step 2: Create and activate a Python virtual environment”python3 -m venv venvsource venv/bin/activateThe prompt should begin with (venv), confirming the environment is active.
Step 3: Install the SDK
Section titled “Step 3: Install the SDK”(venv) $ pip install -U pip(venv) $ pip install allsolveStep 4: Set up API keys
Section titled “Step 4: Set up API keys”Read Creating and using API keys below. Create a .env file in your working directory (see Initializing the SDK), or export environment variables in your shell:
(venv) $ export ALLSOLVE_ACCESS_KEY="<your key id>"(venv) $ export ALLSOLVE_SECRET_KEY="<your secret key>"(venv) $ export ALLSOLVE_HOST="https://allsolve.quanscient.com/"Step 5: Run an example
Section titled “Step 5: Run an example”See the examples README
Windows with Powershell
Section titled “Windows with Powershell”These steps use PowerShell and a standard Python virtual environment.
Prerequisites
Section titled “Prerequisites”- Python 3 installed on your machine
Step 1: Open PowerShell and choose a working directory
Section titled “Step 1: Open PowerShell and choose a working directory”Clone the SDK repository or open a folder where you keep your scripts.
Step 2: Create and activate a Python virtual environment
Section titled “Step 2: Create and activate a Python virtual environment”PS > python -m venv allsolve-venvPS > .\allsolve-venv\Scripts\Activate.ps1The prompt should begin with (allsolve-venv) PS, confirming the environment is active.
Step 3: Install the SDK
Section titled “Step 3: Install the SDK”(allsolve-venv) PS > python -m pip install -U pip(allsolve-venv) PS > pip install allsolveStep 4: Set up API keys
Section titled “Step 4: Set up API keys”Read Creating and using API keys below. Create a .env file in your working directory (see Initializing the SDK), or set environment variables in PowerShell:
(allsolve-venv) PS > $env:ALLSOLVE_ACCESS_KEY="<your key id>"(allsolve-venv) PS > $env:ALLSOLVE_SECRET_KEY="<your secret key>"(allsolve-venv) PS > $env:ALLSOLVE_HOST="https://allsolve.quanscient.com/"Step 5: Run an example
Section titled “Step 5: Run an example”See the examples README
Windows with Anaconda and Spyder
Section titled “Windows with Anaconda and Spyder”If you prefer the Anaconda distribution and the Spyder IDE, follow these steps instead of the plain Python setup above.
Prerequisites
Section titled “Prerequisites”- Anaconda installed on your machine
Setting up Anaconda and Spyder
Section titled “Setting up Anaconda and Spyder”- Creating a new environment in Anaconda
- Open the Anaconda Navigator.
- Navigate to Environments → Create.
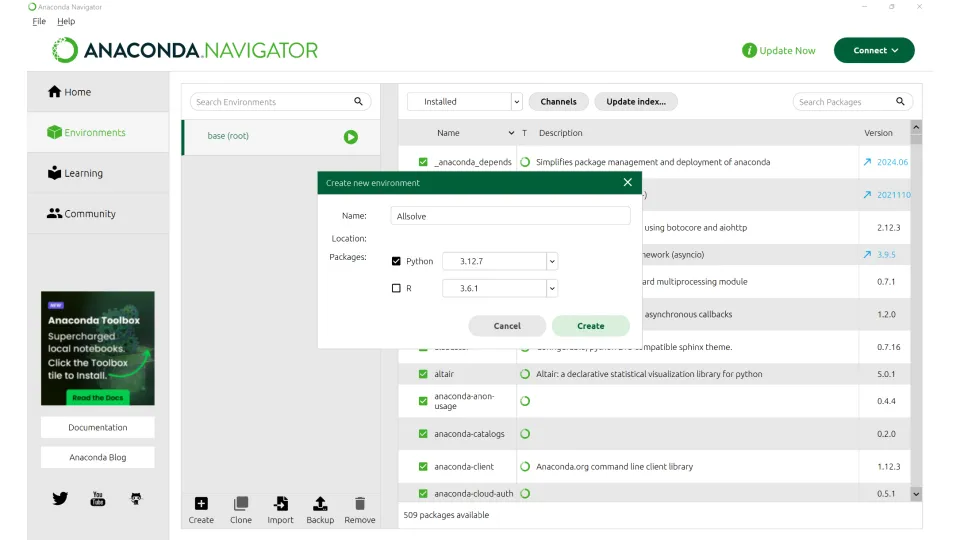
- Name the environment “Allsolve”. Make sure to enable Python 3.10 or newer under Packages before clicking Create.
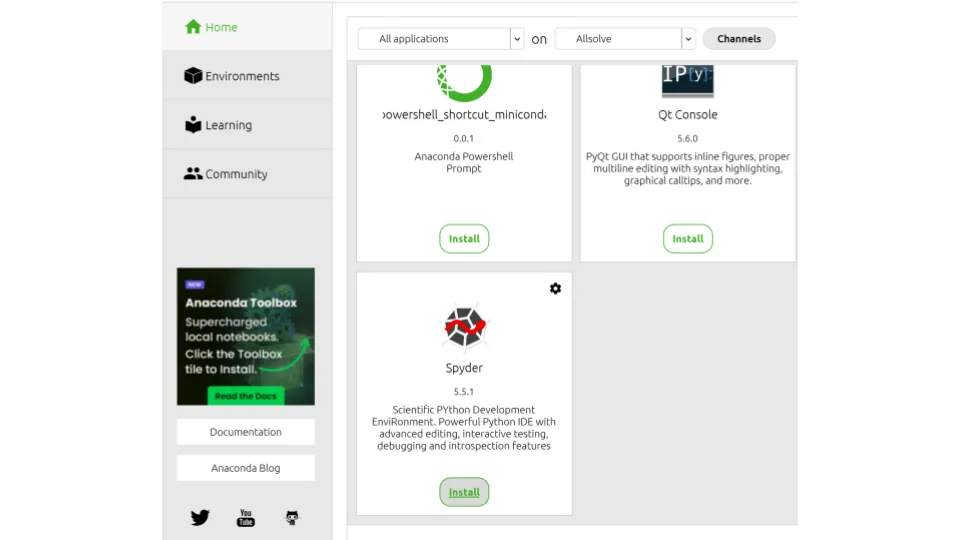
- Navigate to Home and install Spyder in the Allsolve environment (selected in the dropdown at the top).
Running an example
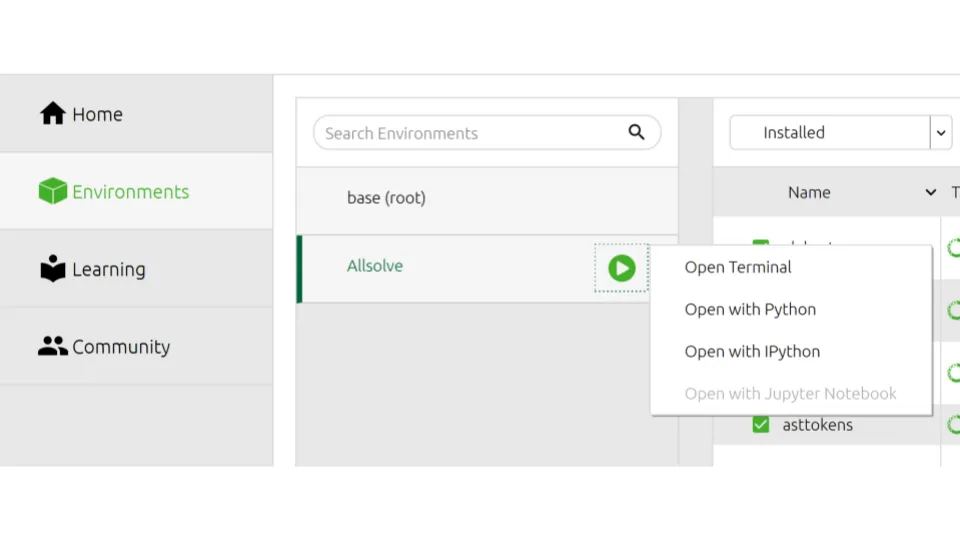
Section titled “Running an example”Open an Anaconda prompt either:
- from Anaconda Navigator, go to Environments → Allsolve → Open Terminal.
- or from Start menu → open Anaconda Prompt and run
activate Allsolve.
Then install the SDK:
(Allsolve) $> pip install -U pip(Allsolve) $> pip install allsolve(Allsolve) $> cd path\to\allsolve-sdk-pythonLaunch Spyder (Allsolve) from Anaconda Navigator or the Windows Start menu. Set your working directory to the repository clone (or your own project folder), create a .env file with your API credentials (see below), and run an example script (for example examples/hello_world/hello_world.py).
Initializing
Section titled “Initializing”Create an organization API key in the Allsolve web UI: Settings → API keys → Create key. See Organization API keys for details.
Create a .env file in your working directory with your credentials:
ALLSOLVE_ACCESS_KEY=your-access-key-hereALLSOLVE_SECRET_KEY=your-secret-key-hereALLSOLVE_HOST=https://allsolve.quanscient.com/If you cloned the SDK repository, you can copy the template instead:
cp examples/.env.default .envThe host URL may differ depending on your region and plan. Use the root URL where you normally access Allsolve.
Legacy environment variable names (QS_ACCESS_KEY, QS_SECRET_KEY, QS_HOST) are still supported.
Create a client and your first project:
import allsolve
client = allsolve.Client(dotenv_file=".env")
project = client.create_project(    name="My Simulation",    description="Created with Allsolve SDK",)print(f"Project URL: {client.get_url(project)}")
You can also pass credentials directly to the constructor:
client = allsolve.Client( api_key="your-access-key-here", api_secret="your-secret-key-here",)The allsolve.setup() function is an alternative that returns a Client instance and accepts the same credential arguments.
General concepts
Section titled “General concepts”This section covers the key concepts behind Allsolve’s programmatic interfaces and how they relate to each other.
There are three distinct APIs that relate to running simulations programmatically in Allsolve:
- Public HTTP API: Defines the basic data structures and higher-level concepts in Allsolve, and how to communicate with the platform.
- SDK: A Python convenience library that wraps the public API client. The recommended entry point is
allsolve.Client. The SDK handles routine processing of inputs and outputs and lets you write readable automation scripts. - Script API: The low-level simulation API in Python, with the most flexibility but a higher learning curve. It allows custom physics formulations and fine-grained control over solver execution. Scripts generated in the GUI use this API.
In almost all cases, use the SDK and let it handle the HTTP API for you. Use the Script API when you need custom formulations or when working with script-based simulations.
The SDK covers most GUI workflows: project management, geometry, regions, materials, physics, interactions, meshing, and simulations. Some specialized GUI features may not yet have SDK equivalents.
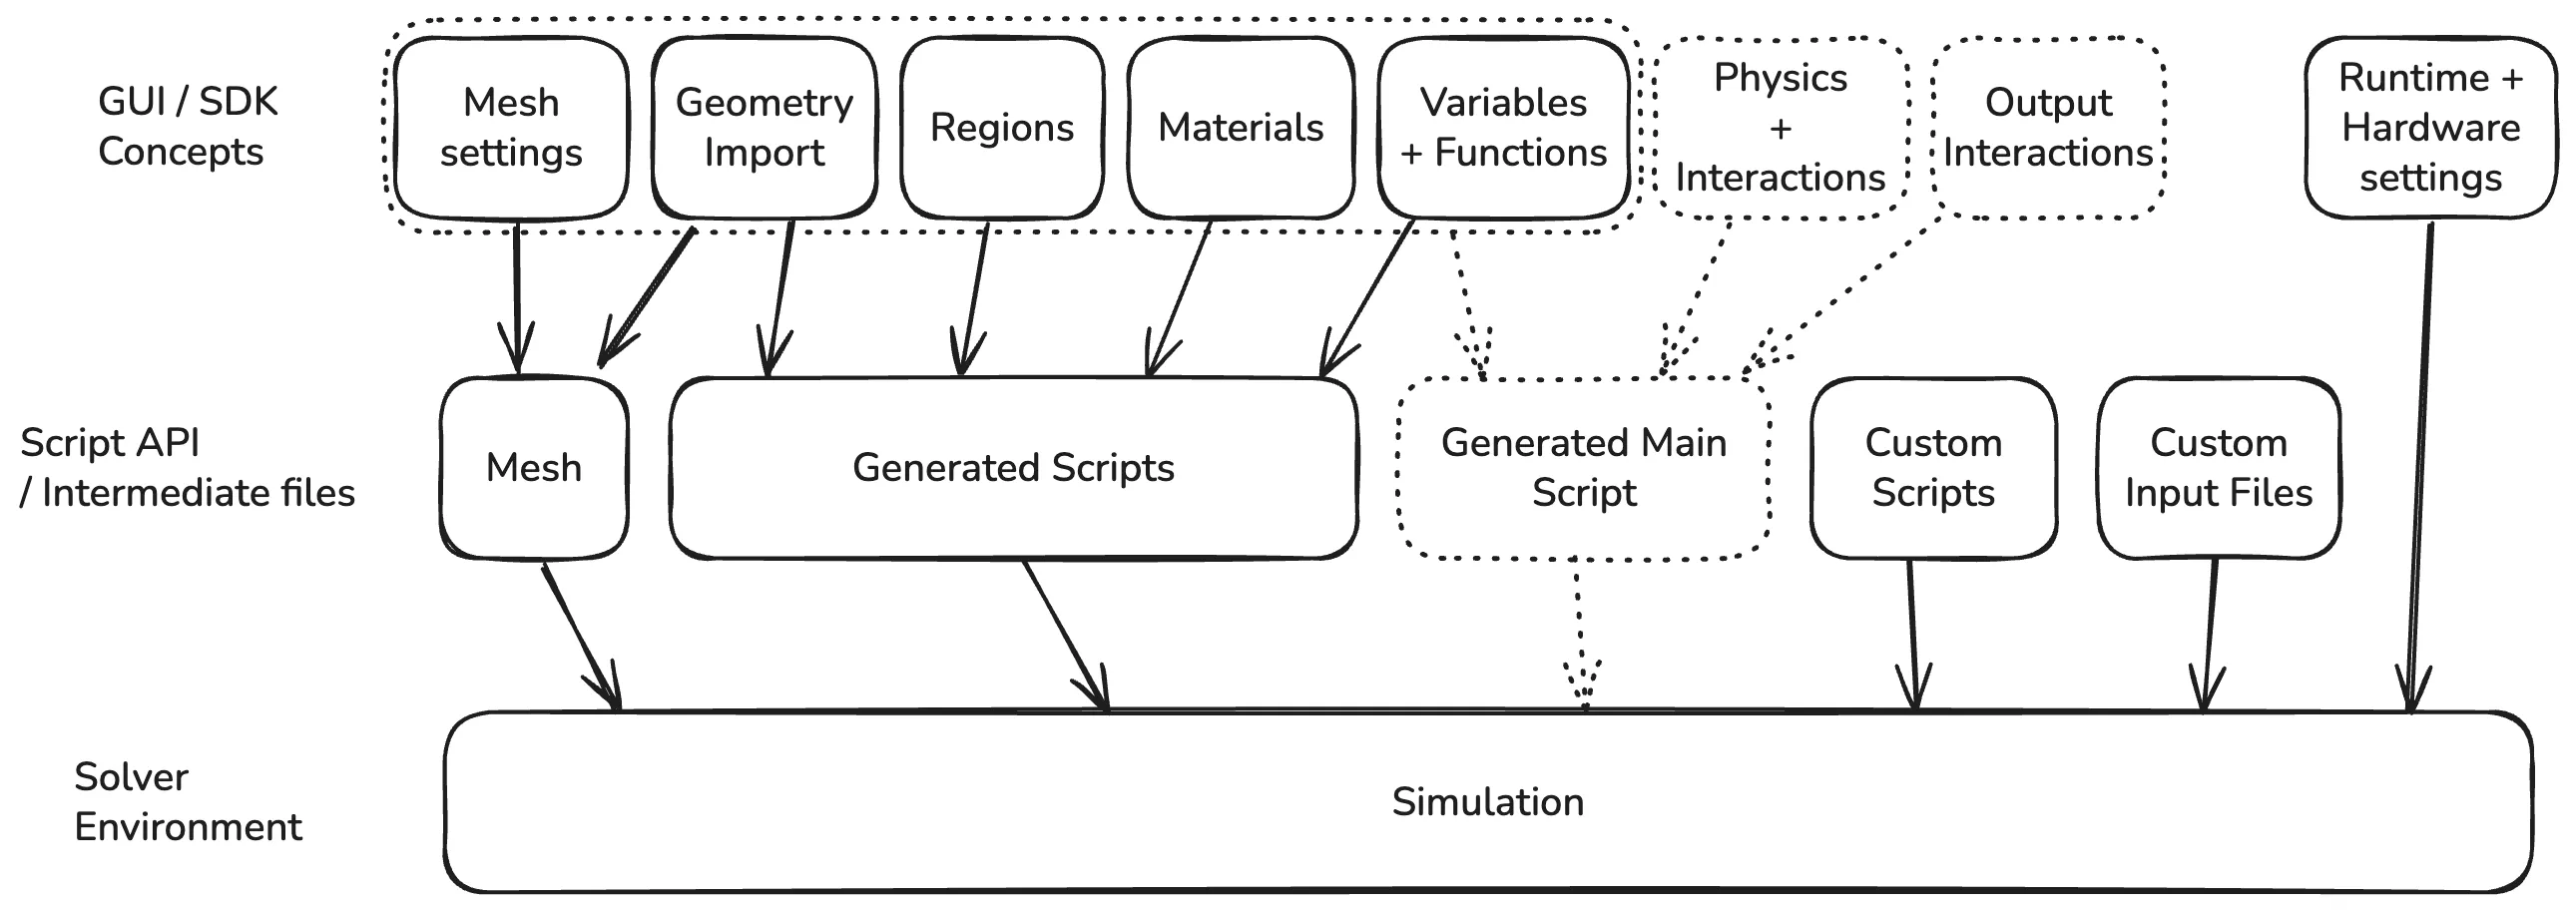
The diagram shows how GUI concepts map to scripts in the solver environment. Physics, interactions, and output interactions are now available directly in the SDK; the dotted boxes illustrate the script-generation path used when simulations run via the Script API in the solver environment.
Project layout
Section titled “Project layout”With the Client API, a project is often a single Python script (or a small set of modules) that creates geometry, sets up physics, meshes, runs simulations, and retrieves results — all through SDK calls on your local machine.
For the legacy script-based workflow — where simulation logic runs on Allsolve workers on the cloud via uploaded Python scripts — see Script-based simulations.
API keys
Section titled “API keys”The SDK supports two authentication methods:
- Organization API keys: For creating and managing multiple projects. Required for
client.create_project(). Always bound to a user. - Project API keys: For working within a single project only. Use with
client.get_project_from_token().
Organization
Section titled “Organization”An organization API key lets you create, list, and delete projects. Permissions are derived from the associated user.
Projects created via the API can be managed in the SDK or in the GUI under the API Projects group. 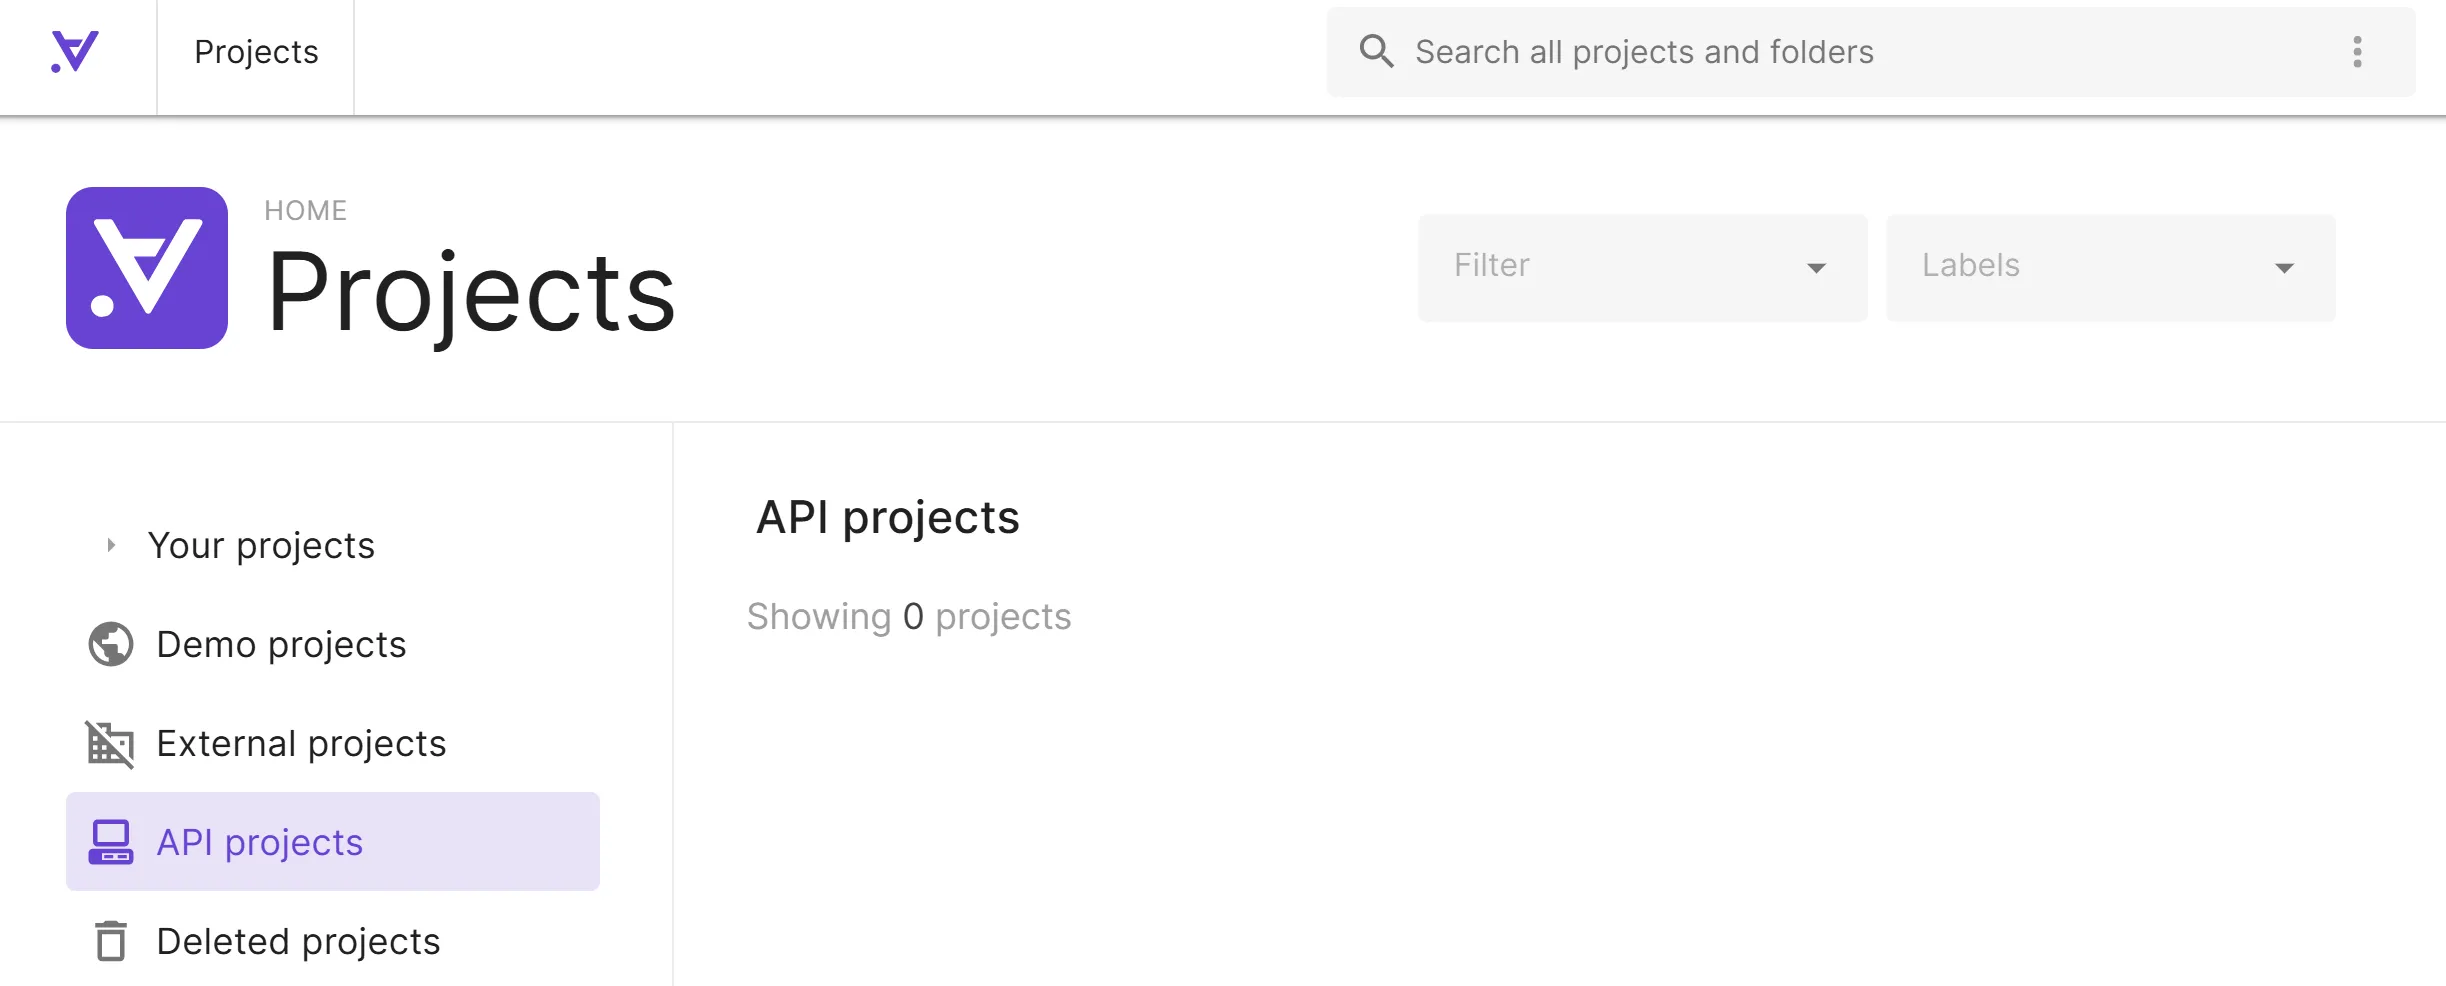
-
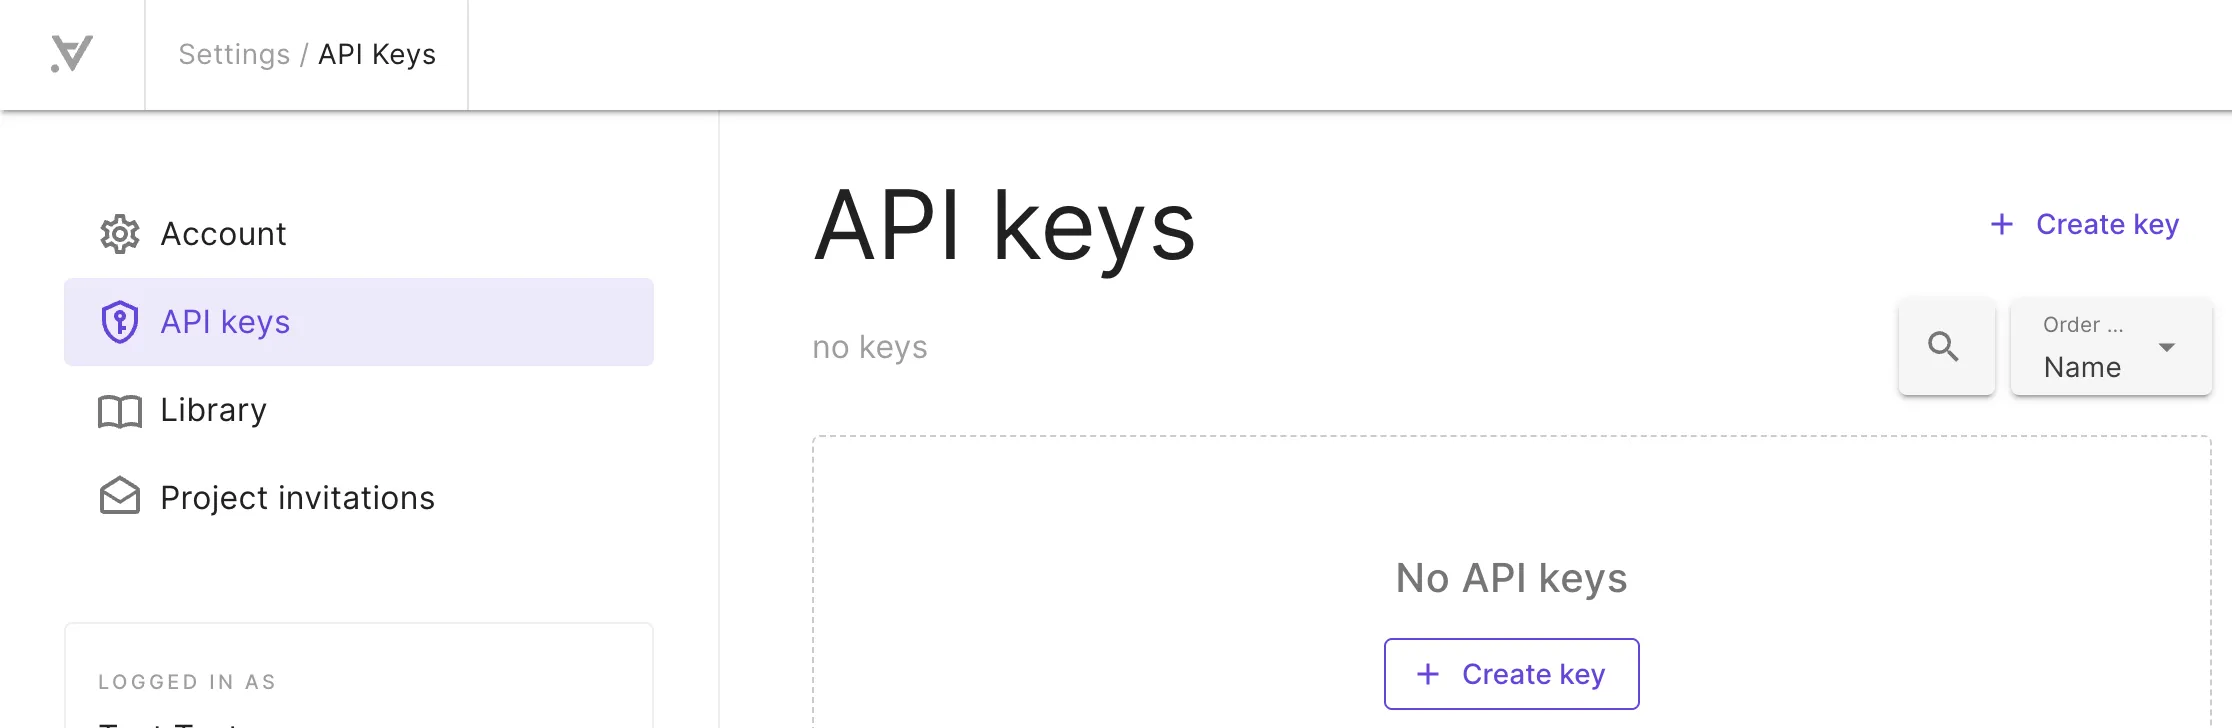
Go to Allsolve settings and open API keys on the left. For organization admins, it is listed under the organization section.
-
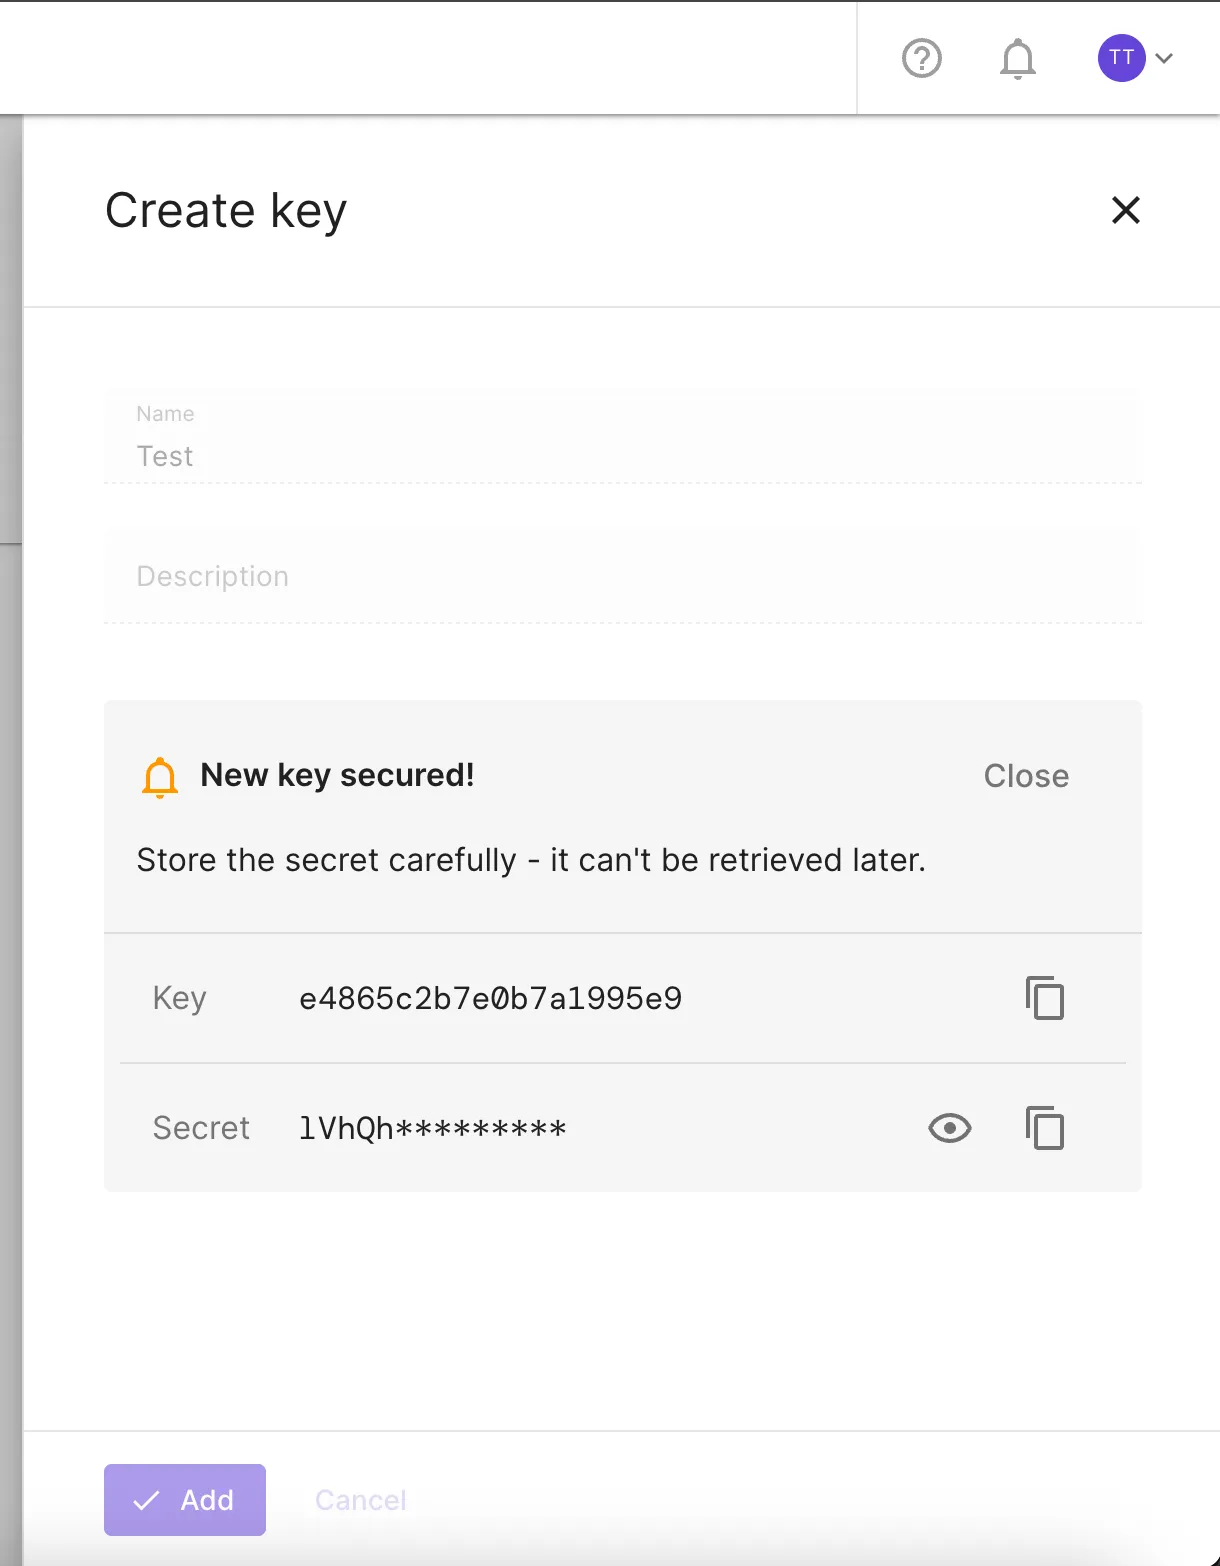
Create the API key and store the credentials securely.
Project
Section titled “Project”A project API key gives access to a single project, allowing the holder to modify and run simulations within that project via the SDK.
-
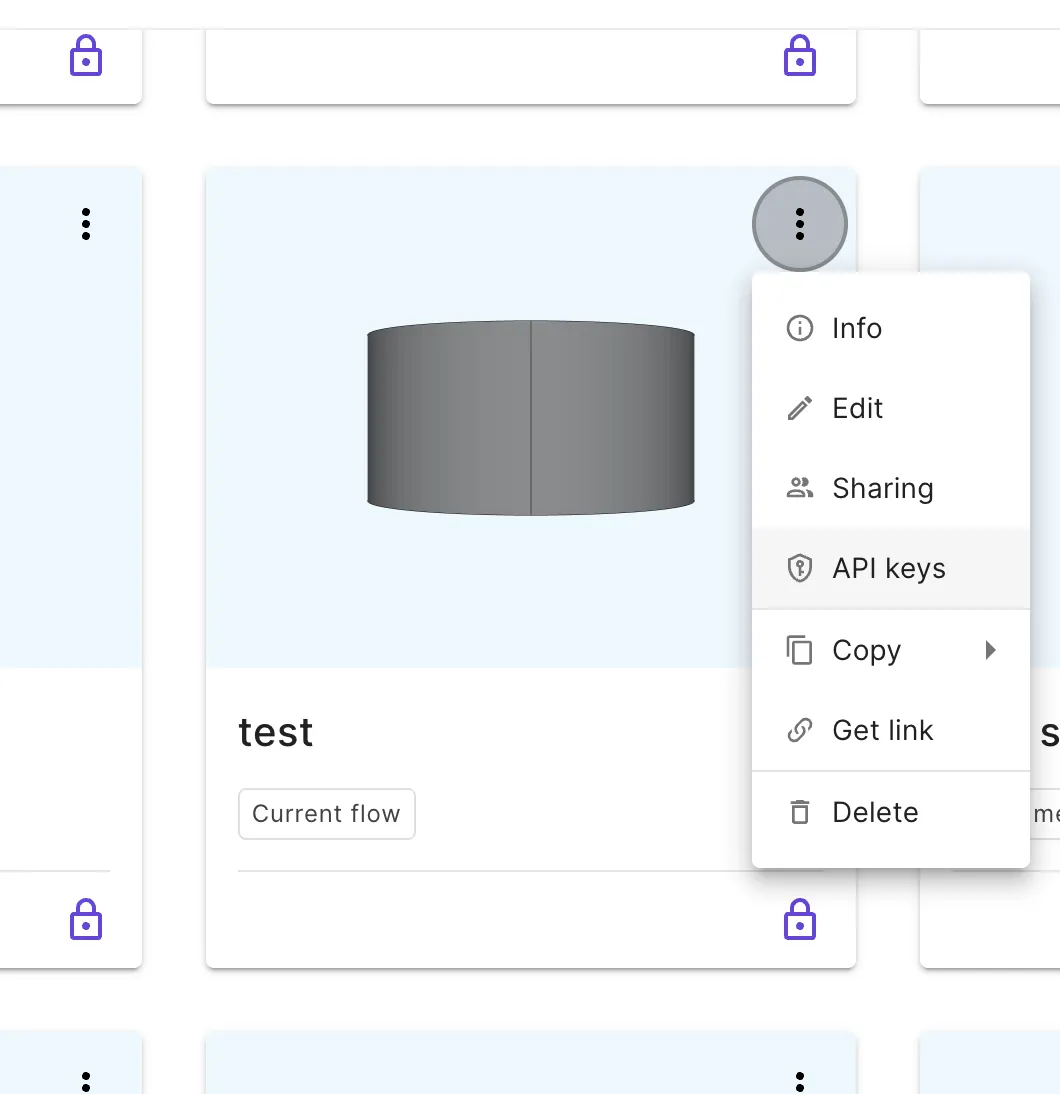
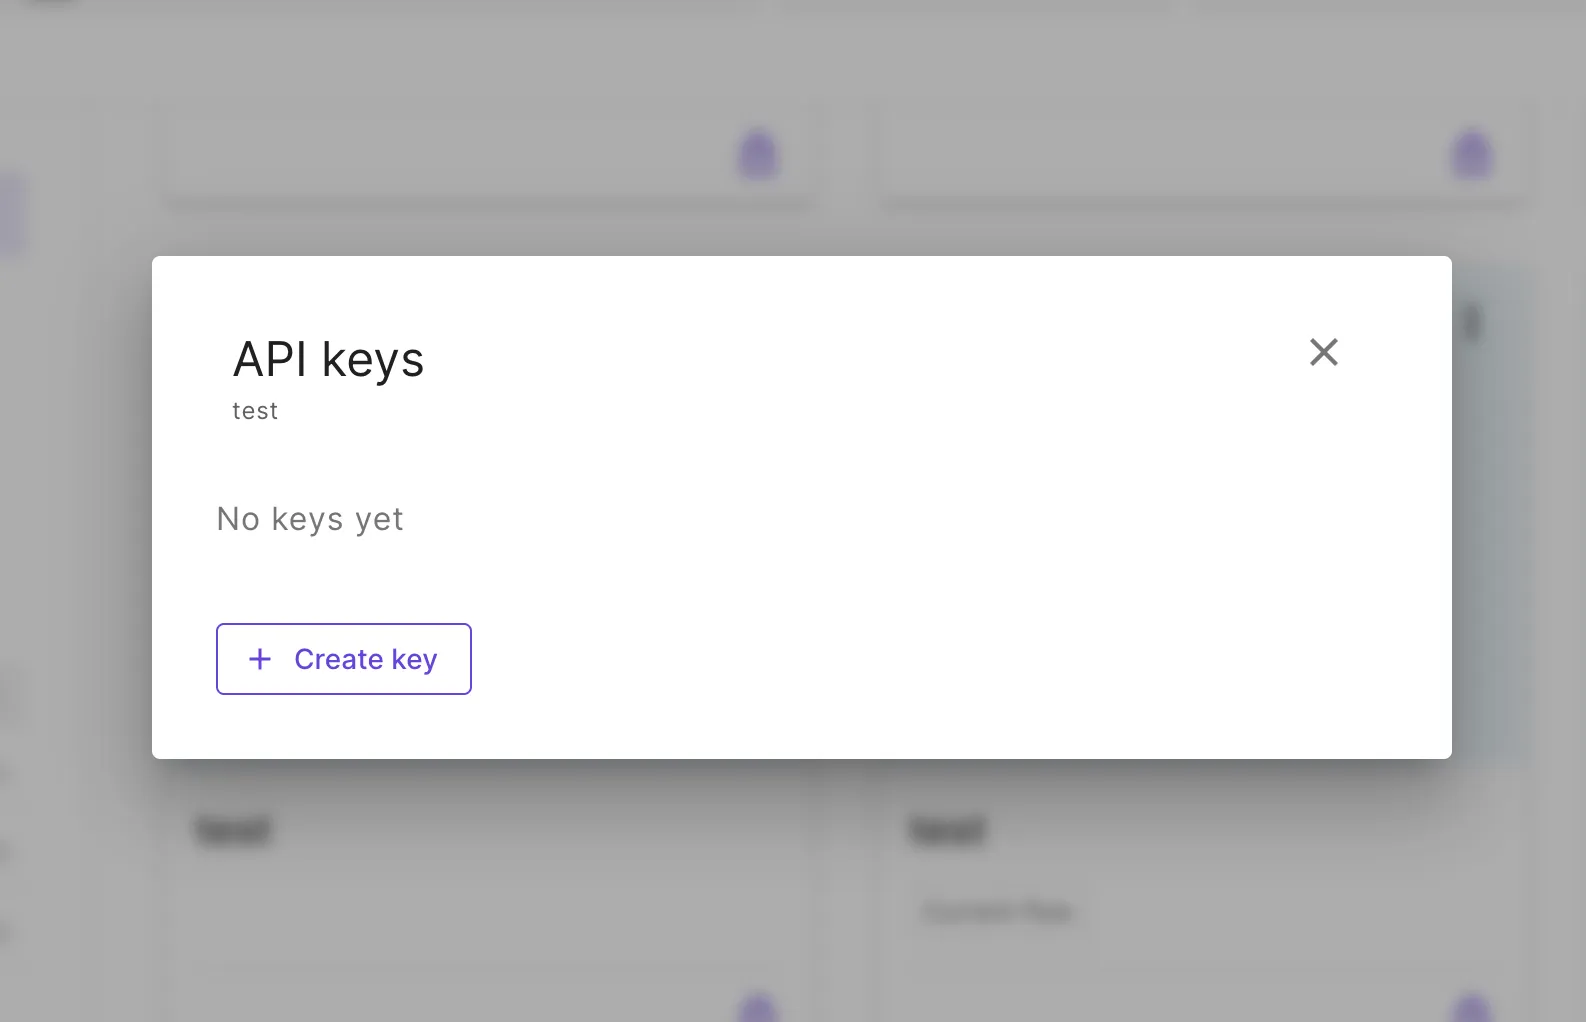
Navigate to the Allsolve projects overview page and select API keys in the project context menu.
-
Create a new API key.
-
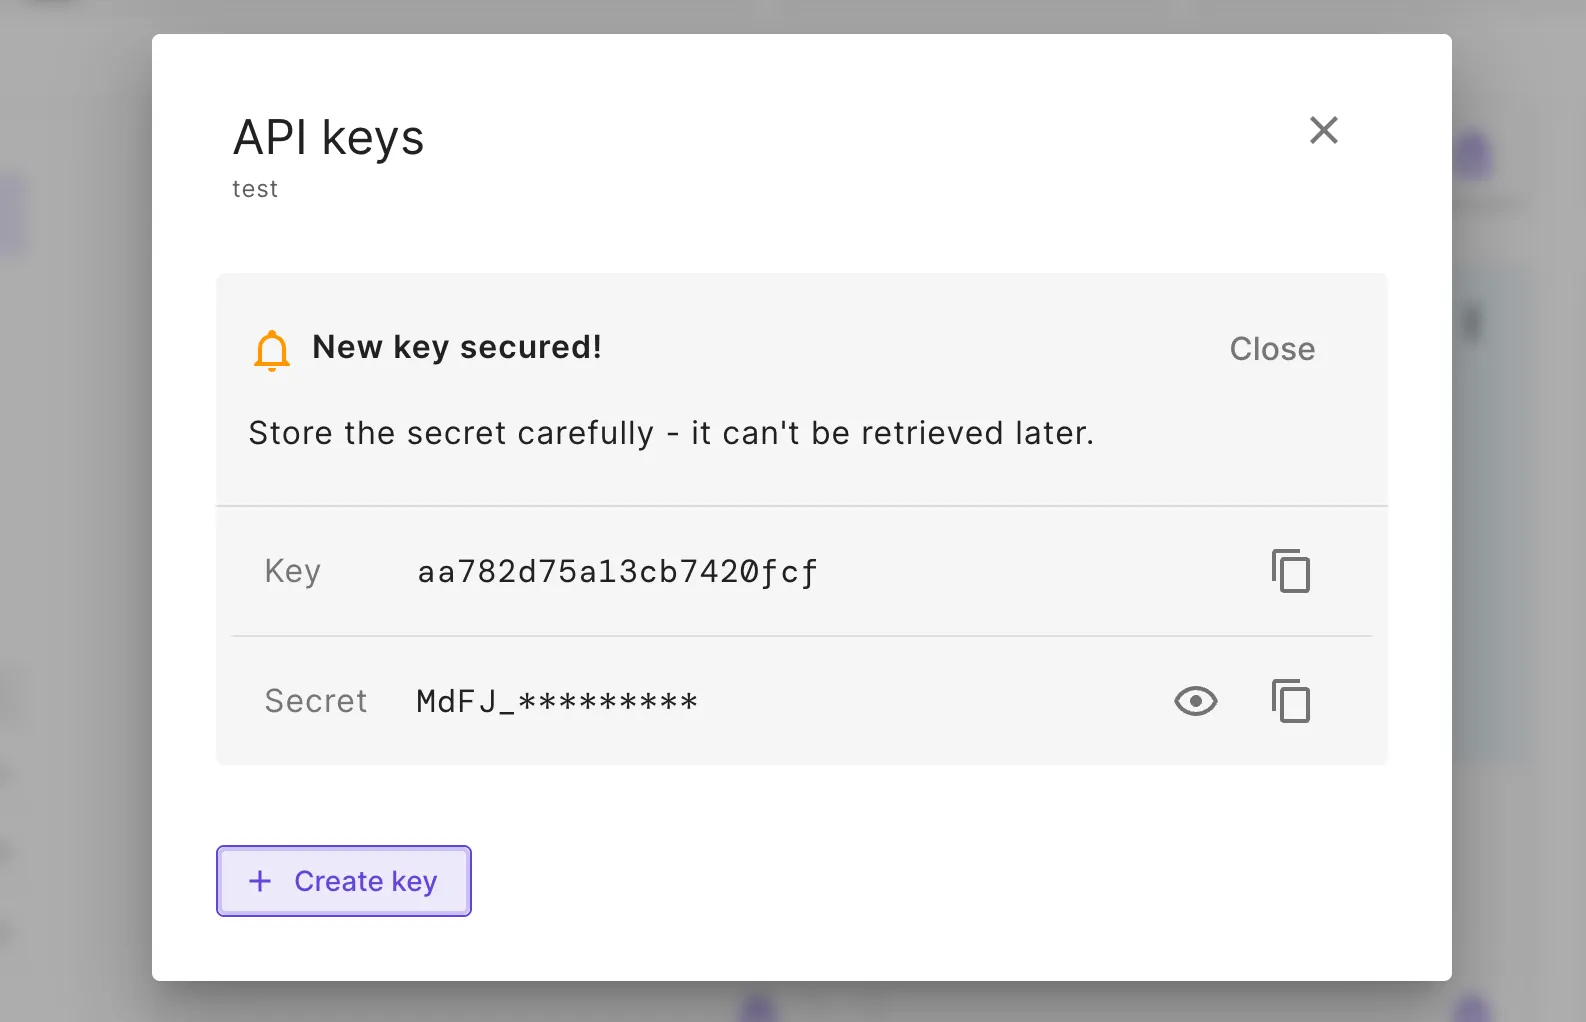
Copy the key information and store it carefully. The secret cannot be fully viewed after closing the window; if lost, create a new key.
With a project API key, connect to the bound project:
client = allsolve.Client(dotenv_file=".env")project = client.get_project_from_token()Application / machine user
Section titled “Application / machine user”Organization API keys require an associated user. For integrations used by many users, an organization admin can create an application or machine user and issue API keys for that identity, with resource sharing managed like any regular user.
Next steps
Section titled “Next steps”- Browse SDK examples on GitHub
- Read the Allsolve SDK API reference
- For custom simulation scripts, see Script-based simulations