Geometries
Working with geometries
Geometry editing in Quanscient Allsolve is done in the Model section. At the top of the Navigation panel, you’ll find the Geometry elements list followed by the geometric Entity tree.
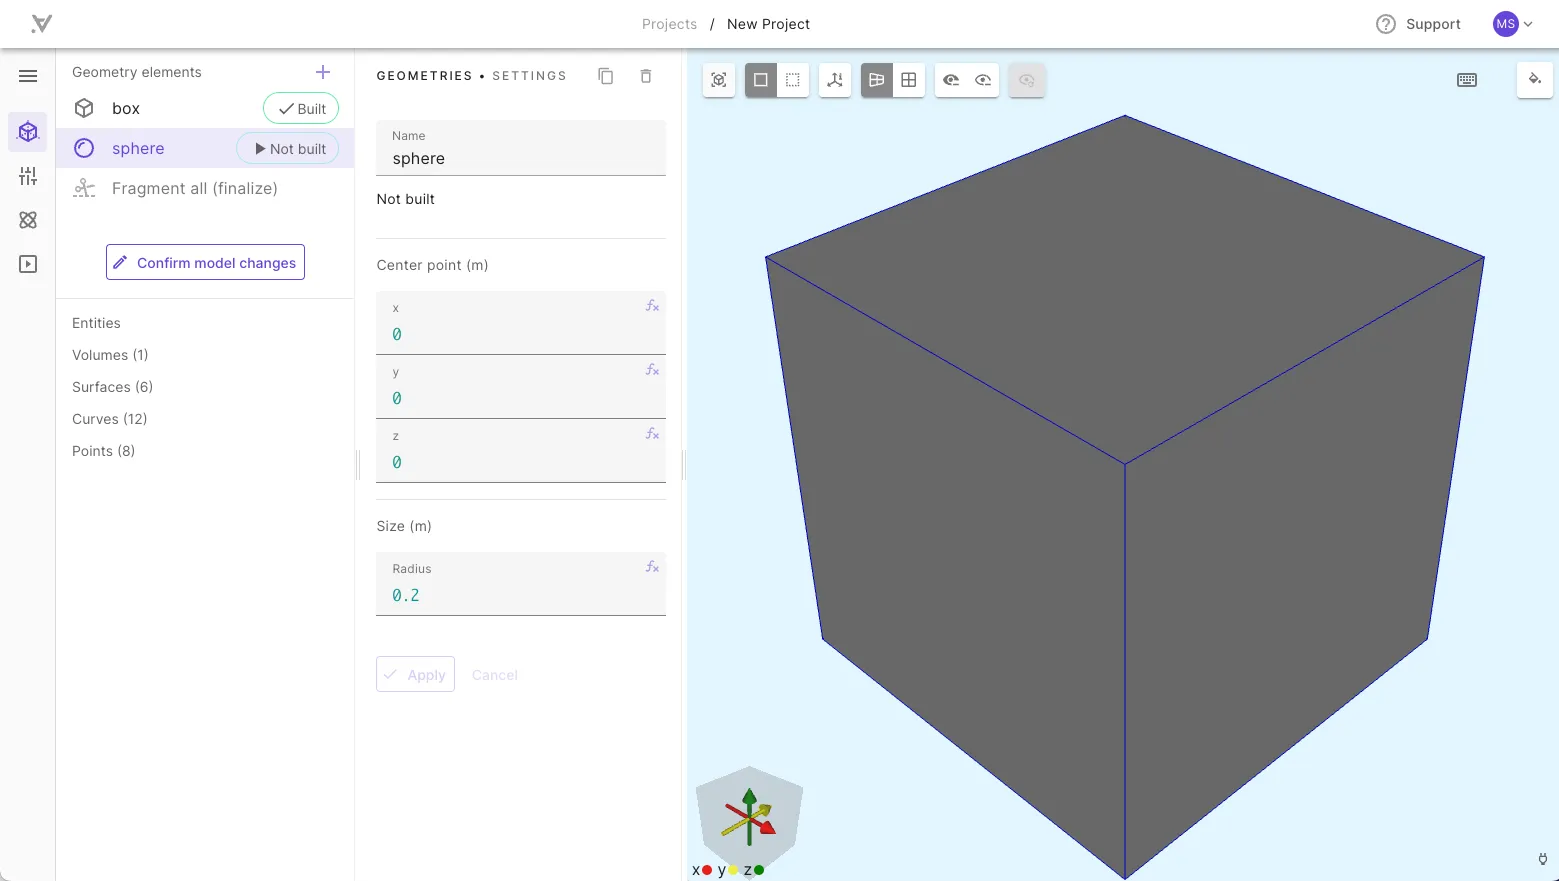
During geometry editing, a number tag is attached to each geometric entity. These tags are used to target geometric entities in material and physics definitions, for example. The entity tags are locked only after confirming the model changes. Therefore, it is recommended to confirm the model changes before moving on to the next section. Not doing so may result in selecting incorrect entity tags which leads to simulation errors.
Geometry elements
All shapes, imports and operations are referred to commonly as Geometry elements.
- Import
- Import step, GDSII or mesh (gmsh or nastran mesh) files
- Shapes
- Box
- Sphere
- Cylinder
- Torus
- Cone
- Surface rectangle - Useful for defining port surfaces
- Simple operations
- Remove - Remove volumes.
- Translate - Move selected volume or create copies.
- Rotate - Rotate selected volume around an axis or create rotated copies.
- Grid - Copy a volume along one or more axes to form a grid easily.
- Boolean operations
- Fragment all - Run automatic Fragments operation on all volumes against all.
- There is always an implicit Fragment all operation as the last operation, to prevent any overlapping volumes.
- Fragments - Split overlapping volumes into new, non-overlapping volumes.
- Intersection - Portion common to both volume sets is kept.
- Union - Merge all selected volumes/surfaces.
- Difference - Subtracts volume set 2 from volume set 1.
- Fragment all - Run automatic Fragments operation on all volumes against all.
Building elements
The geometry elements list can be thought of as a stack where each new element is added on top of all the previous ones. When adding new geometric shapes this does not have to be taken into account, but for targetting operations, it’s important to understand that each operation is working with entity tags of the state just before the operation.

As an example let’s consider the case above, with a .step file import and two boxes. When adding the difference operation, it can not be edited before the previous element (box 2) is built, and geometric entity tags up until that point are known.
The requirement also goes in the other direction. If you want to edit box 2 after the difference operation is built, the operation must first be “unbuilt” so that the tag selection will be correct. This can be done by building the previous element again, or by clicking the Edit button in the difference operation settings.
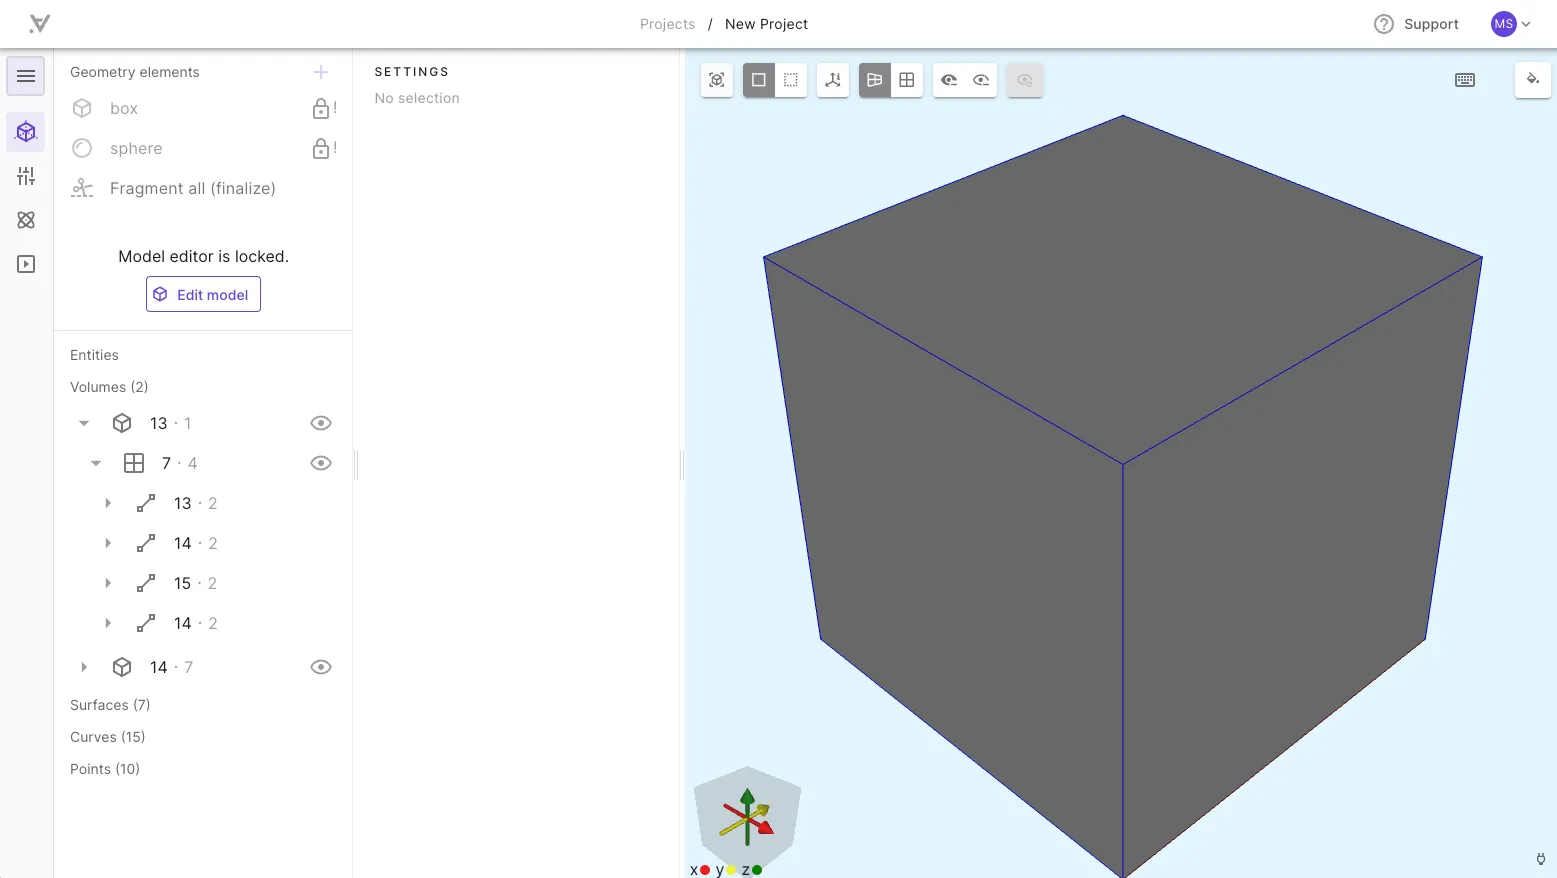
When you are finished editing the model, build the final state of the model by clicking Confirm model changes.
Shapes
In Quanscient Allsolve, you can add various shapes to your project by following these steps:
- If you haven’t yet activated geometry edit mode, do that by clicking
Edit model. - Click
+next to Geometry elements to see the available list of shapes and operations. - Add your shape of choice.
- Adjust the properties of the added shape as necessary.
- Click
Applyto confirm changes to the shape. - Click
Confirm model changesto finalize the changes. Now the model is updated and entity tags are locked.

Geometric operations
In the Quanscient Allsolve geometry elements, there is a selection of simple geometric operations, such as remove, translate and rotate, as well as some common boolean operations.
All of the operations have a target selection and possibly some settings to set before the operation can be applied and built. An exception is the fragment all operation that does not require any target or settings.
Translate and rotate: copying
In the geometry operations translate and rotate, there is a special feature, copying. In the settings for the operations, the user can enable copying and set the number of copies they want to create. Each copy is then rotated or translated by the amount specified in relation to the original copy.
| Original box | Transform with 5 copies | Rotate with 3 copies |
|---|---|---|
 | 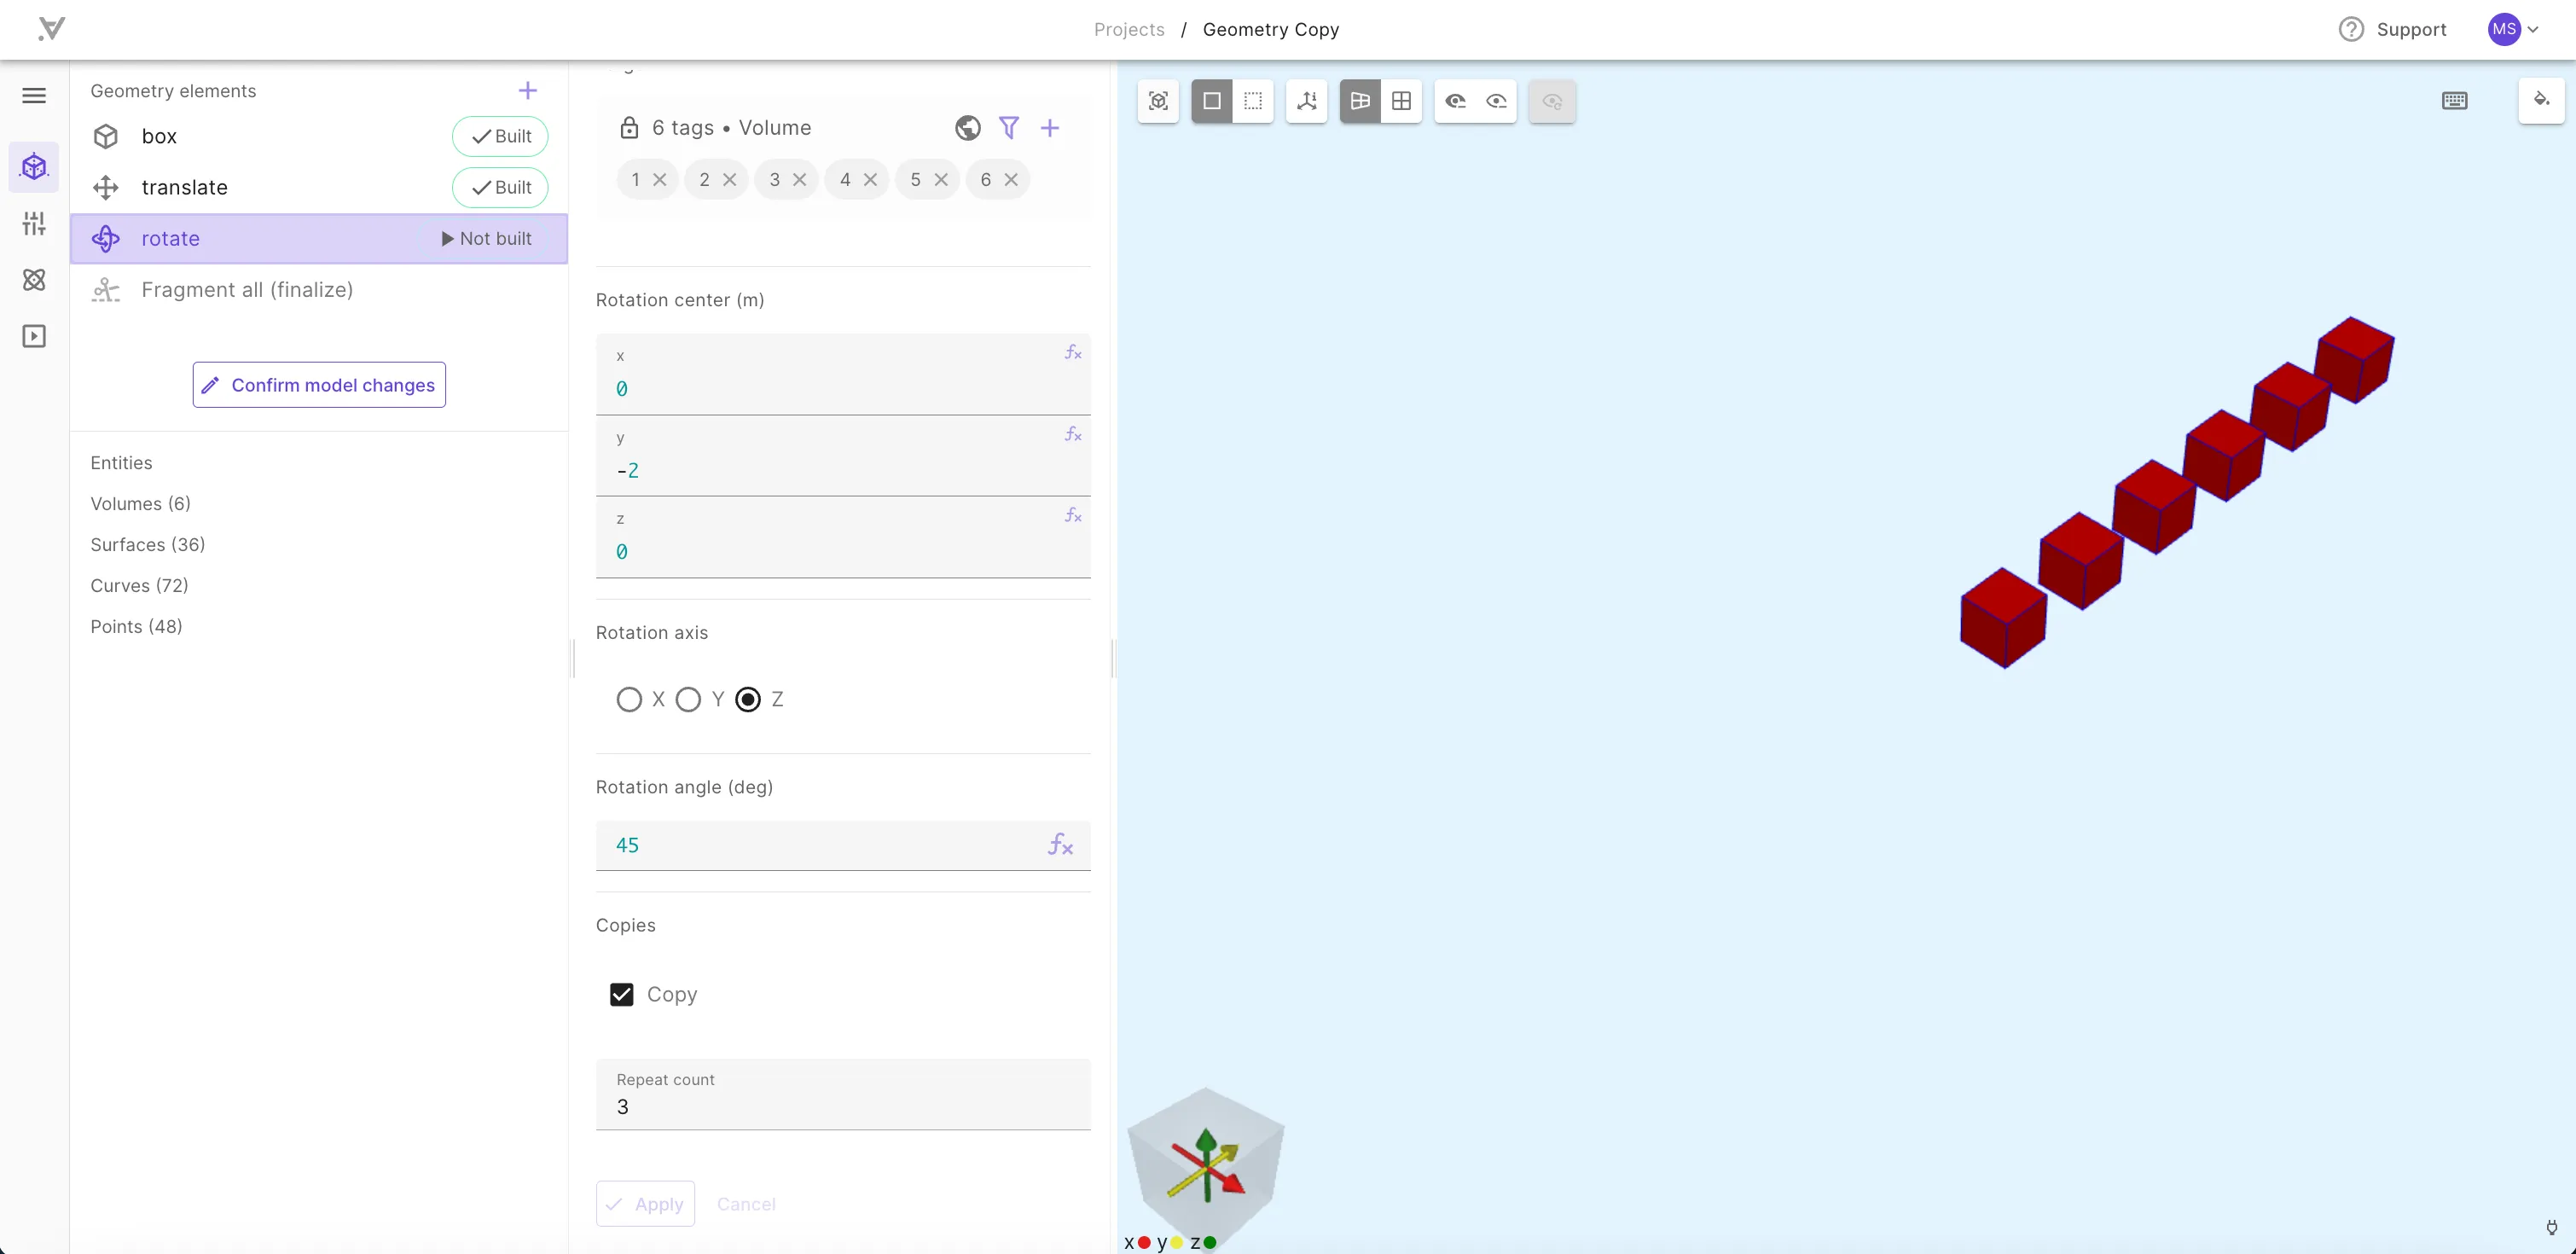 | 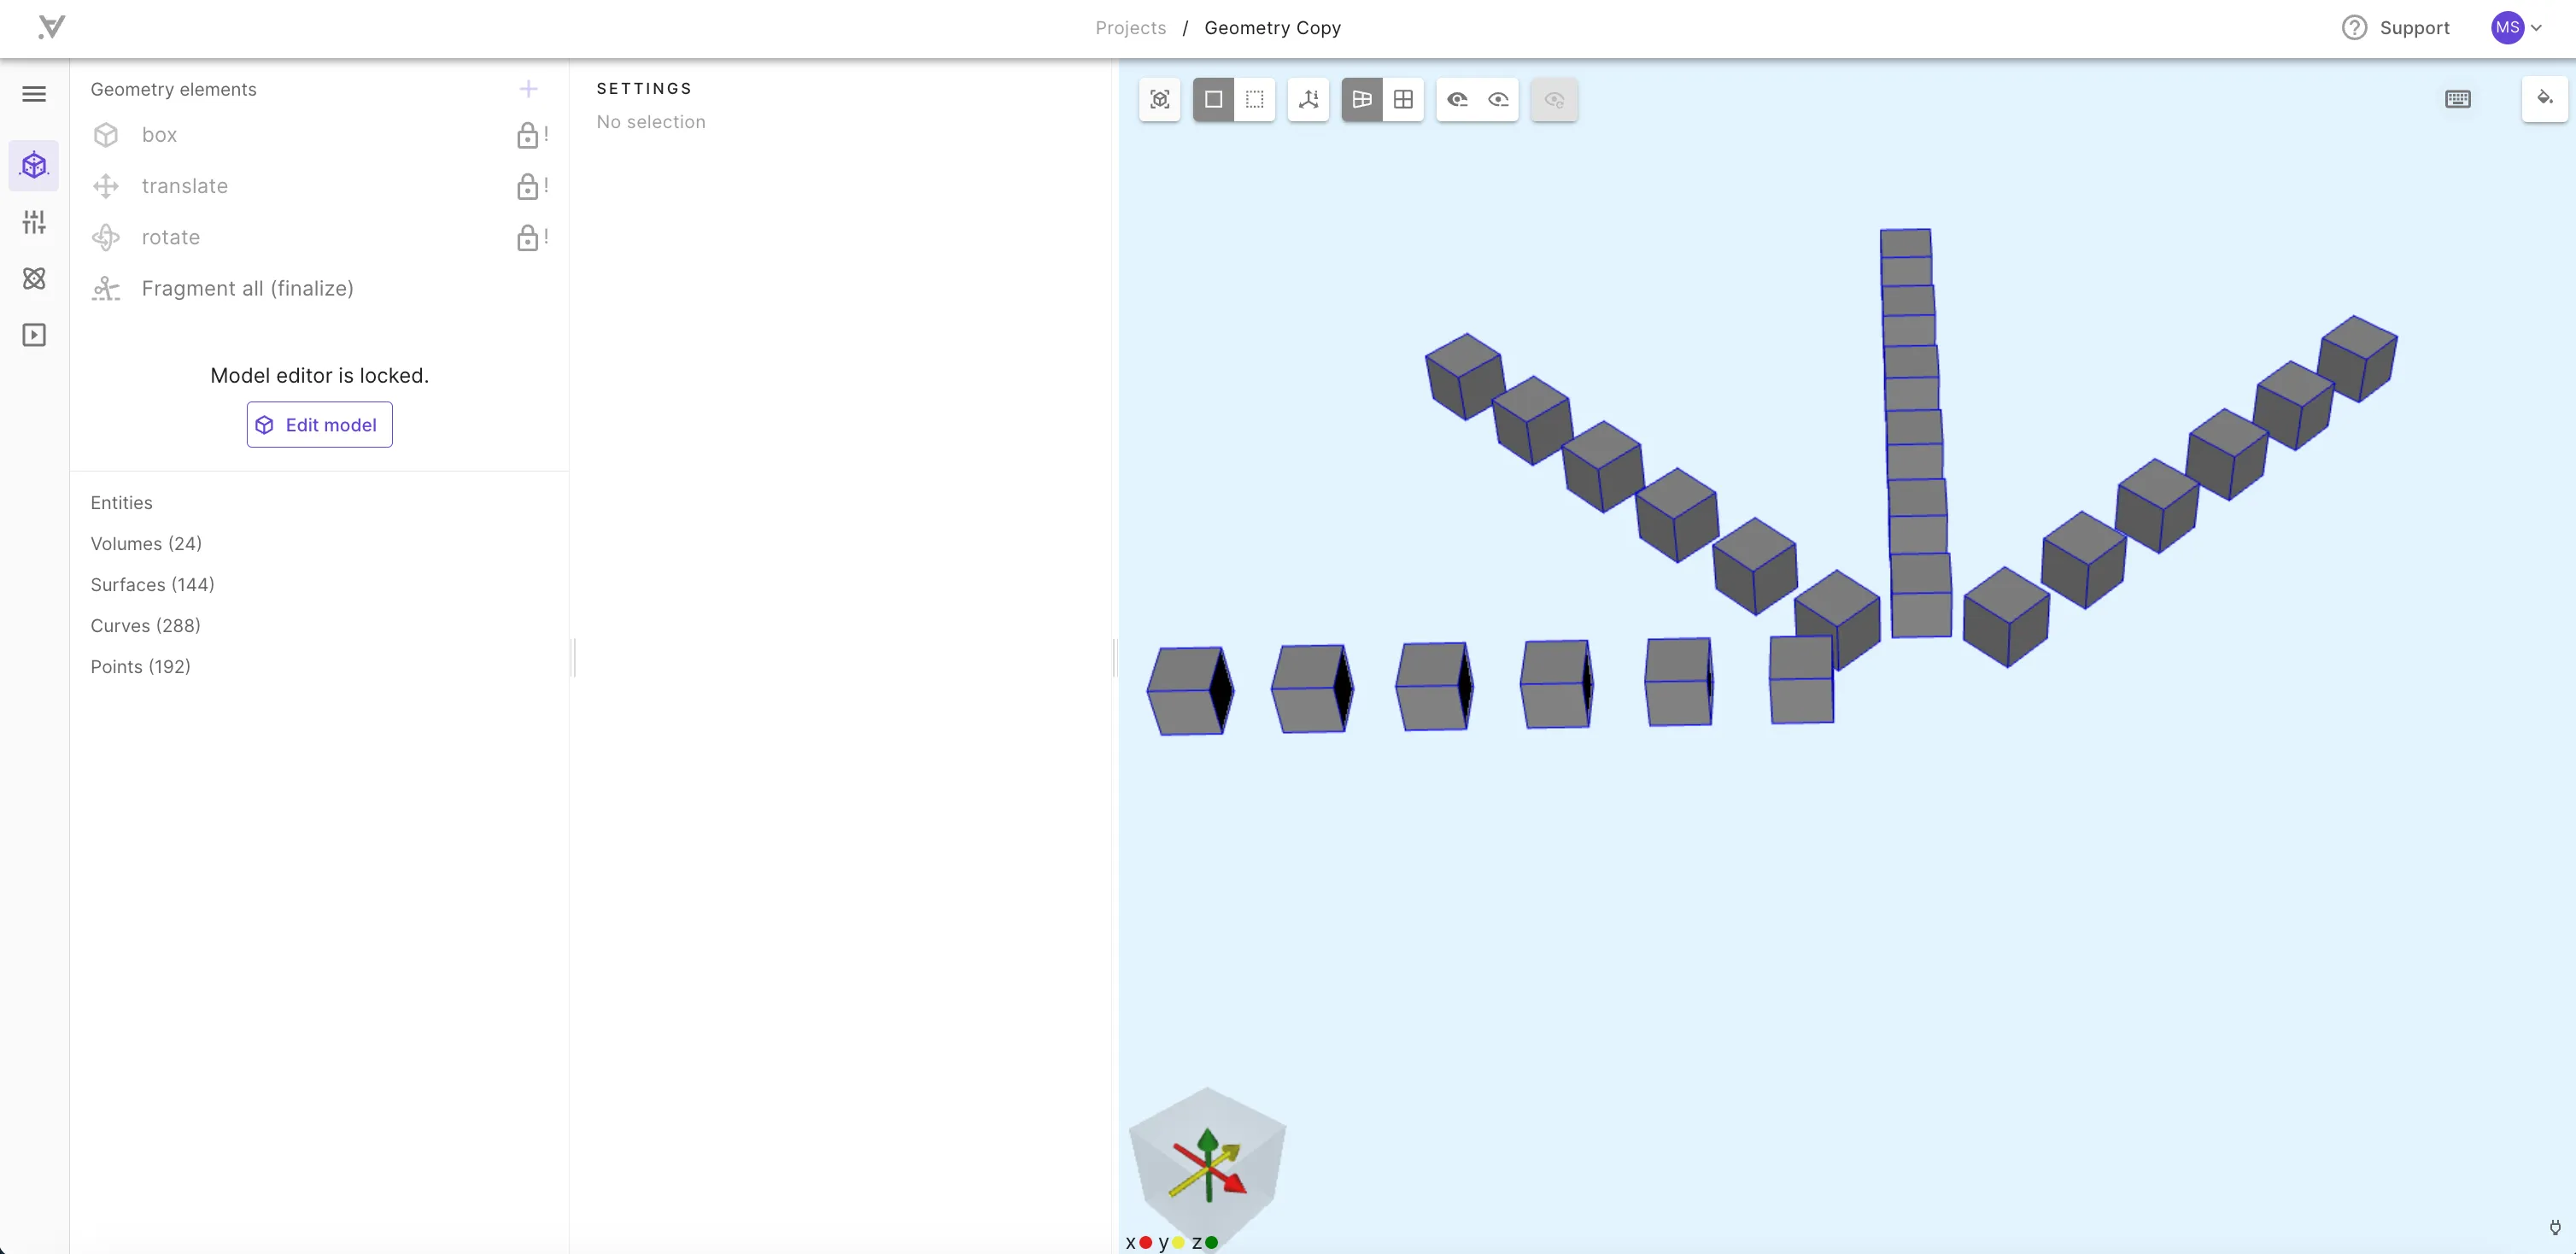 |
Grid
To make 2 or 3-dimensional grid from a selected volume easily, use the grid operation. The grid operation can also be used to copy a volume multiple times along just one axis easily.

File imports
These geometric exchange formats are currently available for model geometry imports:
You can also import the following mesh file formats:
Importing STEP files
To create a geometry by importing a STEP file:
- Enable model editing.
- Add a new element.
- Select
Import file. - Select a STEP file with extension
.stepor.stp. - Build the file import by clicking
Not built.
You can change the offset of the imported model or enable clean-up of detached entities from the import settings.
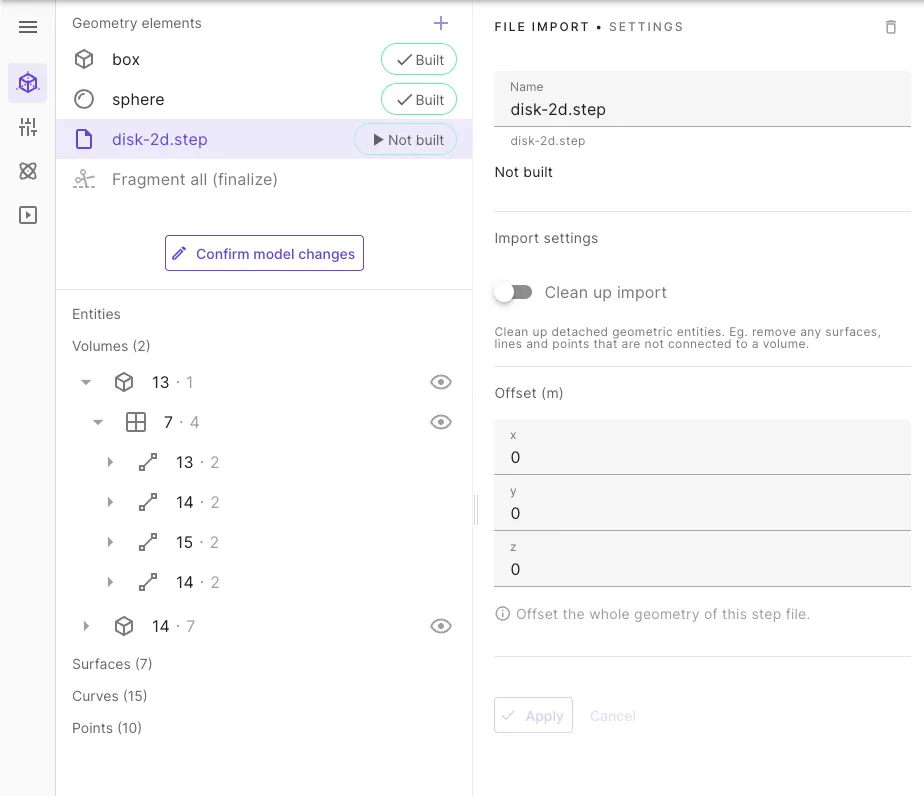
Finalize model creation by clicking Confirm model changes.
Importing GDSII files
To create a geometry by importing a file in the GDSII stream format:
- Enable model editing.
- Add a new element.
- Select
Import file. - Select a GDSII file with extension
.gdsor.gds2.
At this point, the GDSII file content is parsed, but a 3D model is not yet created.
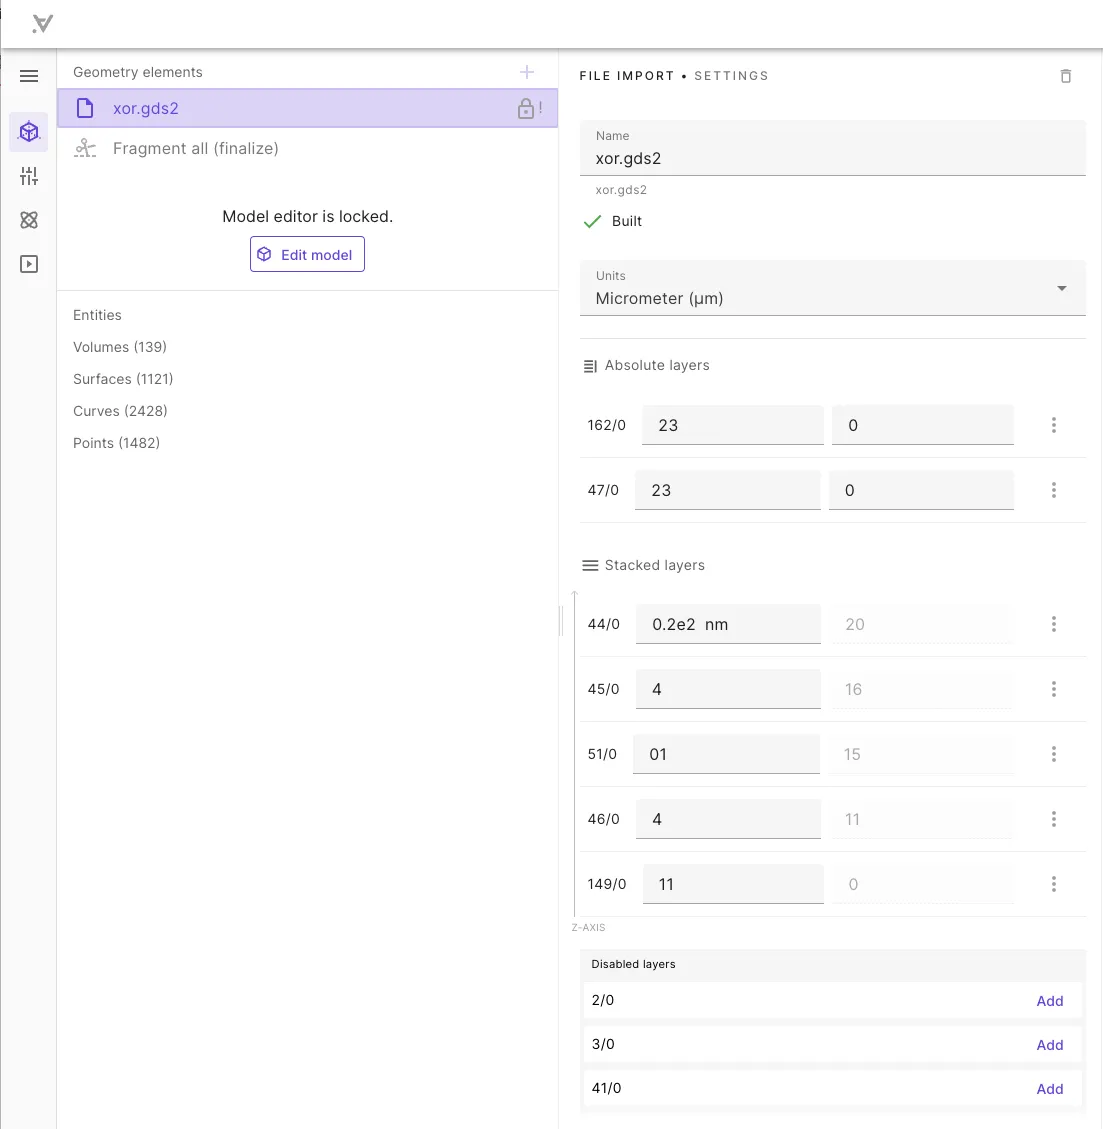
To create the 3D model, perform the layer stackup:
- Select Units for layer thickness.
Layer thickness units can be overridden for any layer by providing units after the thickness value, like
0.2e2 nm. - Add all layers you want to use in the model from the bottom up.
- Enter thicknesses for each layer.
Applysettings and build the import.
Finalize model creation by clicking Confirm model changes.
Layer stackup: stacked layers
By default all layers are added as relative stacked layers, starting from level 0 on the Z-axis. Each new layer is stacked on top of the previous one. Stacked layers can be moved up and down in the layers list after they are added.
Layer stackup: absolute layers
If you need to define cut-out layers or layers that otherwise span across multiple levels, use absolute layers:
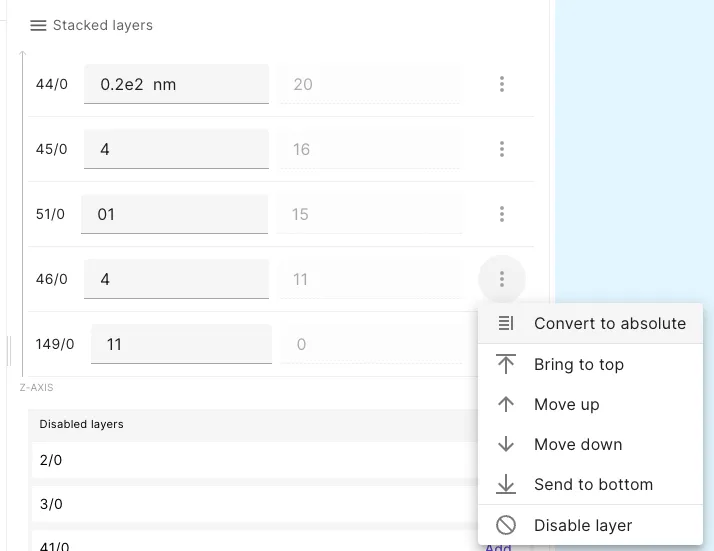
- In layer settings, select
Convert to absolute. - Enter thickness and start position on the Z-axis.
Importing mesh files
Quanscient Allsolve supports Gmsh (.msh) and NASTRAN (.nas) mesh formats as direct mesh imports.
Importing a mesh file works in the same way as other file imports but includes some limitations:
- There can be only one mesh for a project.
- You cannot add any other shapes or operations before or after a mesh import.
- The simulation mesh is automatically selected and cannot be modified in any way after import.
NASTRAN mesh imports
Quanscient Allsolve allows importing NASTRAN mesh files.
If the mesh file is exported from COMSOL, choose the following export settings:
| File extension | Data to export | Field format | Units |
|---|---|---|---|
.nas | ☑️ Domain elements | Large | Meters [m] |
| ☑️ Boundary elements | ☑️ Export as second-order elements | ||
| ☑️ Geometric entity information |
Comparable mesh files
If you want to run the same simulation with another mesh for the same geometry:
- Copy the project including a mesh import.
- Remove the existing mesh file from geometry elements.
- Import the comparable mesh file.