Scripting
Script view
The script editor view comprises of scripts list, extra input files and the main code editor.
If you are working with a regular project, the scripting mode is by default in preview mode. The contents will update whenever you make changes to the project configuration.
The auto-generated scripts make the regions, materials and variables defined in the GUI easily available in your custom scripts.

You can at any time activate project scripting mode by toggling it on from Scripting mode switch.
Once in scripting mode, you take full control over the simulation.py file. The autogenerated files will still update if you, for example, update your variables or regions.

The simulation.py file acts as the primary entry point for the simulation and initially contains the generated (if any defined in the GUI) physics. It is also possible to split your simulation into multiple modules by adding new files in “your scripts” -section.
Scripting mode can be disabled at any time which causes any user made changes to be lost. You can also click the Refresh button to update the script with the current project state.
To make modifications to an existing script, select the script from the list and edit the contents as necessary. You can rename a script by double-clicking its name in the list. The autogenerated scripts cannot be modified.
Extra input files
Input files such as custom mesh files and CSV files can be utilized within your script. You can upload files to be used only in single simulations or use existing project level shared files by selecting them.
Script editor
Several useful features are available in the script editor to aid the coding process, including syntax checking, which alerts you to any syntax errors in the script. The script autocomplete tool provides easy access to the API reference documentation.
The script autocomplete tool in Quanscient Allsolve supports the following features:
- Hover-over documentation:
- Hover over a function name such as
loadto see its API documentation.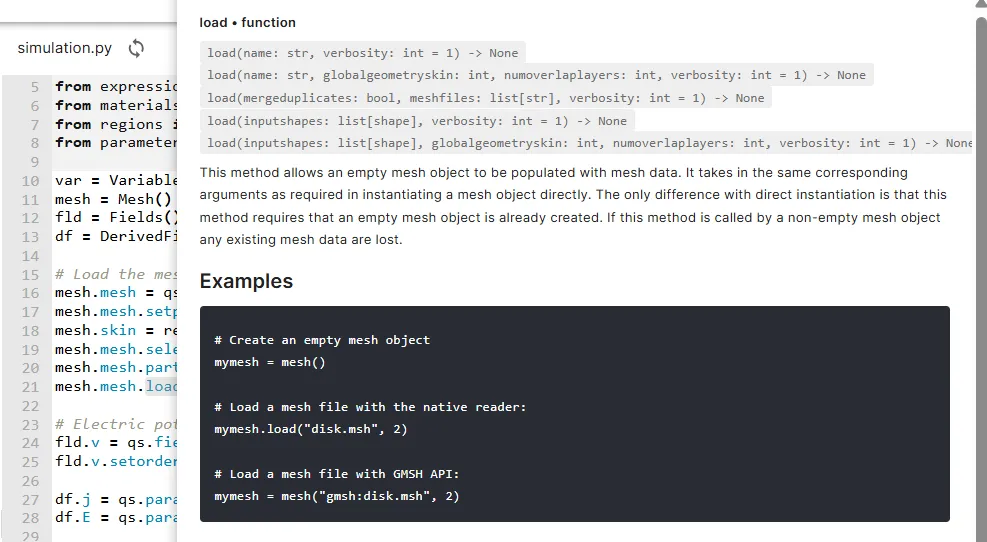
- Hover over a function name such as
- Intelligent autocomplete:
- Start writing a new function call, such as
qs.pre. - A drop-down-list appears. Scroll down through the autocomplete options with arrow keys until you find
qs.predefinedelasticity. The function API documentation is attached to the right.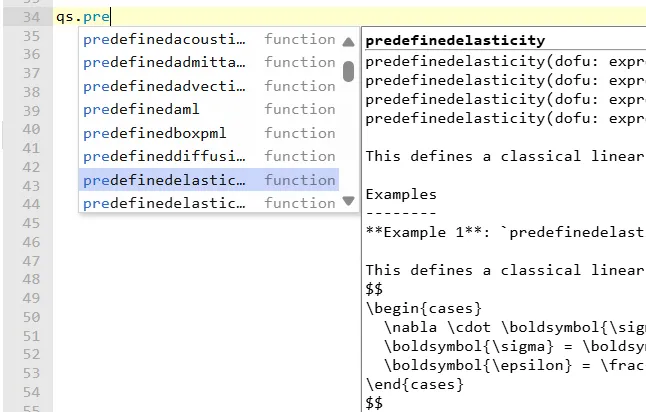
- Press Enter. Your
qs.predefinedelasticityfunction call is now autocompleted.
- Start writing a new function call, such as
- Function parameter autocomplete:
- To check possible parameters for the
qs.predefinedelasticityfunction, type parentheses()after the function call. - Inside parentheses, press the ctrl + space or cmd + space key to see autocomplete options for the function parameters.
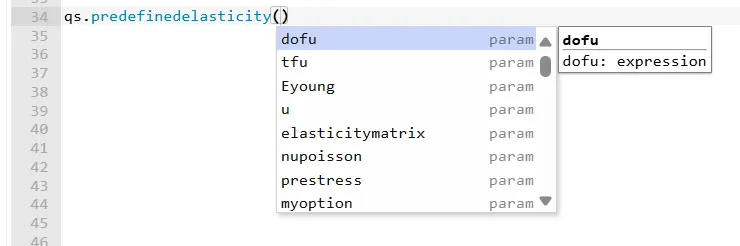
- Cycle through the parameter autocomplete options with arrow keys. Press Enter to autocomplete the highlighted parameter.
- To check possible parameters for the
- Python snippets:
- To utilize a try/except-snippet for error handling, type
try. A drop-down list of snippet options appears. Use the arrow keys to highlight a suitable snippet and press Enter to autocomplete it.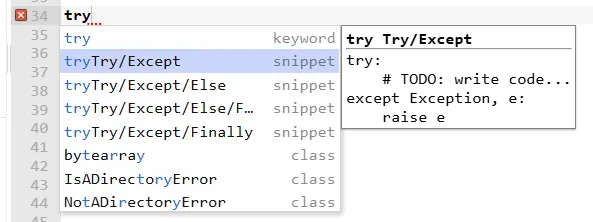
- To utilize a transient snippet for simulating over time, type
traand press Enter.- Some snippets, such as
transient, have multiple fields for the user to complete (form,duration,timestep). You can move on to the next by pressing Tab.
- Some snippets, such as
- To utilize a try/except-snippet for error handling, type
More advanced scripting features
- The script editor allows folding code blocks with indentation in the Python code.
- By double-clicking on a word, it can be highlighted across the entire script.
- A search function can be accessed by pressing ctrl + F or cmd + F key while the editor is active. This function allows searching for a specific word in the script.
The search results can be navigated by pressing the arrow keys and all results can be highlighted by clicking the
Allbutton.- While the search bar is active, the replace function can be accessed by clicking the
+button. The replace function allows the user to replace one or all occurrences of a specific word with another one.
- While the search bar is active, the replace function can be accessed by clicking the
- Multi-cursor mode can be enabled by pressing the alt or the option key and dragging with the mouse.
- The ctrl + Z or cmd + Z key can be used to undo changes.
- Press ctrl + shift + Z or cmd + shift + Z to redo undone changes.
From simulation script to simulation logs
The print() function can be used to print a variable value from the script to the simulation logs. The Logs can be accessed under Results after running a simulation successfully.