Regions
Introduction to entities & tags
3D models in Quanscient Allsolve contain 4 types of geometric entities: volumes, surfaces, curves and points. Each entity in a model geometry has a unique identifier called a tag. The tag is always a positive integer.
Entity tags can be used to identify and reference entities within the application. A separate running number 1, 2, 3, … is assigned to each dimension, so there can be a point, a curve, a surface and a volume each with tag 1.
You can view the tags of entities in the entities list. Visibilities for volumes and surfaces can also be toggled from the entities list.

Introduction to regions
Regions in Quanscient Allsolve are sets of entity tags. Regions can only contain tags for entities of a single dimension, that is, volumes, surfaces, curves or points. Entities of different dimensions cannot be grouped into the same region.
Regions allow you to reference and group certain parts of a geometry for various purposes. This can be assigning material properties or defining boundary conditions, for example.
When you create a new region, you select specific entity tags to group under a region. These regions can then be used throughout the application to reference to the selected group.
Private and shared regions
There are private regions and shared regions in Quanscient Allsolve. Shared regions can be added in the properties section, and can exist on their own without any references to them. Shared regions can be referenced while adding target regions in Materials, Physics, Interactions and Outputs.
A private region can only exist as a target of some kind, like in a material region, for example. Private regions can be elevated as shared regions at any time, allowing them to be used as targets throughout the application. To elevate a private region as shared:
- Click on the icon. Click
Yeson the popup. - Click
Save.

Advanced region picking
There are 4 options in total when it comes to region picking:
- Picking a target on the GUI model view.
- See the example video in the Introduction to regions section on this page.
- Picking a target with a range / interval filter.
- Click the Filter icon.
- Select
Range / Interval. - Input
Start tag,End tagandIntervalto form a picking rule.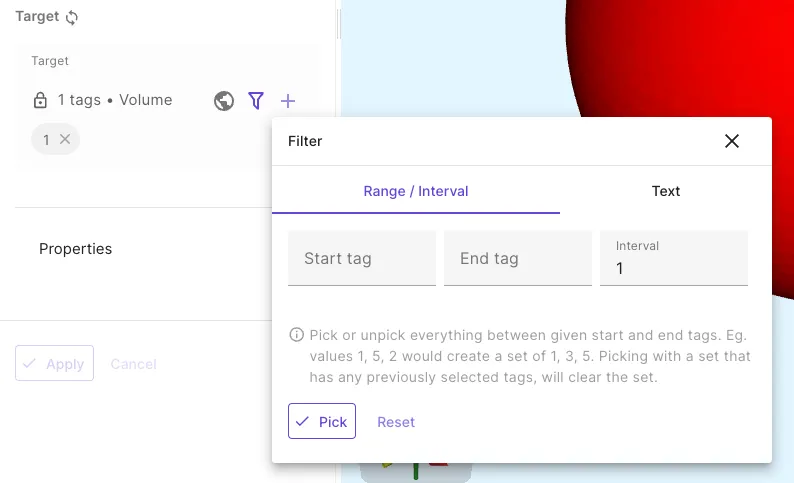
- Picking a target with a text filter.
- Click the Filter icon.
- Select
Text. - Input target tags as text.
- Separate individual tags and ranges with commas (
1-3, 5, 7, 10-20).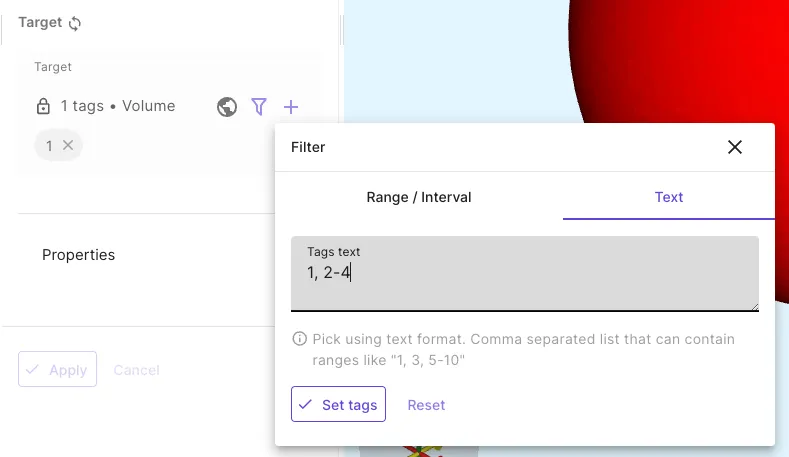
- Separate individual tags and ranges with commas (
- Click
Set tags.
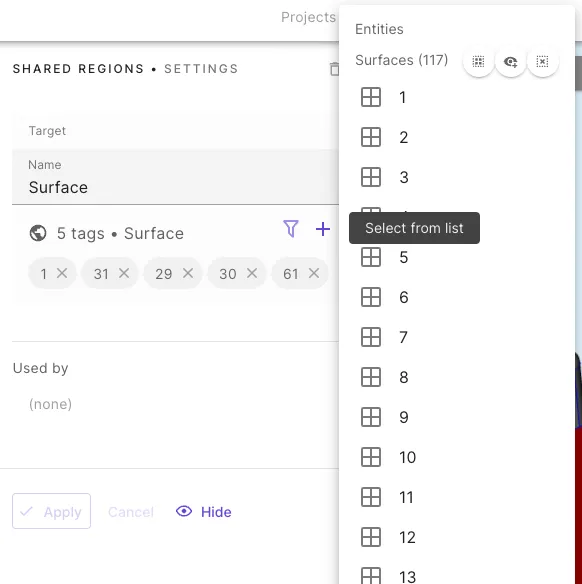
- Picking a target on the entities list.
- Click the
+icon. - Select tags by clicking individual entities in the drop-down list.
- Click the
Visibility of a shared region
Sometimes it is necessary to
- hide a shared region so that the focus is on the remaining entities, or
- isolate a shared region for a closer look without the distraction of all the other entities.
Such manipulation of the visibility would also simplify the selection of entities while creating new shared regions. Using the Visibility icon, the visibility of a shared region can be controlled. The following visibility options are available:
- Hide selected region: The entities of the shared region will be hidden.
- Show selected region: The entities of the shared region are made visible.
- Show only selected region: Only the entities of the shared region are made visible and hides all the other entities.
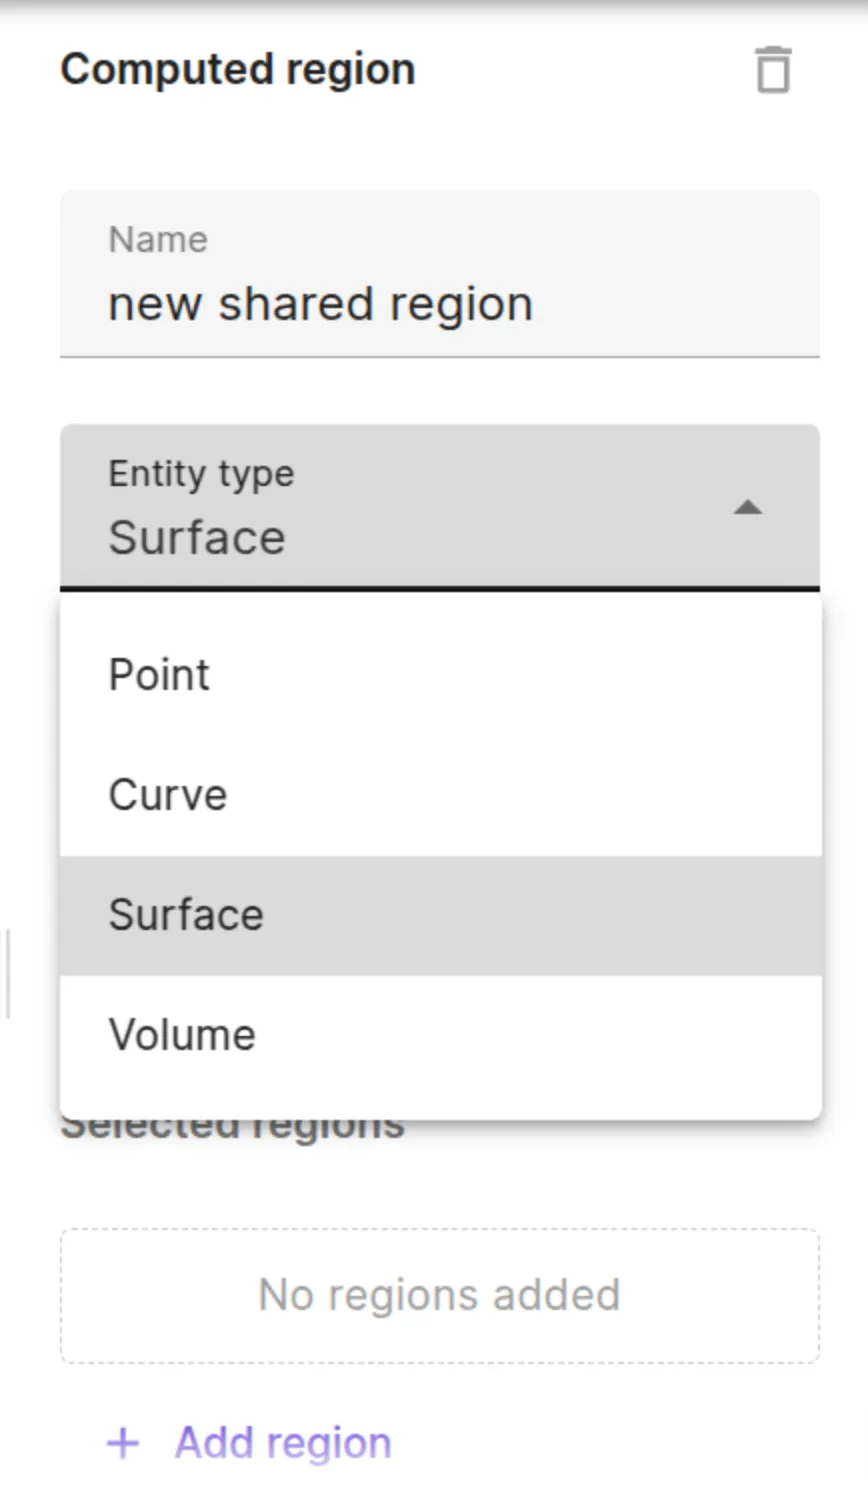
Computed regions
Computed region allows you to perform certain operations on the already defined shared regions. They offer a convenient way to utilize existing shared regions to create a new shared region. This can be helpful in avoiding repicking the entities, especially in a complex geometry with large number of entities.
The following operations are available:
Union (OR) : The computed region is the union of all the added shared regions.
Intersection (AND) : The computed region is the intersection of all the added shared regions.
Difference (A-B) : The computed region is the difference between the two added shared regions A and B.
Symmetric Difference (XOR): An entity in this computed region is exclusively present in only one of the added shared regions. It is equivalent to the (Union - Interesection) of all the added shared regions.
Complement (NOT): The computed region is the complement of all the added regions. It contains all those regions in the geometry not present in the added shared regions.
Boundary: The computed region consists of entities that are the boundaries of the added shared region.
Depending on the chosen Entity type, the computed regions resulting from the boolean operations would be either points or curves or surfaces or volumes.
Geometry selector
Geometry selector is another way of creating a shared region. This is typically helpful when many entities need to be selected in which case picking them manually can be quite laborious. The following type of selectors are available which can be used individually or in combination:
- Minimum size: Selects all entities whose
X,Y,Zsize is beyond the defined minimum size. - Maximum size: Selects all entities whose
X,Y,Zsize is within the defined maximum size. - Bounding box: Selects all entities found within the bounding box. The bounding box is defined by two corner points
whose coordinates are
Min X, Min Y, Min ZandMax X, Max Y, Max Z.
To further assist in the selection, the tool can be utilized.
By picking one or more similar entities, the X,Y,Z values are autofilled for the Minimum size or the Maximum size or the Bounding box.
The chosen Entity type will determine whether the selected regions would be points or curves or surfaces or volumes.