Introduction to Quanscient Allsolve
Introduction to projects
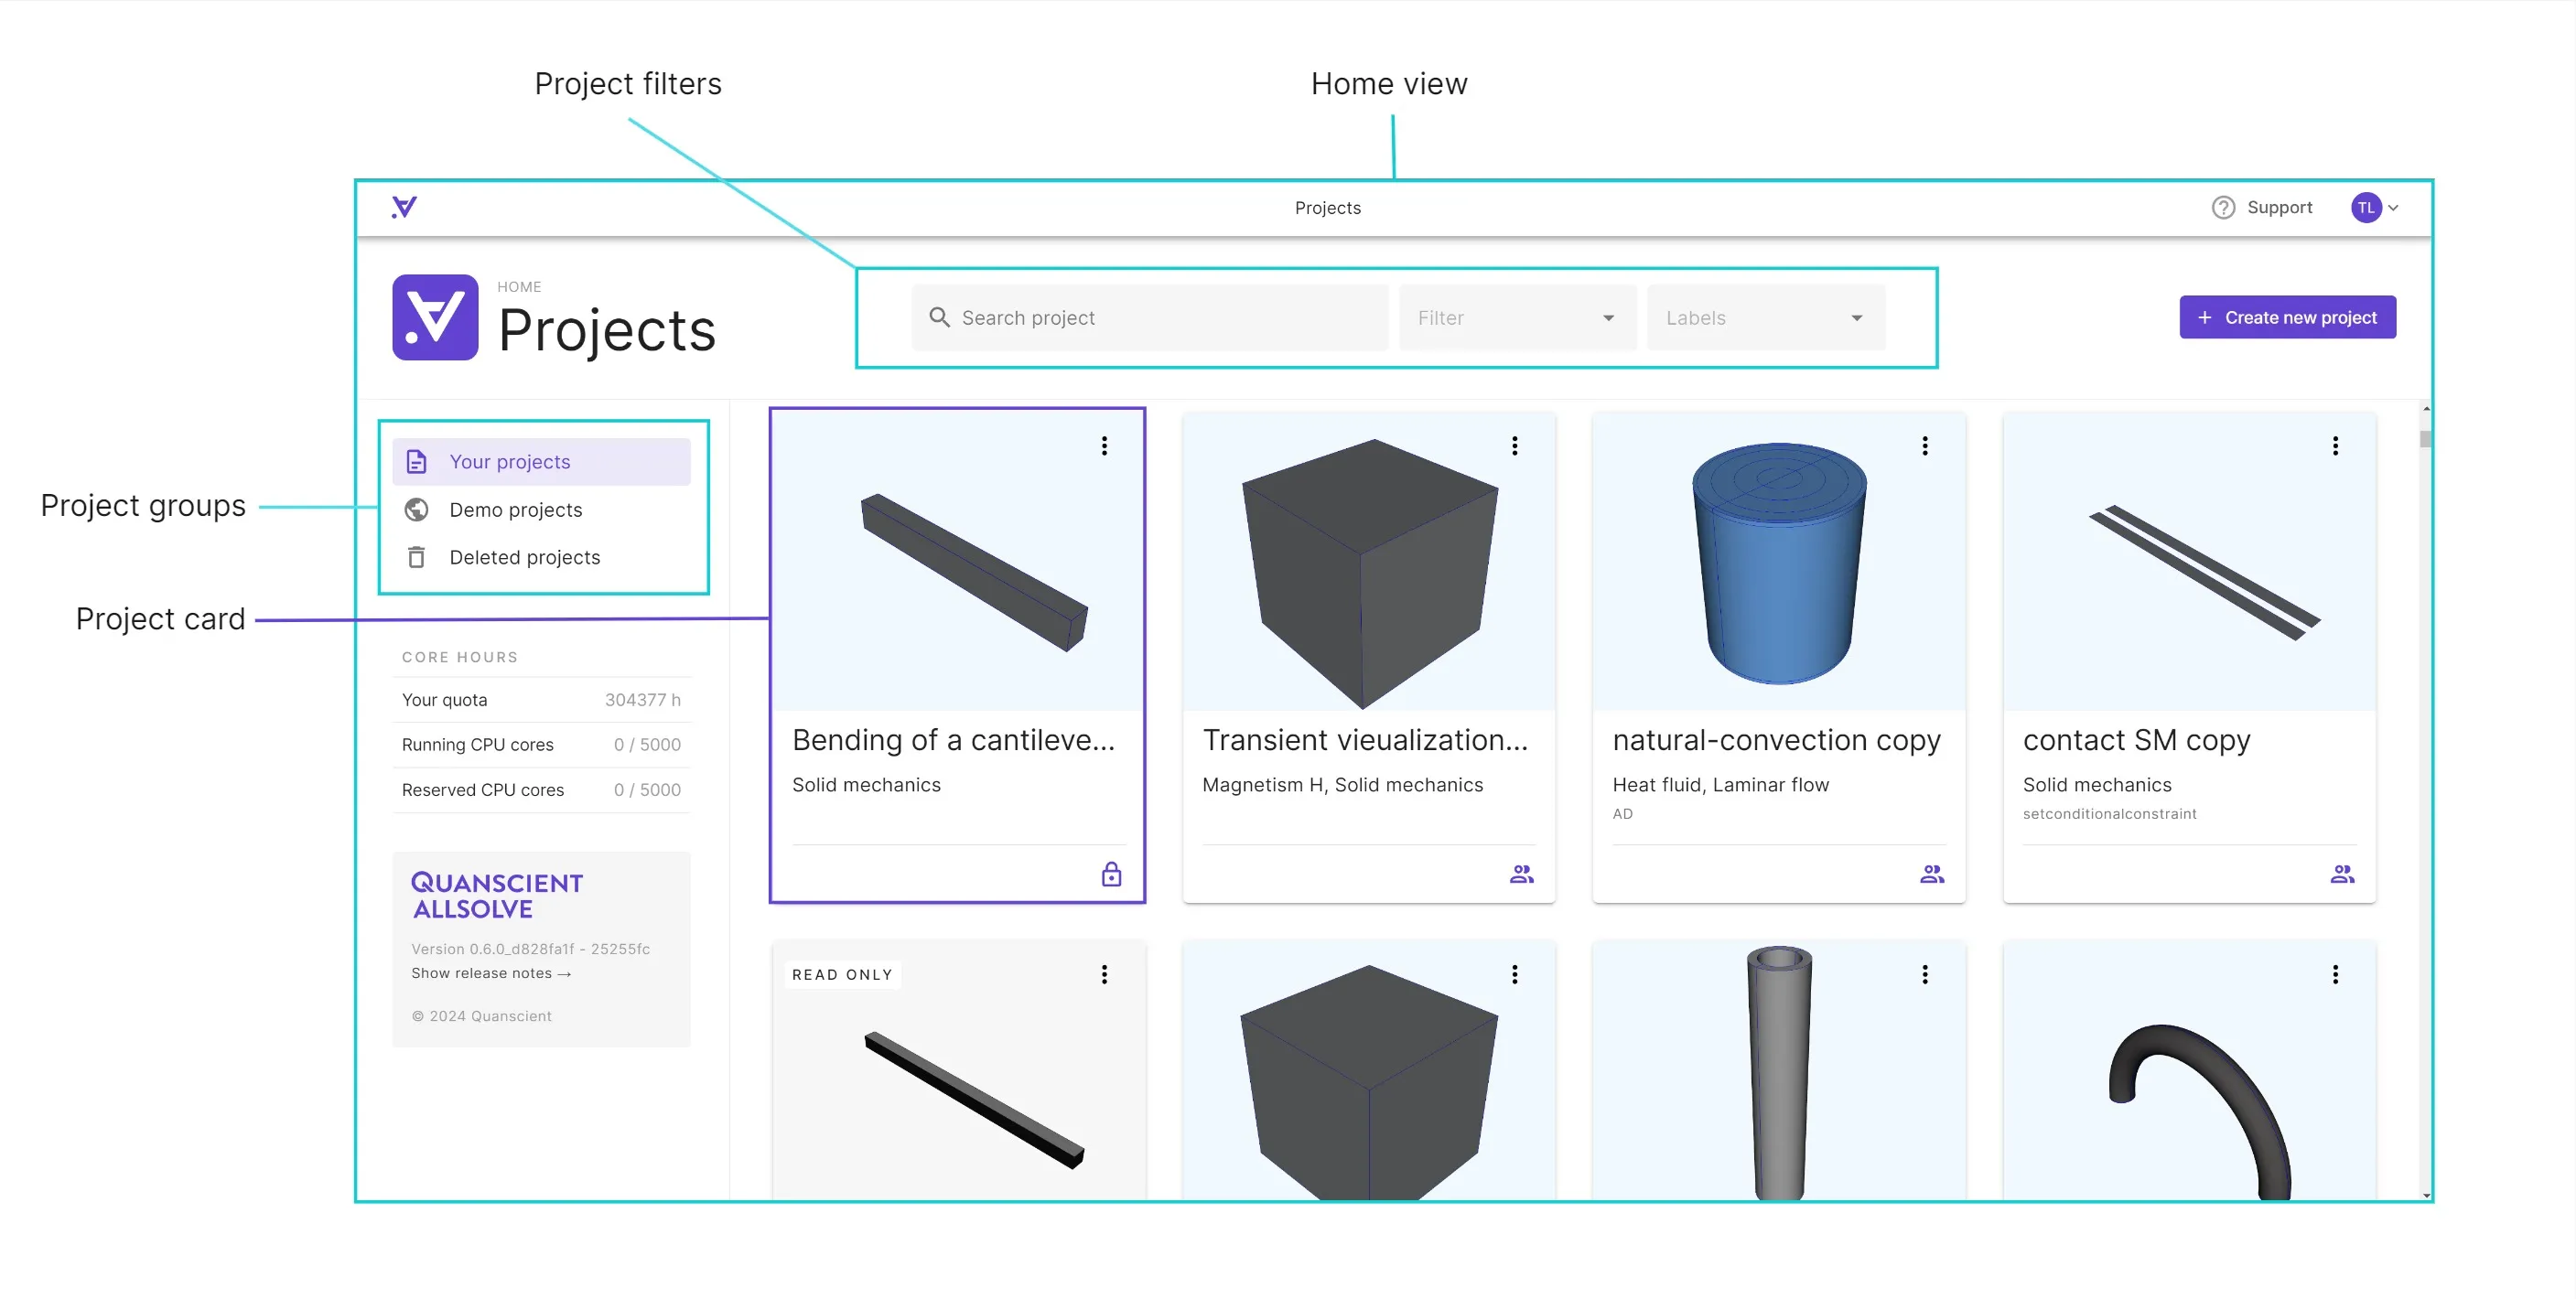
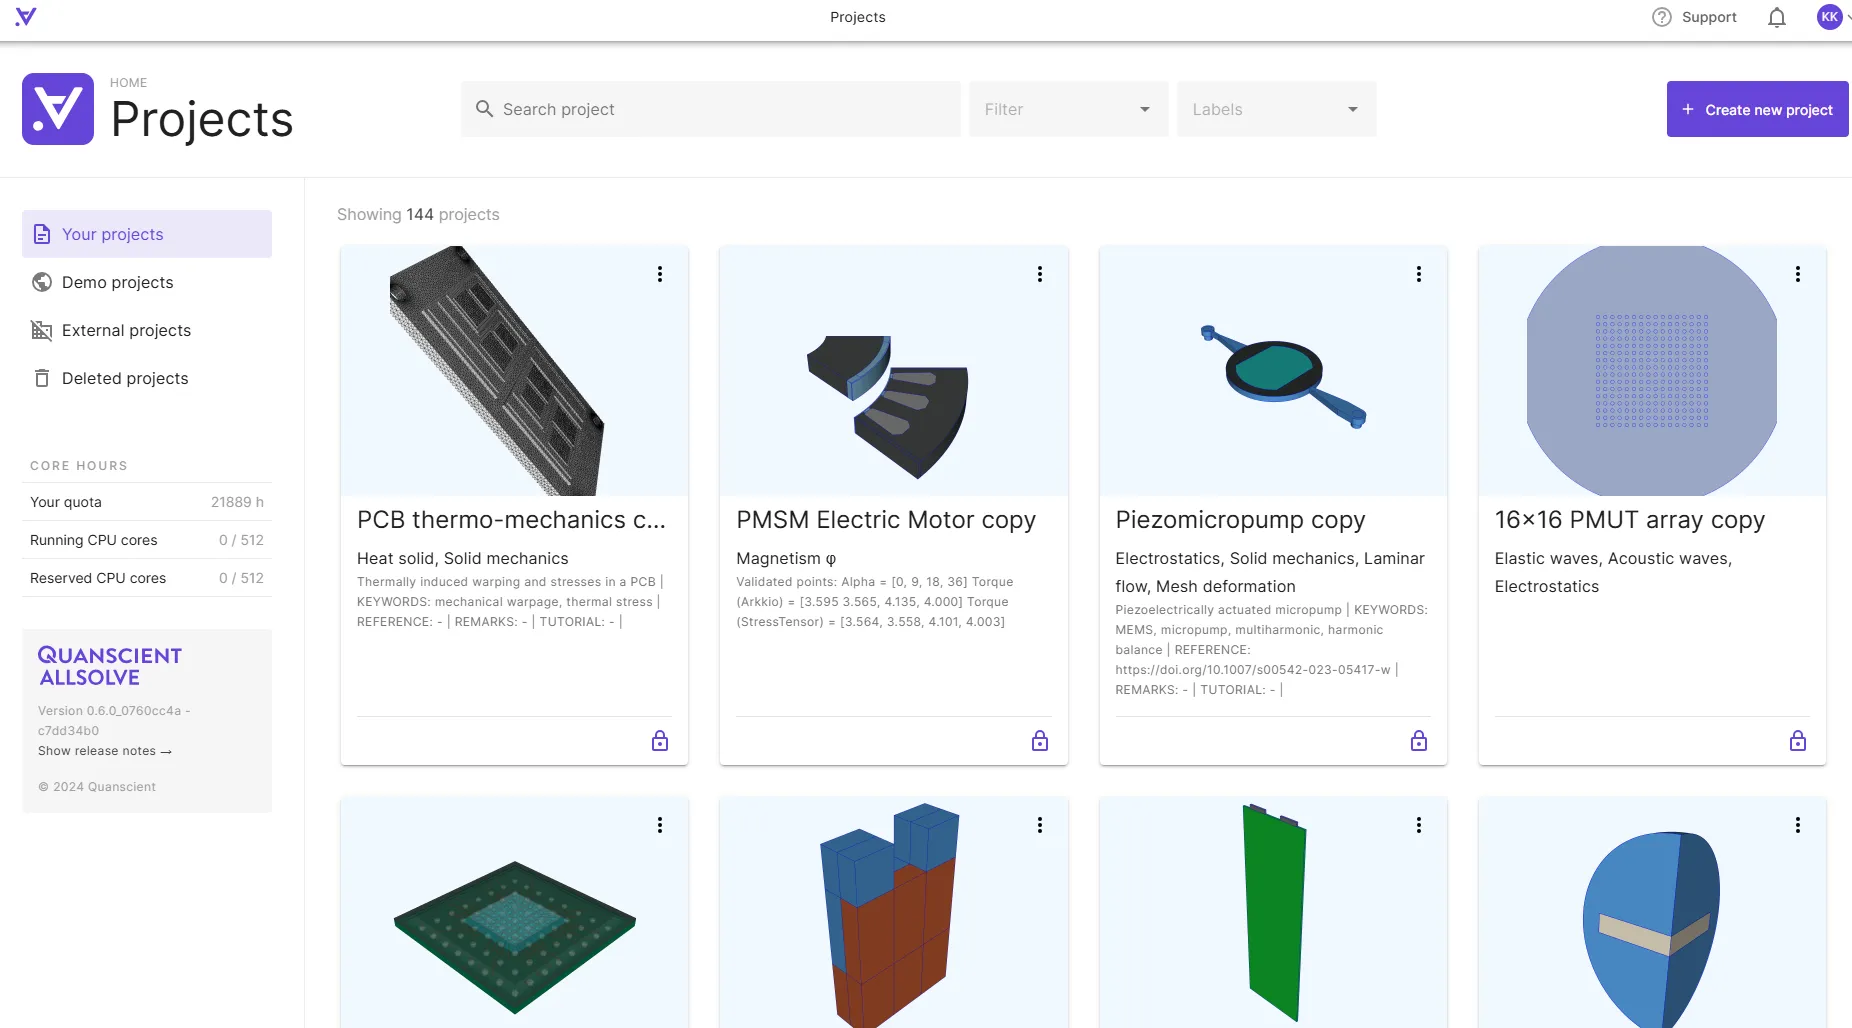
Section titled “Introduction to projects”The Quanscient Allsolve home view shows the overview of your projects. This is where you can view and manage all the projects you have access to.
- Search for projects: Search by name or description to easily find projects that match specific keywords.
- Filter the list of projects: The project list can be filtered by project physics or used labels.
- View and edit project details: Access a project’s details by clicking the three dots on a project card. This is where you edit general details, such as project sharing and labels.
- Access projects: Navigate to a project by clicking on the project card. This is where you set up and run your simulations.
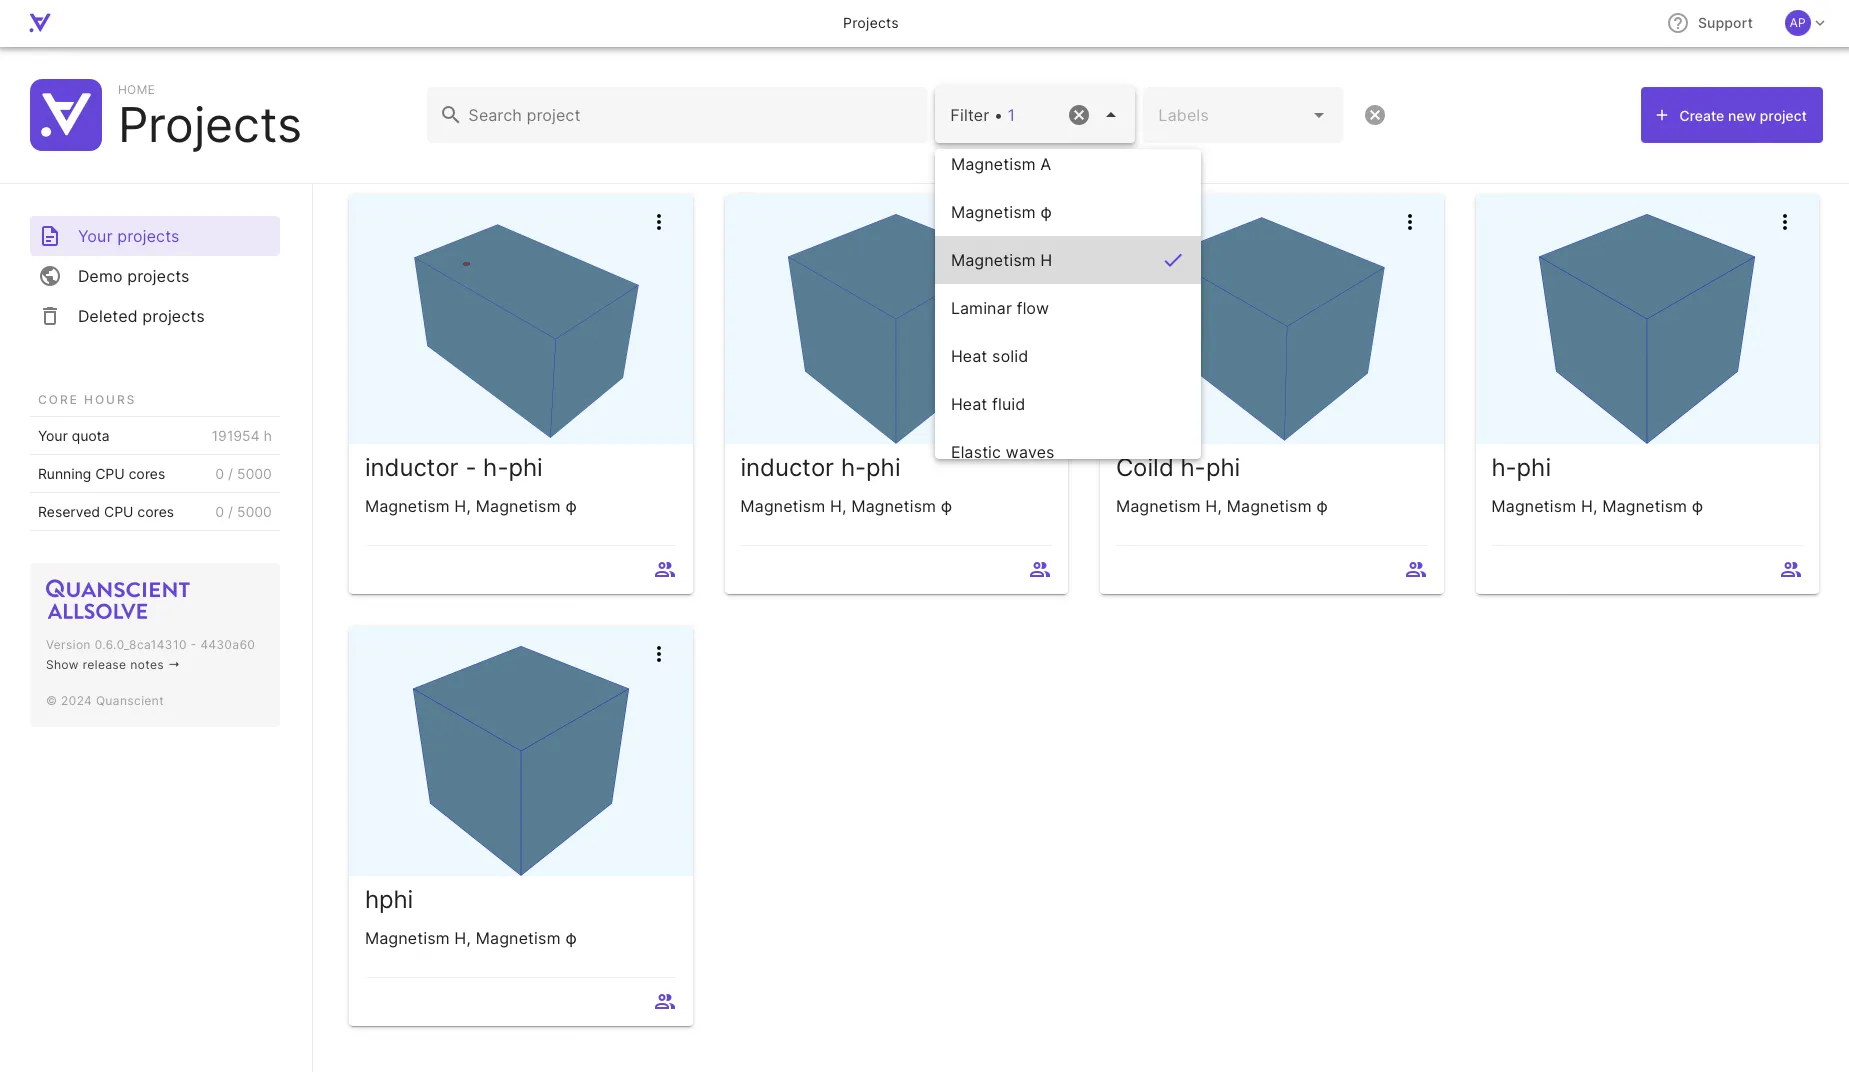
Filtering the list of projects allows you to find what you’re looking for quickly. You can configure the list to only show projects that are in full script mode.
Additionally, you can filter the list to only show projects that have been created with specific physics. This filter is an “or” filter, which means that it will show all projects that have any of the selected physics.
Next, we will look at different ways to start a new project.
How to start a project with geometry modeling
Section titled “How to start a project with geometry modeling”To start a project in Quanscient Allsolve with a new geometry:
- Click
+ Create new projectand fill in the project details on the Create new project dialog. - In the project creation dialog under Create a geometry, select a shape from the pre-defined shapes, such as a sphere or a cylinder.
- Once a shape is selected, the application will create a new project with that shape or geometry as a starting point.

How to start with a STEP import
Section titled “How to start with a STEP import”To start a project in Quanscient Allsolve with a STEP file as a starting point:
- Click
+ Create new projectand fill in the project details. - Browse and select a file under Upload a geometry file, or simply drag your file to the
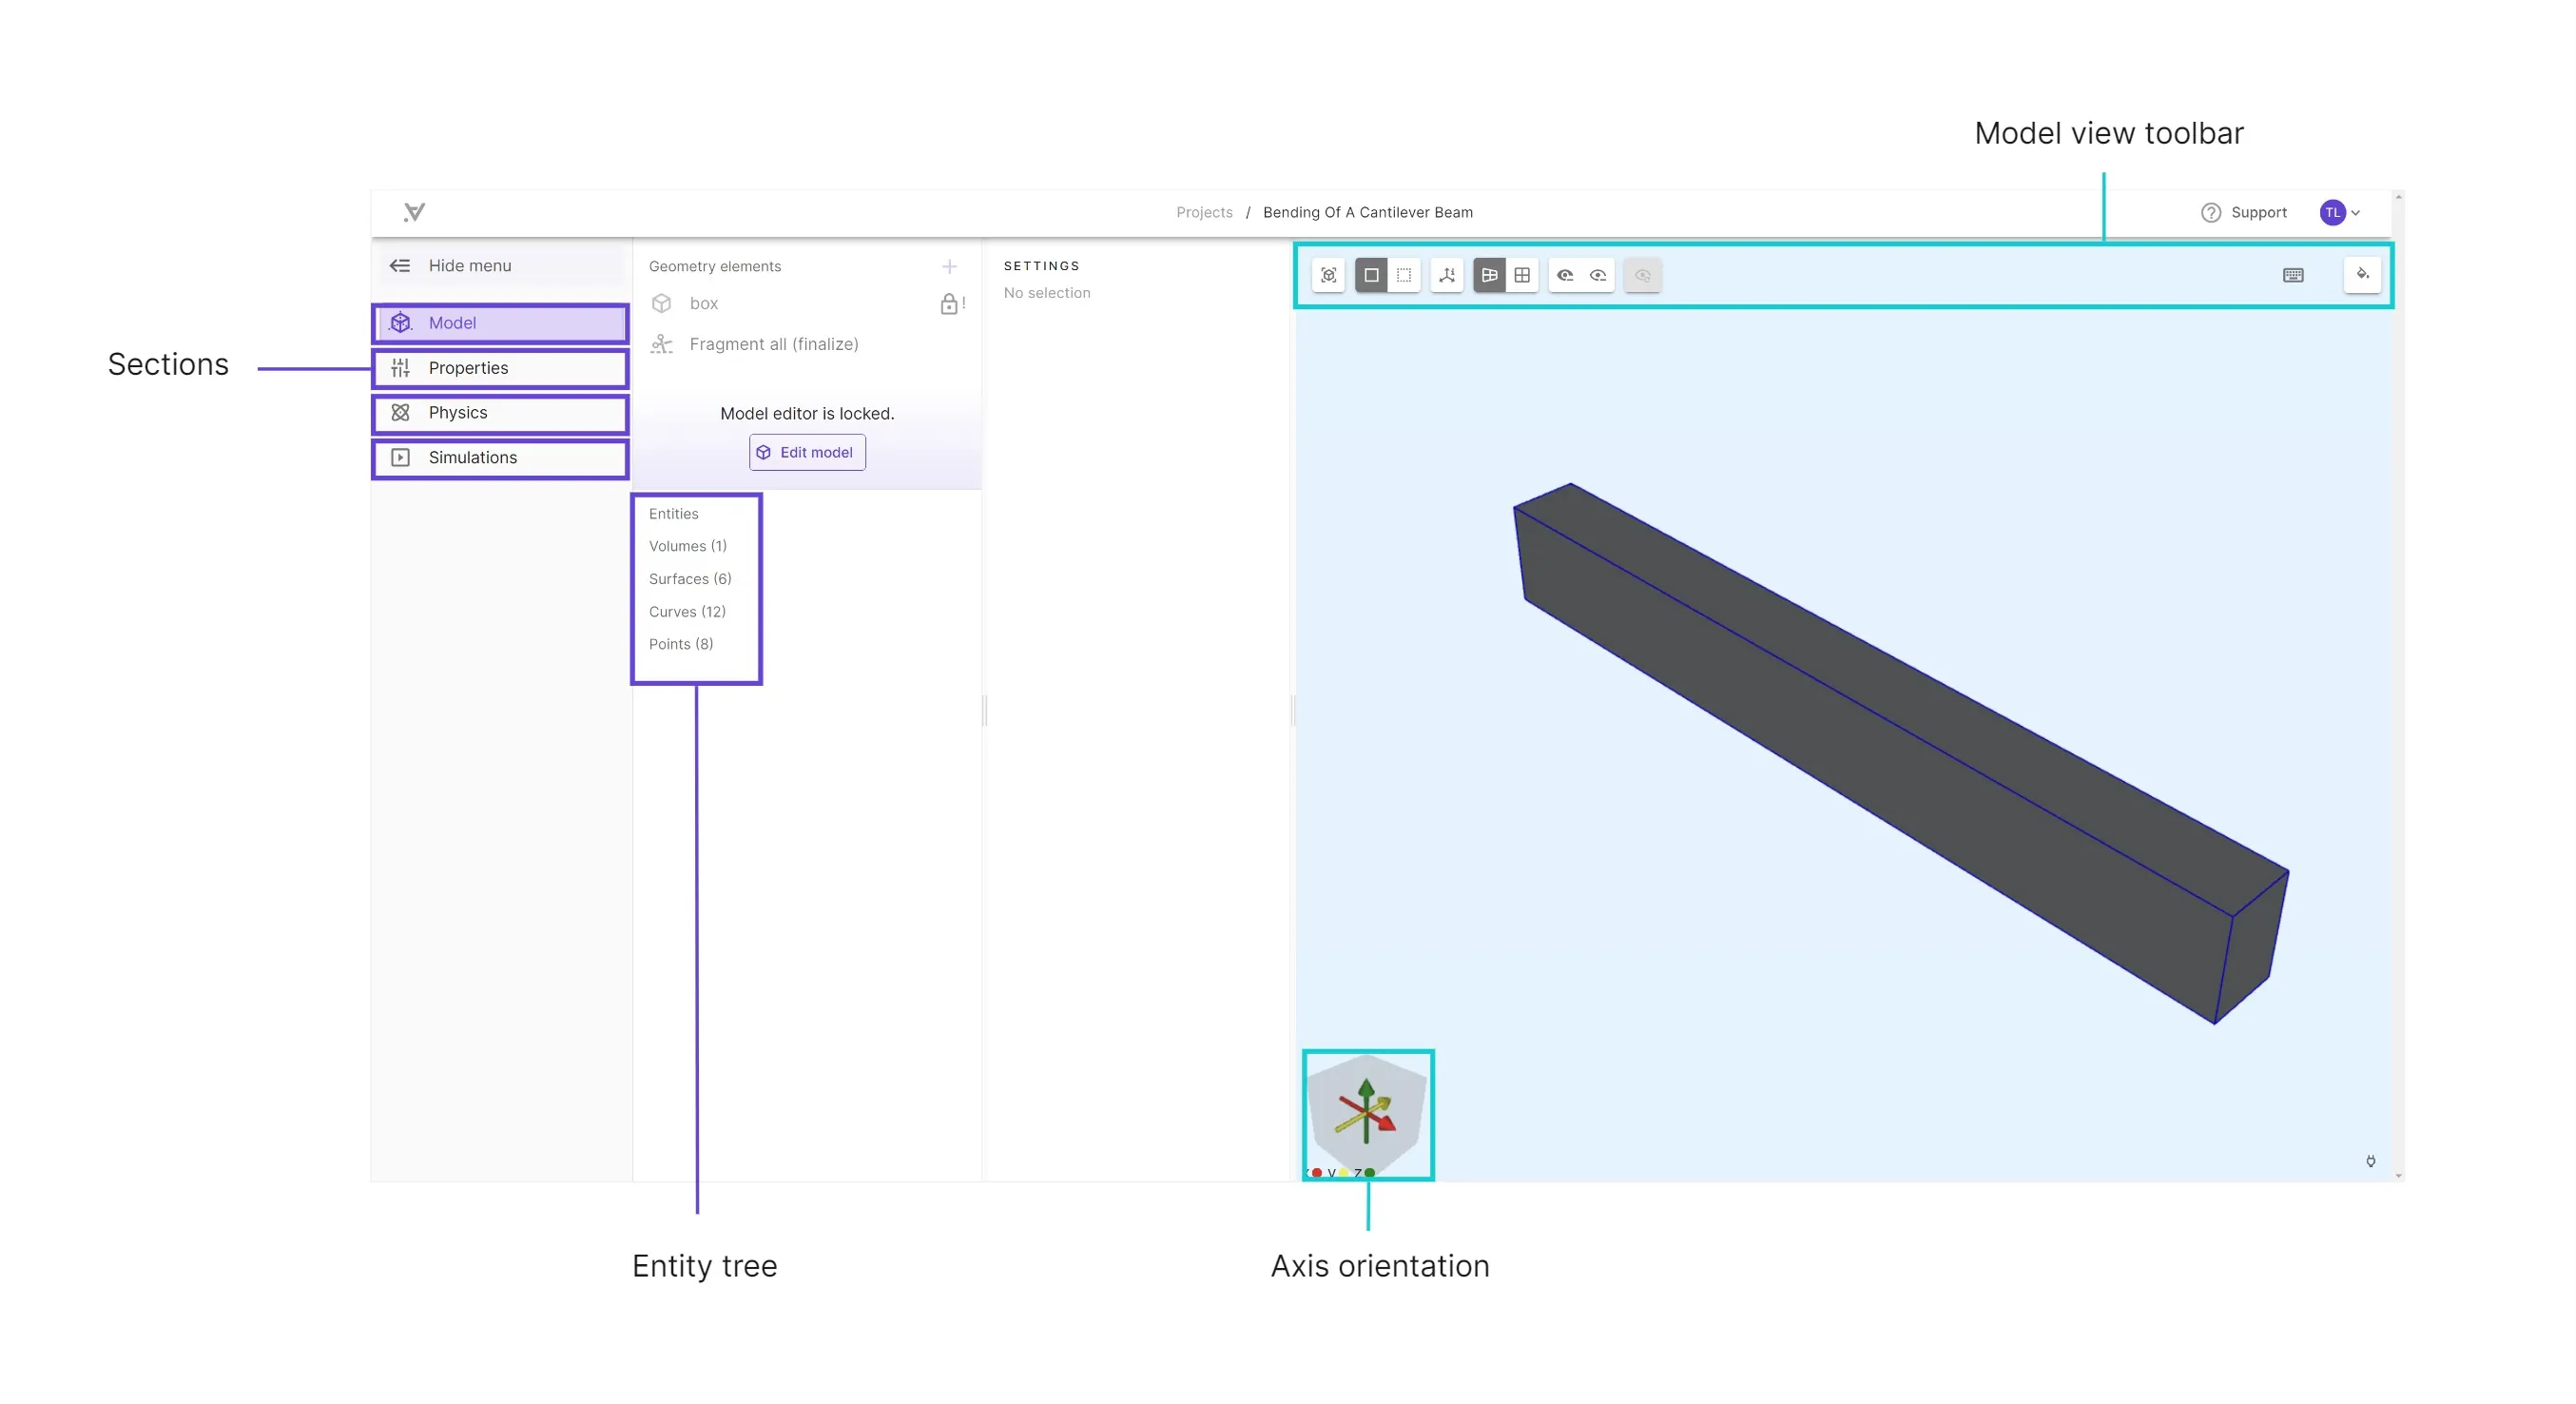
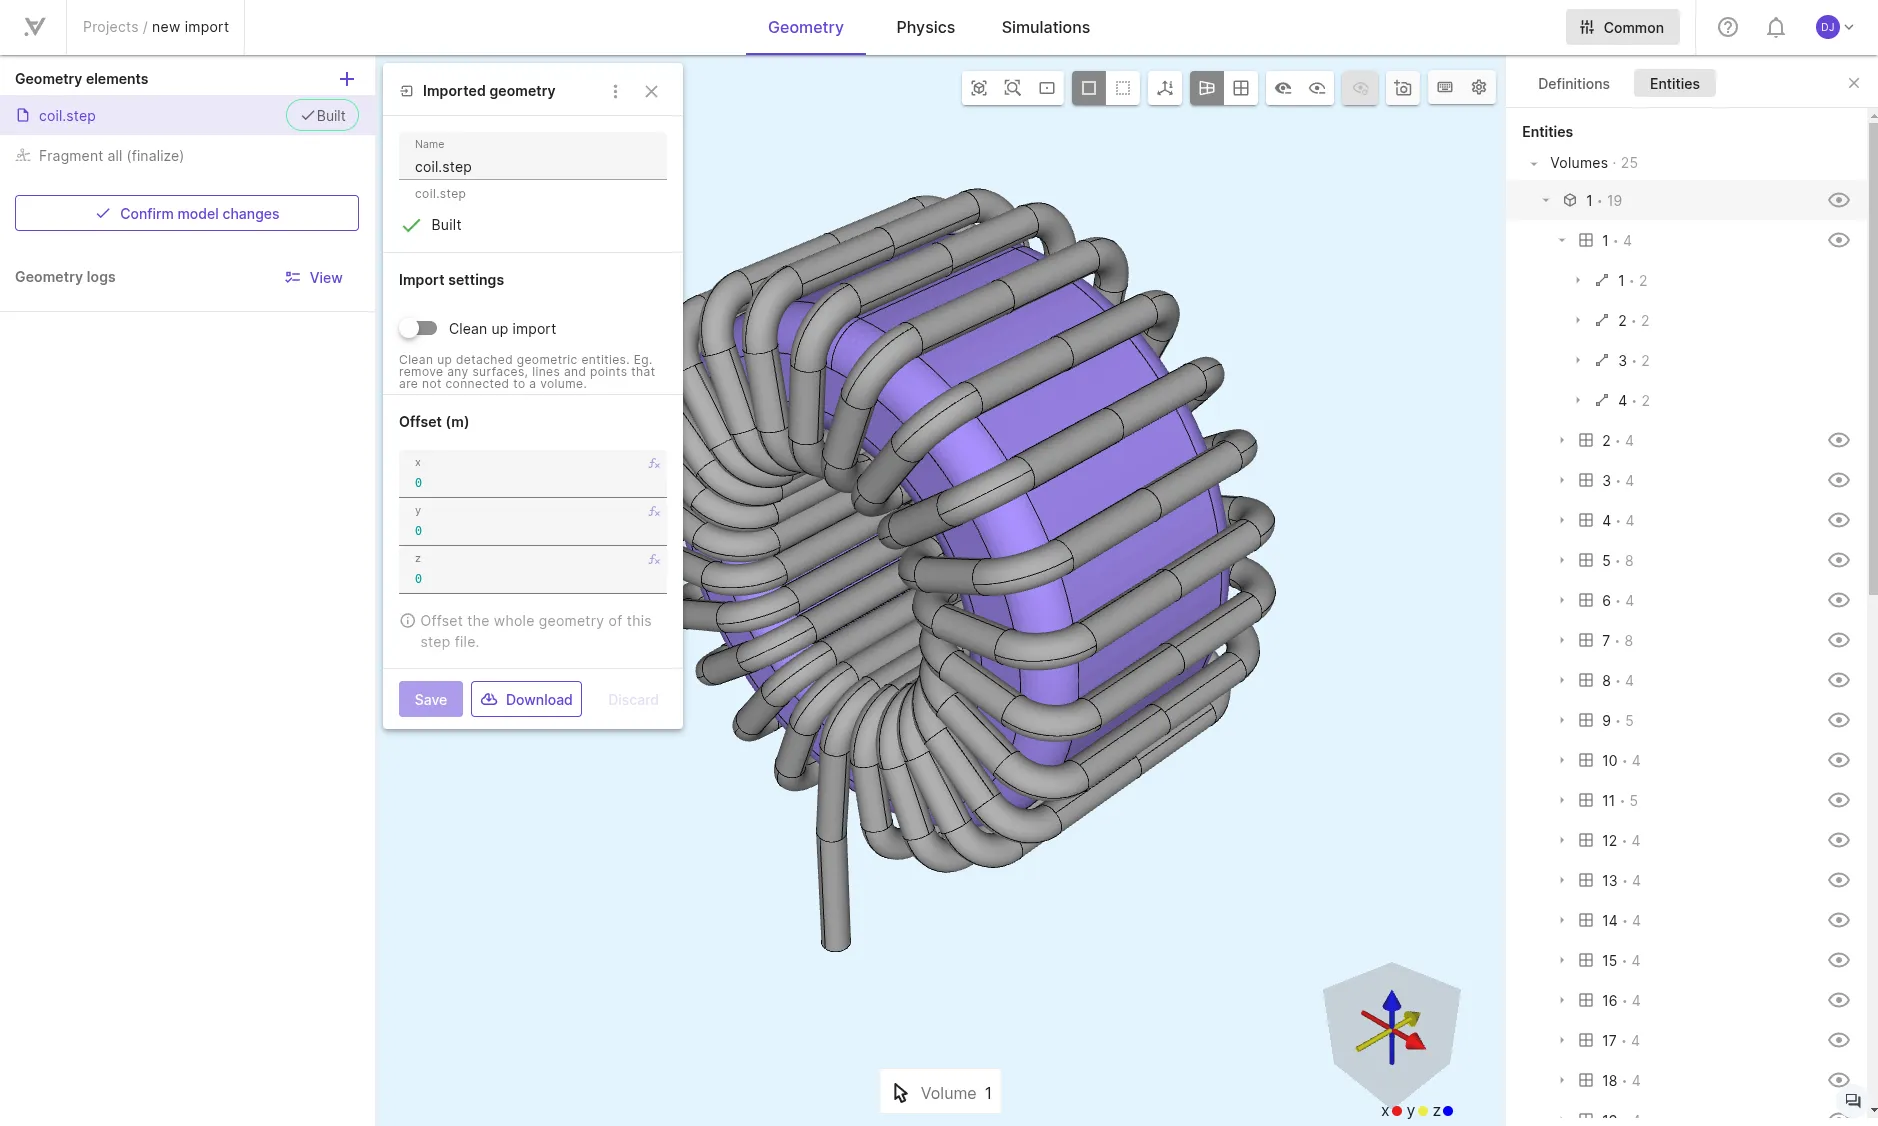
Geometry filefield. - The model view opens on file upload after importing has finished. The model volumes, surfaces, curves, and points can be viewed in the entity tree.
- You can edit the file import offset or configure a separate cleanup step by clicking the file name under Geometry elements. The cleanup step helps remove any orphan geometric entities that do not belong to a parent entity.
- Click
Confirm model changesto lock in your model, or continue modeling with the application’s built-in CAD tools.
How to start a full script project
Section titled “How to start a full script project”To start a project in Quanscient Allsolve using full script mode:
- Click
+ Create new projectand fill in the project details. - Click
Go with the script. A new, empty script view is opened.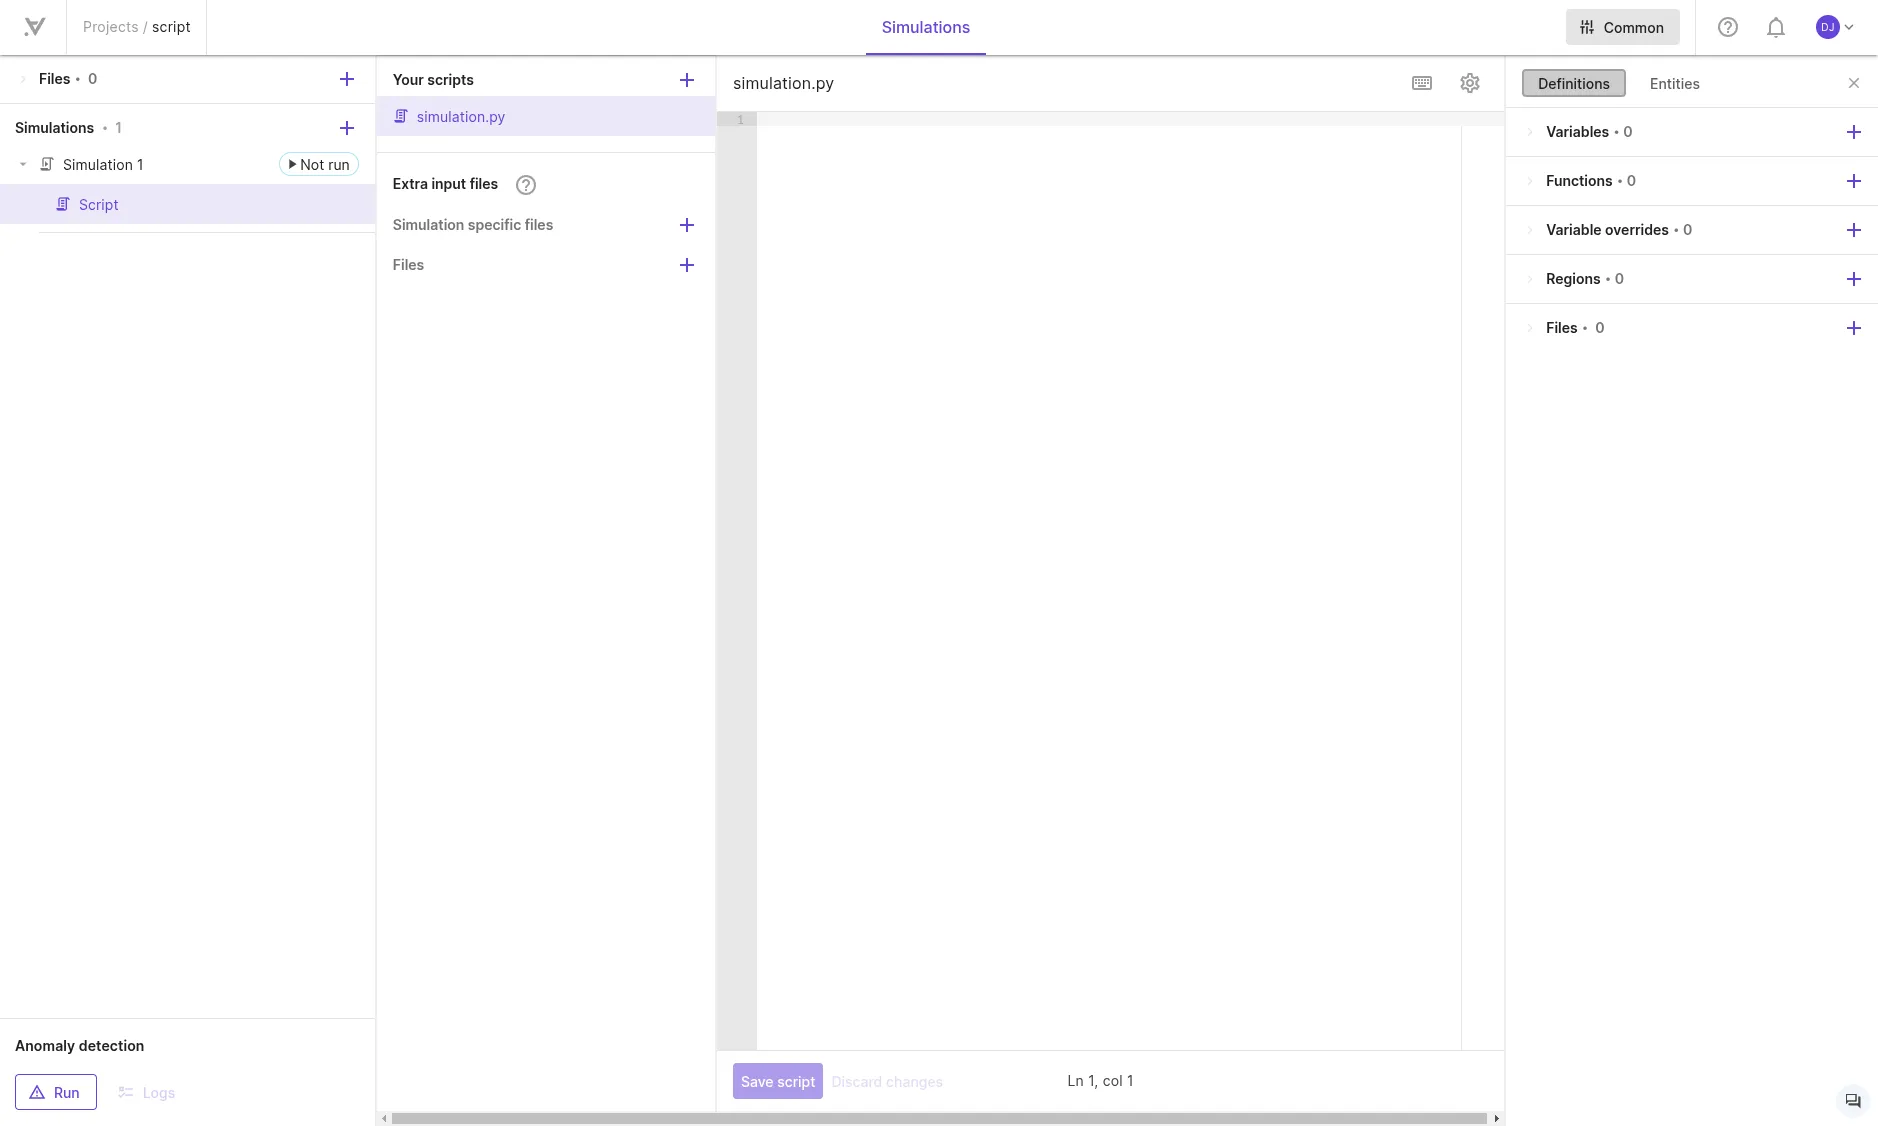
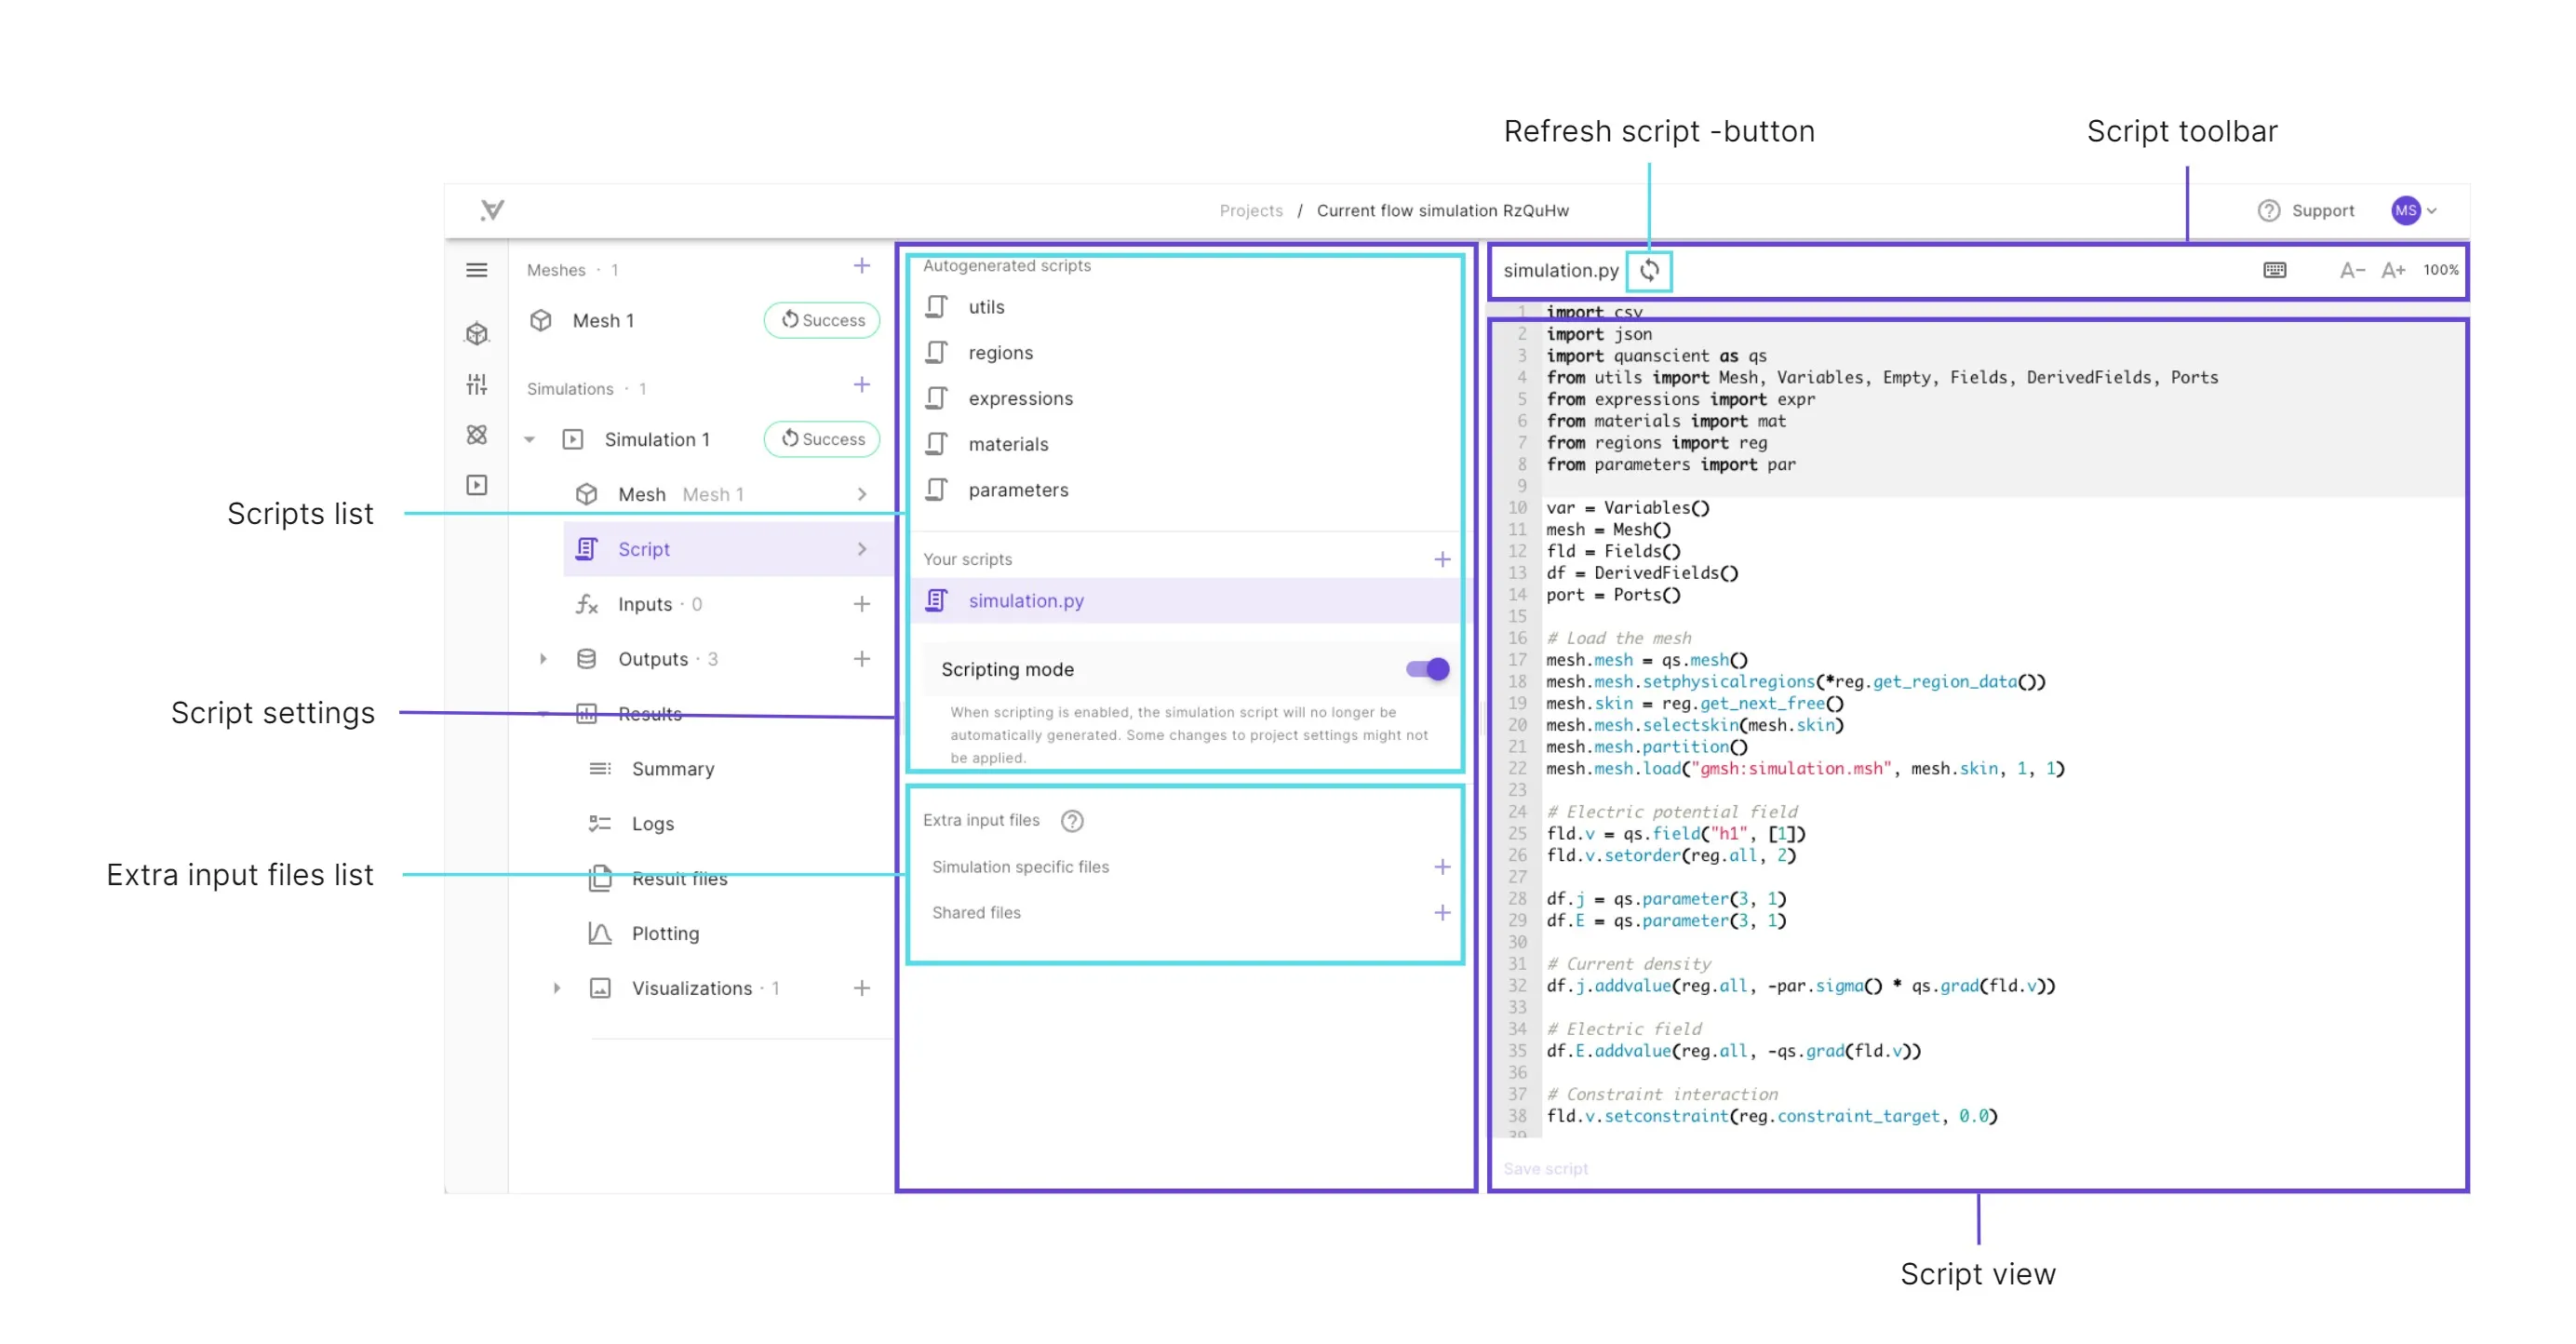
- In a full script project, you will only have access to the script view. You can edit script files and add new ones. You can upload necessary mesh files under Extra input files.
- In the script editor, use the Quanscient module with
import quanscient as qsto access all built-in functionality and use autocomplete for functions. - When your script is finished, set a desired node count and run the simulation.
Introduction to sections
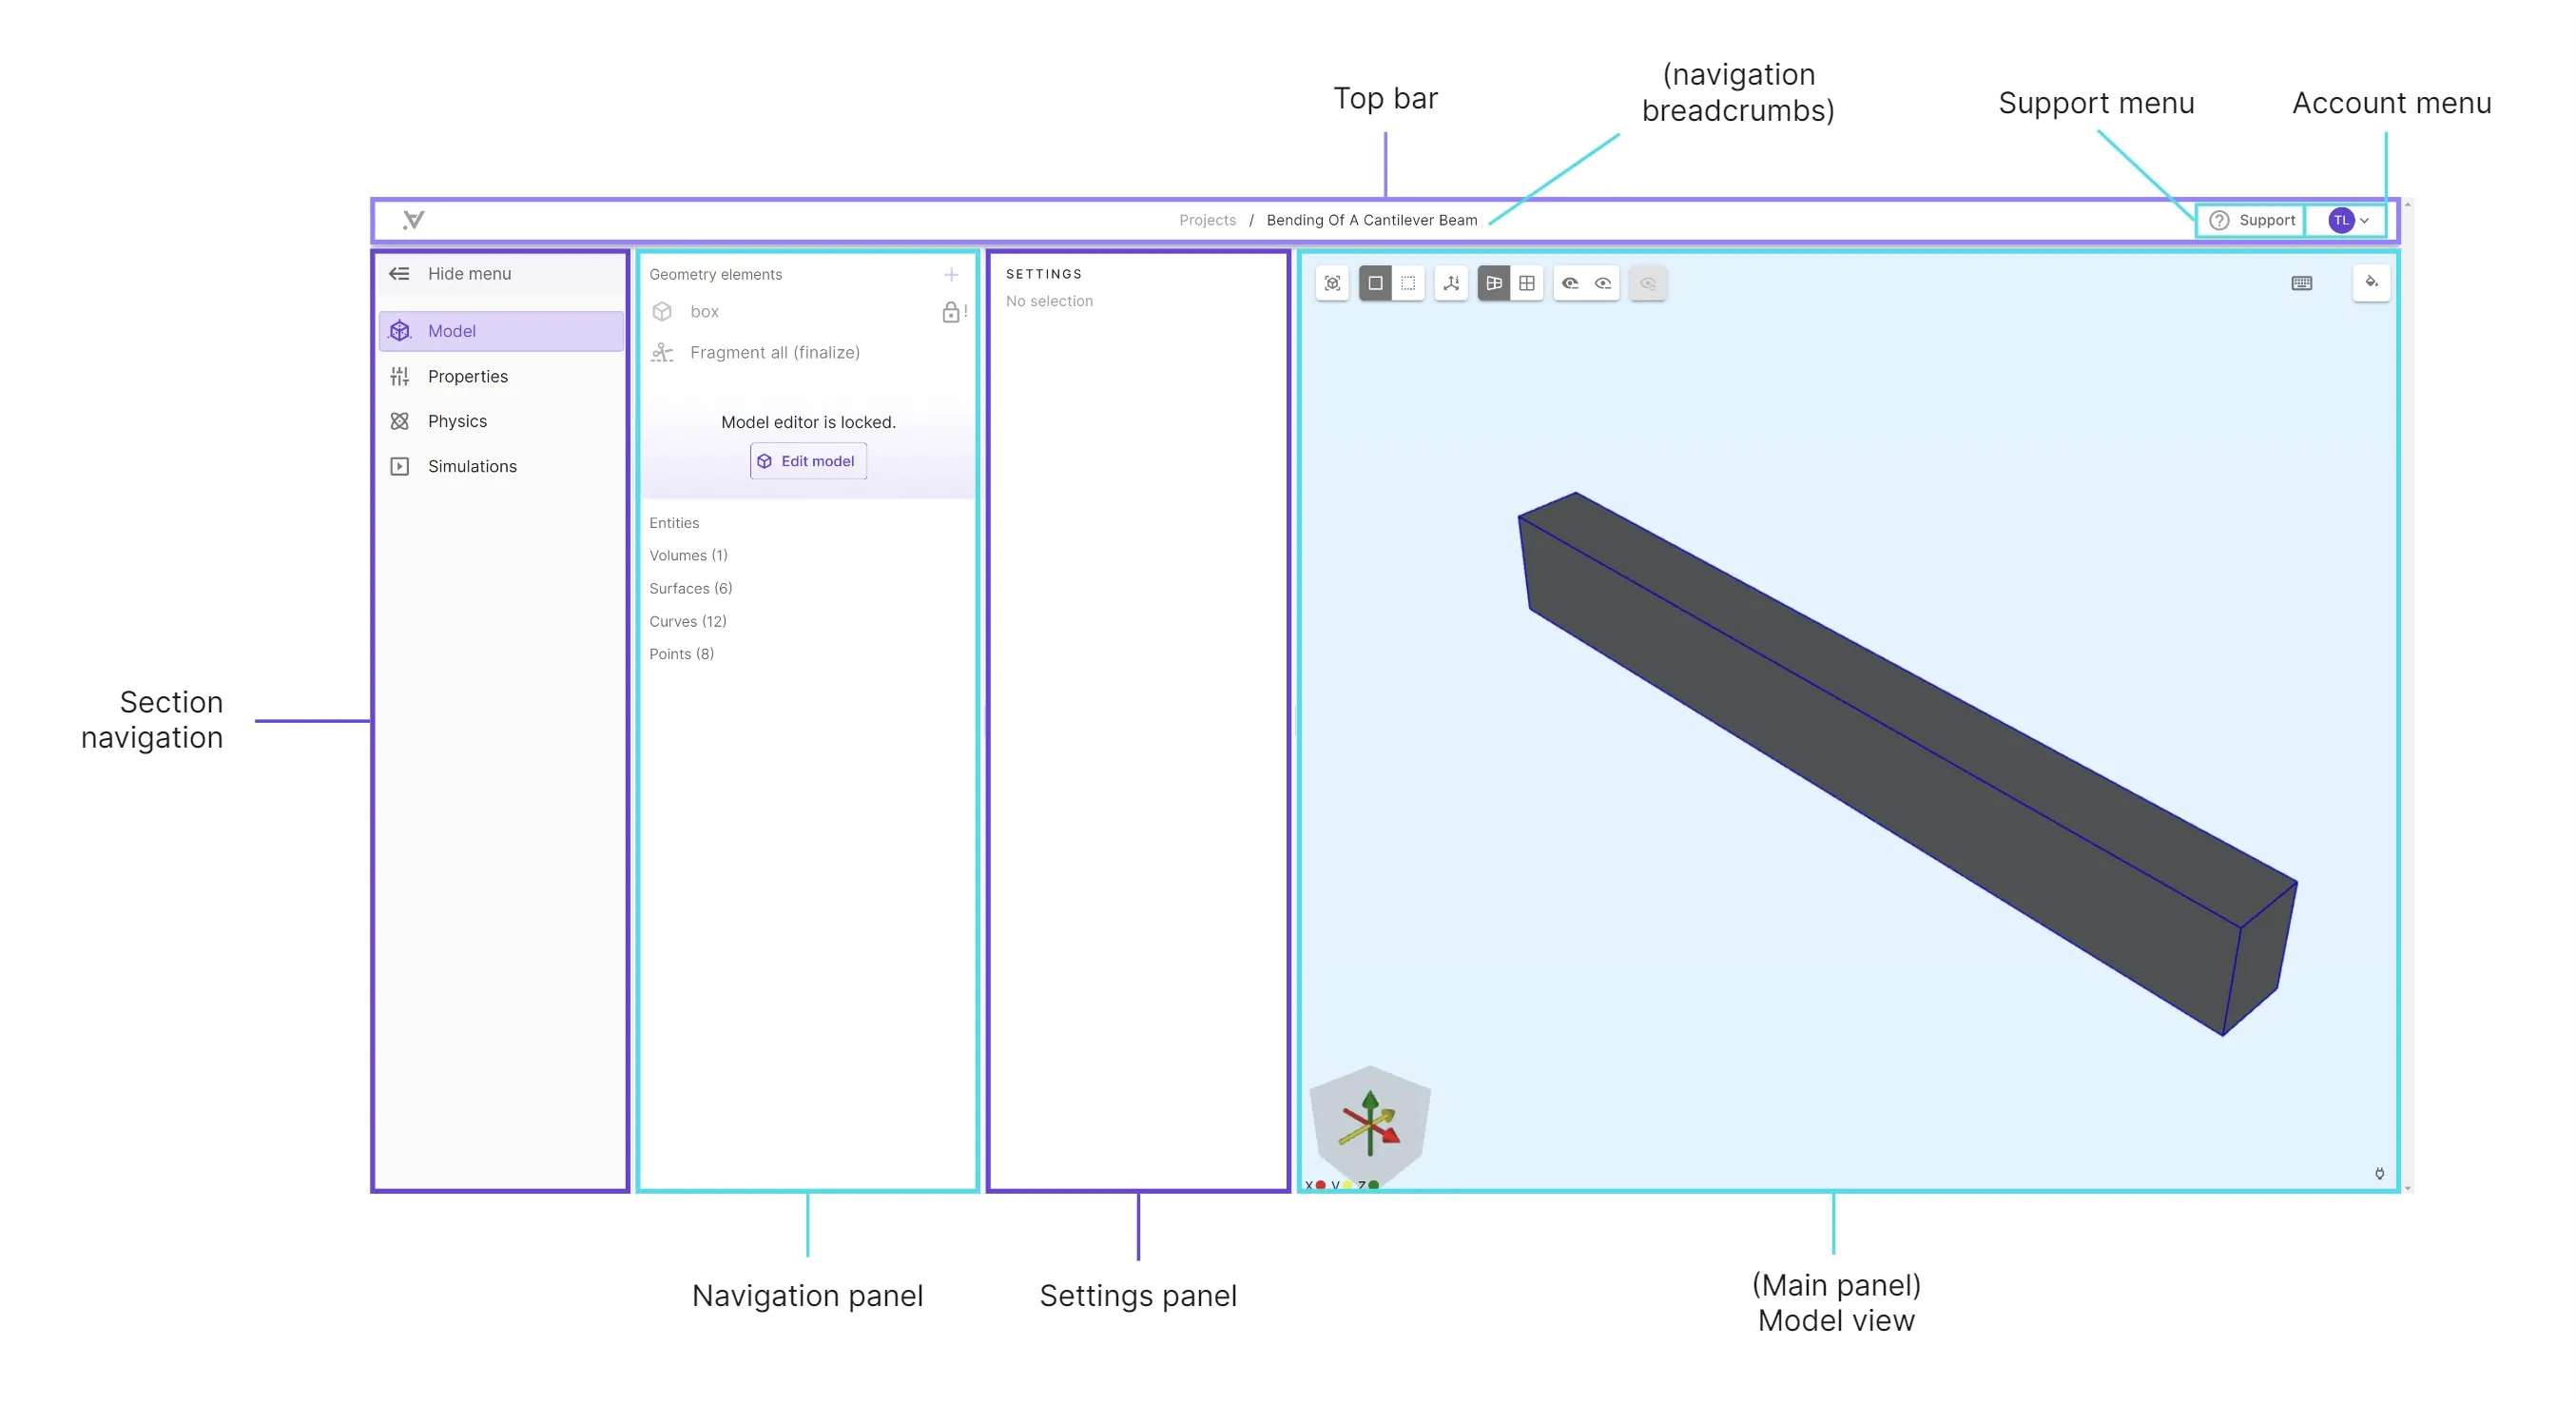
Section titled “Introduction to sections”The Quanscient Allsolve project view is split into 3 sections:
- The Geometry section
- The Physics section
- The Simulations section
In general, each section corresponds to a stage in the simulation workflow.
The separate Common sidebar is found on the top right of the project view.
Below is an overview of features included in each section, along with an image of the section view. Section navigation is found on the top of the project view.
The Geometry section
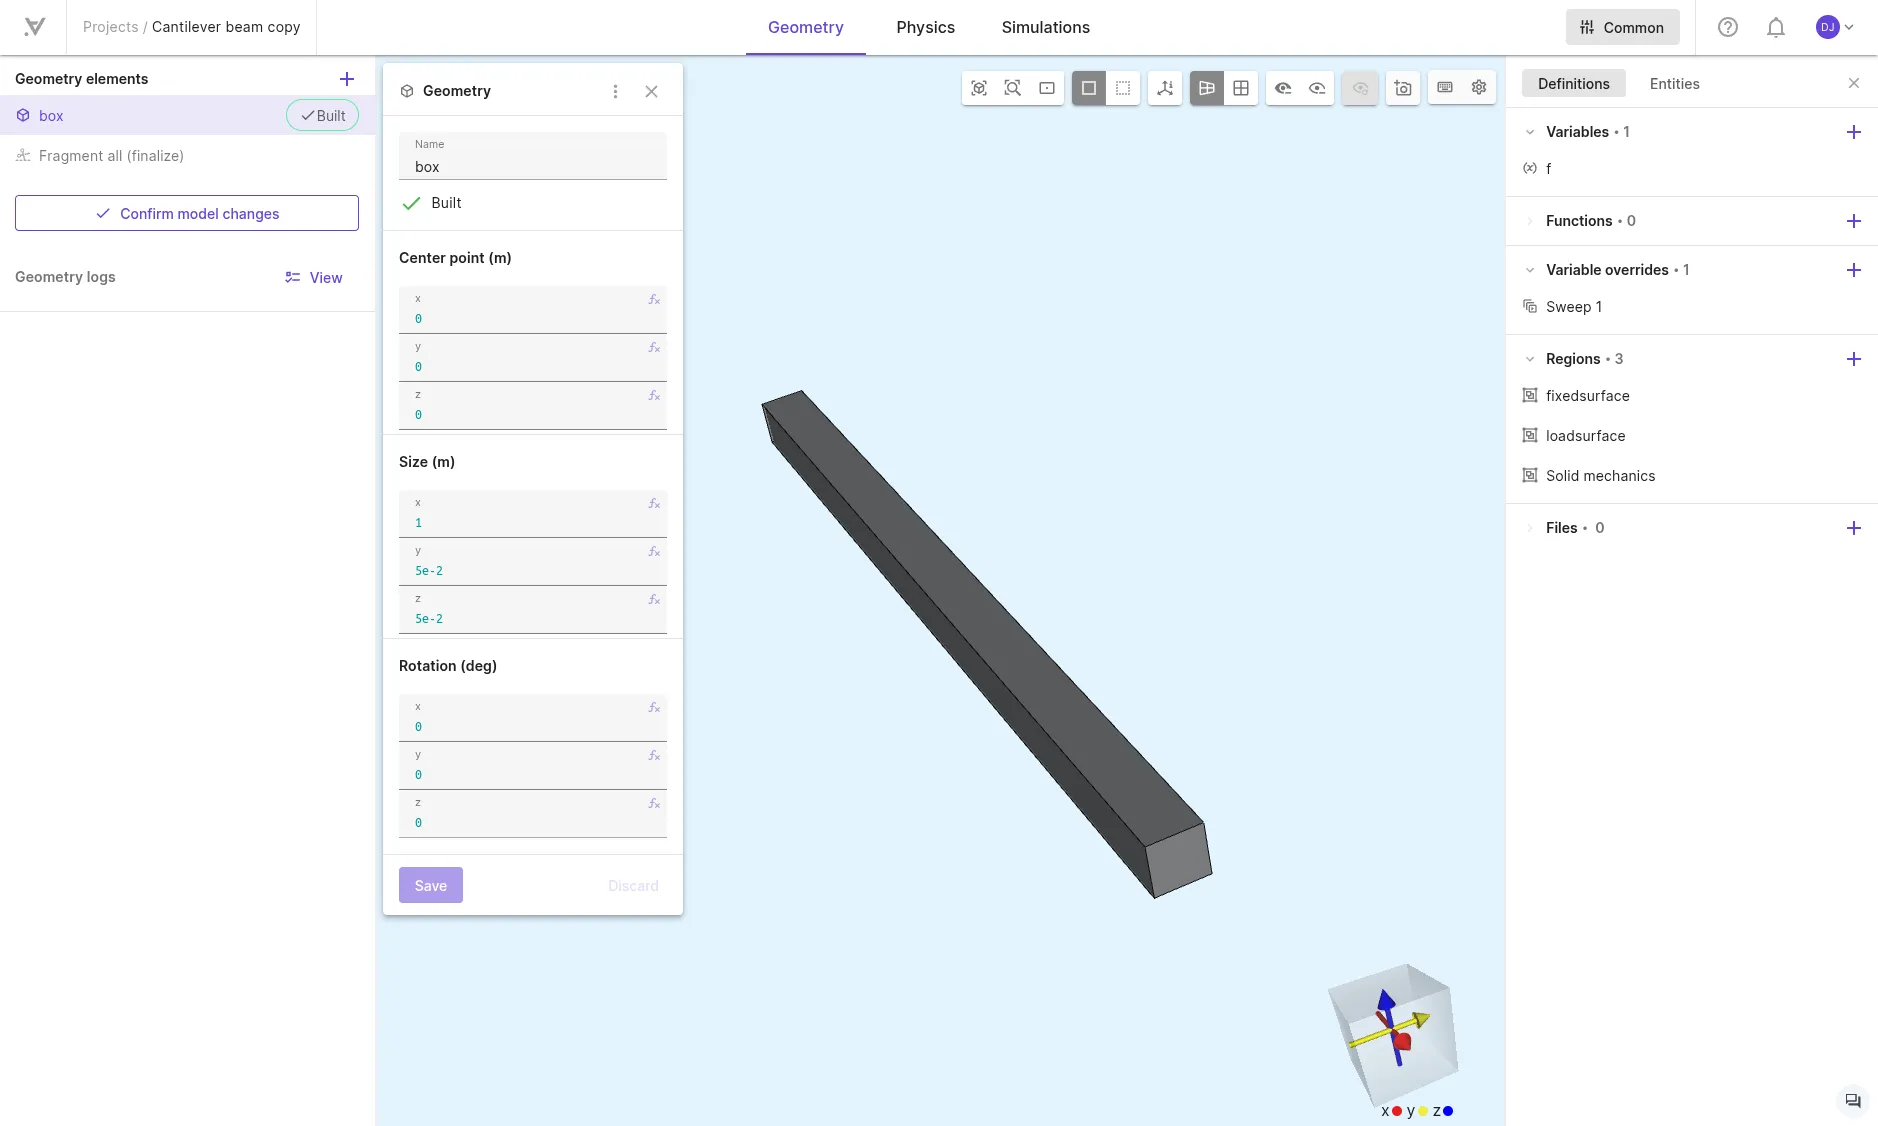
Section titled “The Geometry section”In the Geometry section, you can:
- Import model geometries.
- Create and modify model geometries using geometry elements.
- For details, see Geometries.
- View existing geometry entities in the Entities list.
The Physics section
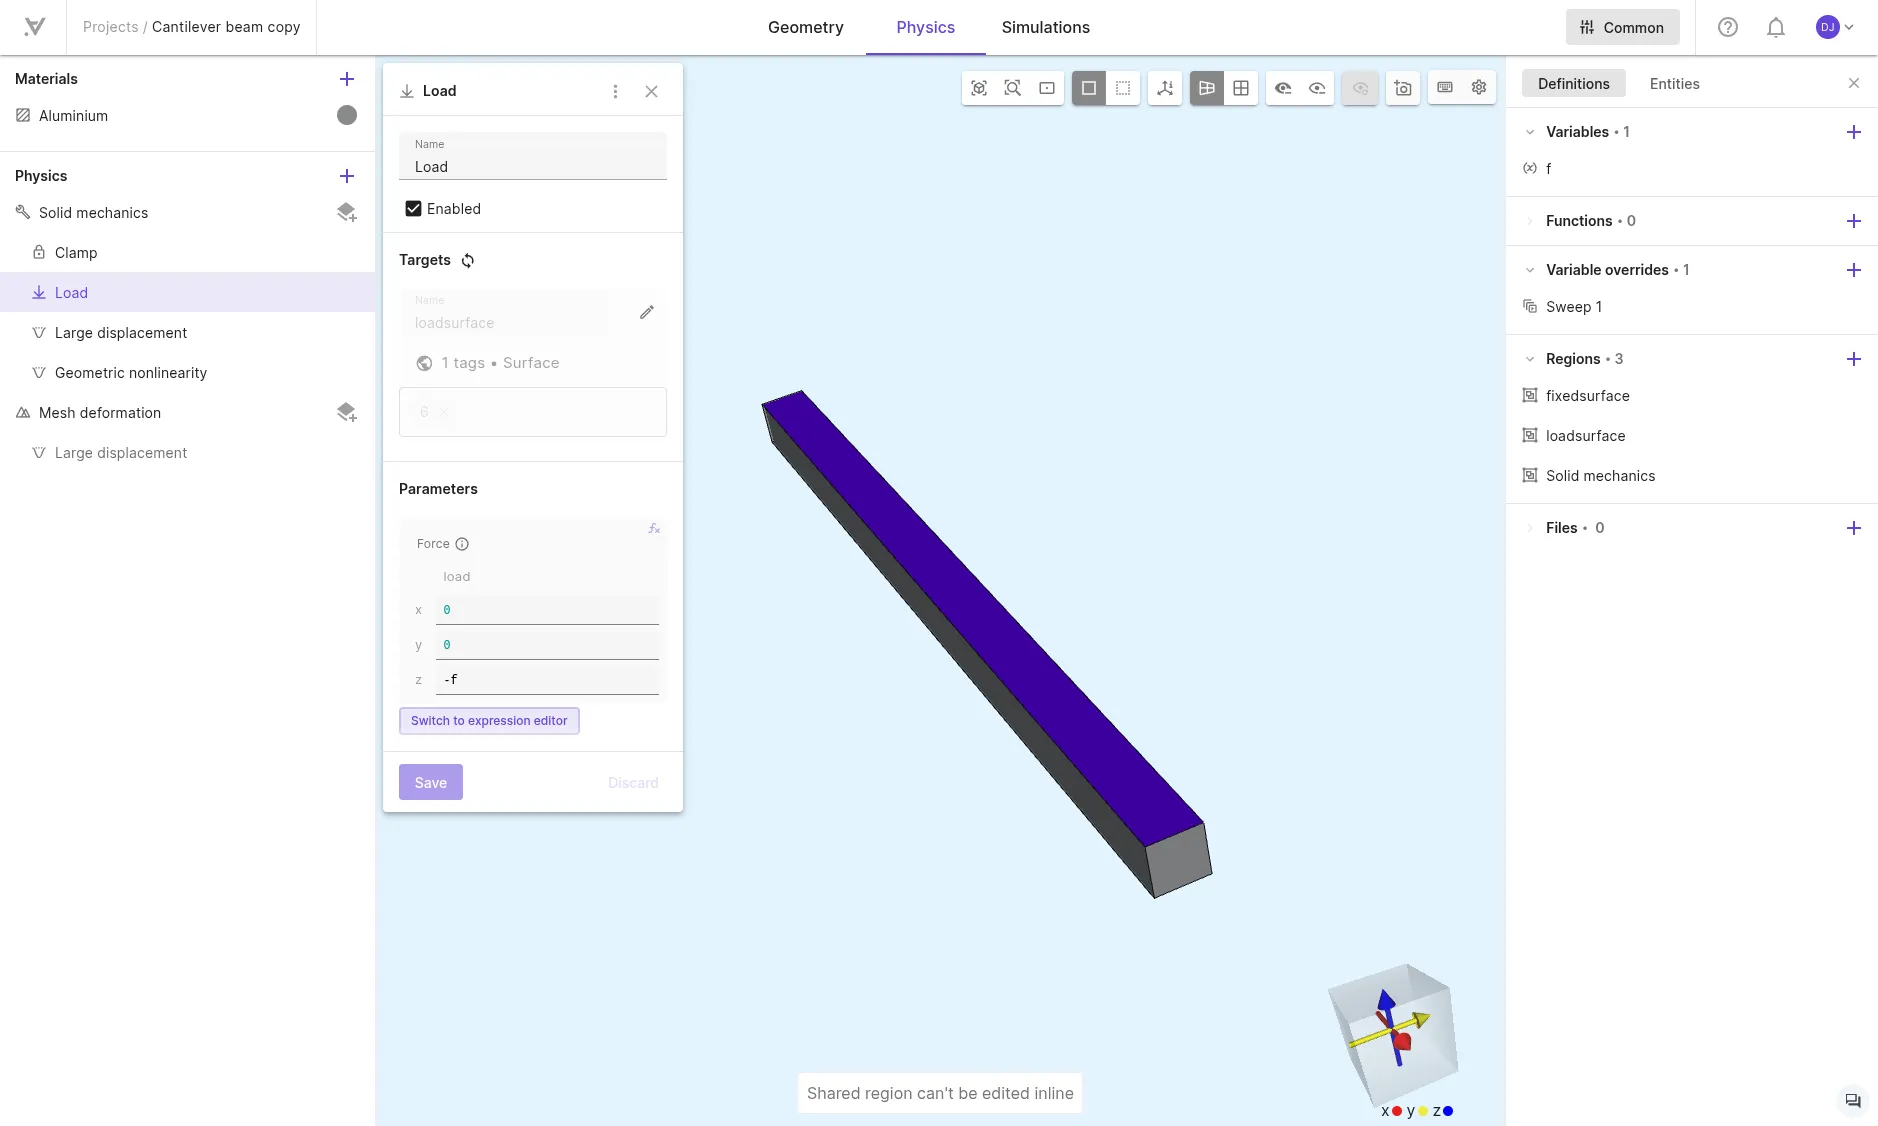
Section titled “The Physics section”In the Physics section, you can:
- Define simulation physics.
- Define model materials.
- Define interactions, such as boundary conditions and couplings between different physics.
The Simulations section
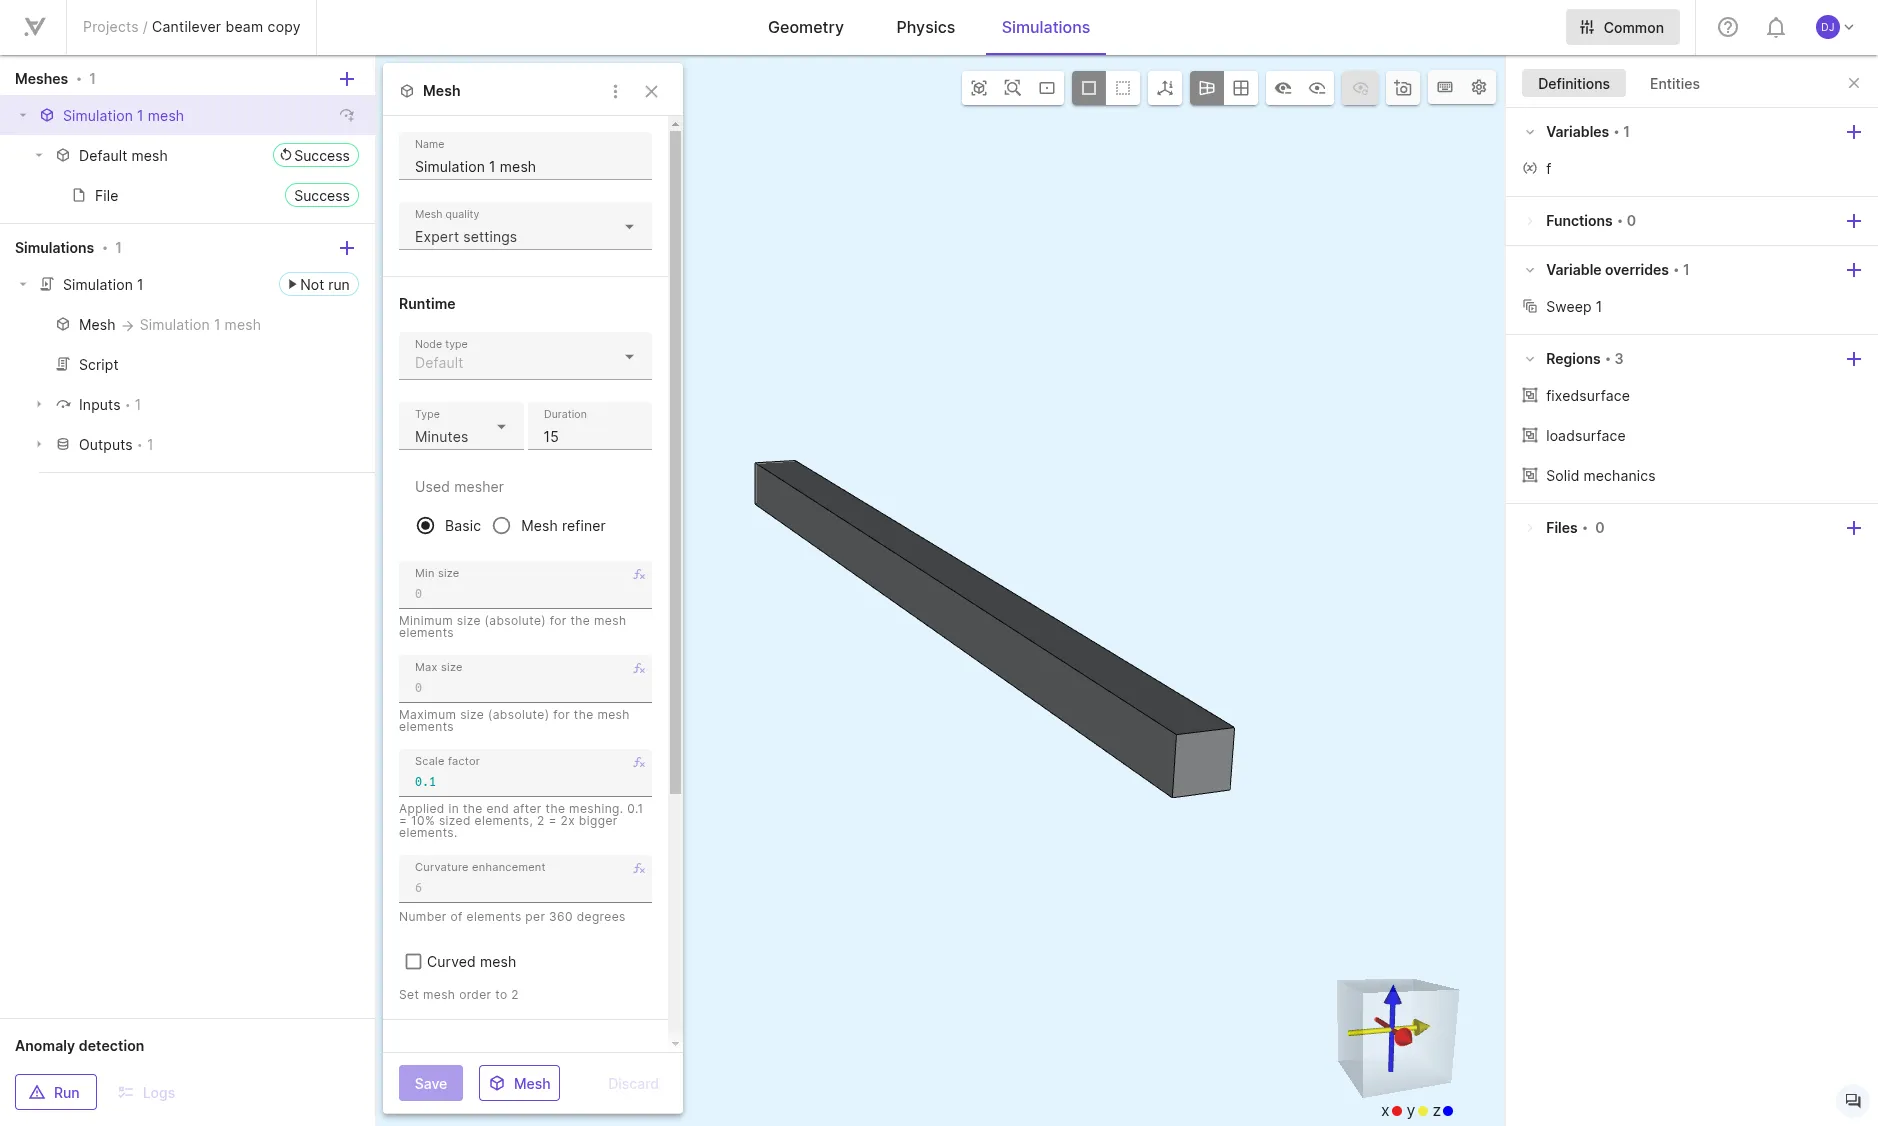
Section titled “The Simulations section”In the Simulations section, you can:
- Create and preview meshes.
- For details, see Meshing.
- Create and run simulations.
- Define simulation inputs and outputs.
- Plot and visualize simulation outputs.
- For details, see Simulations.
The Common sidebar
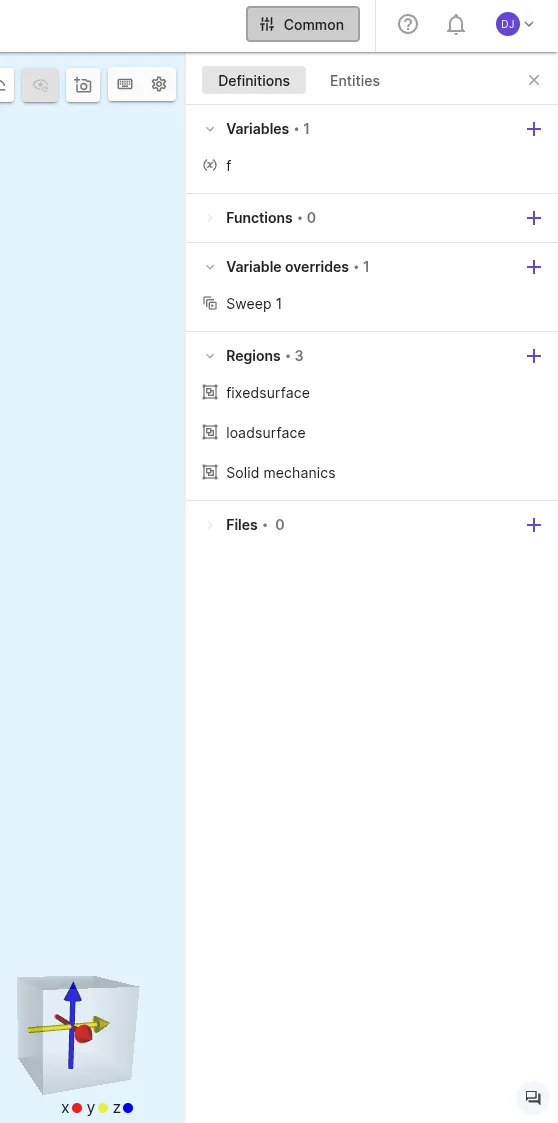
Section titled “The Common sidebar”In the Common sidebar, you can:
- Define variables and functions.
- For details, see Variables & Functions.
- Define variable overrides
- For details, see Variable overrides
- Define and view regions.
- For details, see Regions.
- Import shared files.
- Shared files can be reused for multiple simulations without reuploading them.
- View existing geometry entities in the Entities list.
Introduction to the model view controls
Section titled “Introduction to the model view controls”The model view controls in Quanscient Allsolve provide various options for viewing and manipulating the model. These controls can be found in the top left corner of the model view.

The model view controls from left to right are:
- Reset view: Reset model rotation and zoom so that the full model is visible.
- Zoom to area: Click and drag with the mouse to choose an area to zoom to. Works best with parallel projection.
- Set focal point: Specify a point on the model to set camera focal point to. By defult, it is at the center of the model.
- Opaque/Translucent model: Toggle translucency to see through layers in the model. Opaque by default.
- Show axes: Fit axes with scales around the model to see lengths [m] of model edges.
- Camera projection: perspective/parallel: Switch between perspective projection and parallel projection. Perspective by default. Parallel is useful for zooming into small details.
- Hide volumes: Hide a volume in the model by clicking on it.
- Volume visibilities can also be viewed and toggled in the entity tree.
- To show all volumes again, click the
Clear hiddenbutton. - Keep Shift pressed to hide multiple volumes in a row.
- Hide surfaces: Hide a surface in the model by clicking on it.
- Surface visibilities can also be viewed and toggled in the entity tree.
- To show all surfaces again, click the
Clear hiddenbutton. - Keep Shift pressed to hide multiple surfaces in a row.
- Clear hidden: Show all entities.
- Screenshot: Take a screenshot of the current model view state.
Model view camera controls
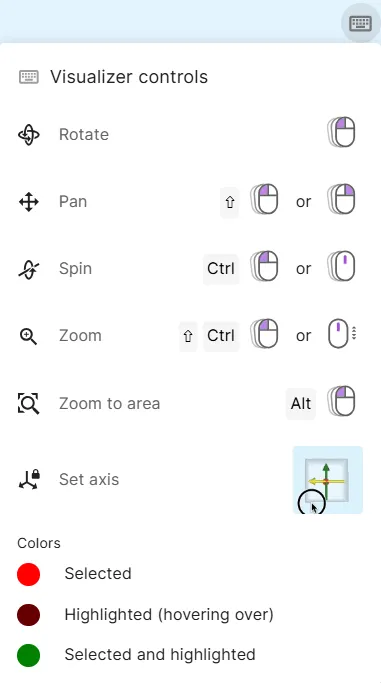
Section titled “Model view camera controls”The model view camera can be rotated, panned, spun and zoomed with the mouse. Check the camera control keys anytime from the Model view controls popup on the top right of the model view.
Interface terminology
Section titled “Interface terminology”