SAW 001 - Unit cell
Surface Acoustic Wave (SAW) devices play a crucial role in modern electronic systems, serving in applications ranging from wireless communication and sensing to signal processing and filters. Understanding and optimizing the performance of SAW devices requires comprehensive simulation techniques that accurately model their complex behavior under varying conditions.
Full-scale SAW device simulations can be computationally expensive, however. In this example, we demonstrate a streamlined approach using a unit cell of a single-port SAW filter. This simplified model, comprising a pair of aluminum electrodes (grey) on a Lithium Niobate (green) piezoelectric substrate, allows for rapid analysis of device performance while still capturing the essential physics.
Demo project: SAW unit cell

The model is set up to simulate a Y-cut, which can be rotated to the desired angle. The base design generates an shear horizontal (SH) mode at 852 MHz using a finger pitch of 1 μm.
Simulation setup guide
Section titled “Simulation setup guide”Here you’ll find a simplified, example case level guide for setting up a SAW unit cell simulation.
Step 1 - Define variables & functions
Section titled “Step 1 - Define variables & functions”In the Common sidebar, define variables:
| Name | Description | Expression |
|---|---|---|
| width | Cell width [m] | 4e-6 |
| thickness | Cell thickness [m] | 1e-7 |
| elec_height | Electrode height [m] | 2e-7 |
| subs_height | Substrate height [m] | 12e-6 |
| freq | Frequency [Hz] | 8.7e8 |
Also define the following functions:
| Name | Description | Arguments | Expression |
|---|---|---|---|
| Zreal | Real part of the impedance | Ir, Iim, Vr, Vim | (Vr*Ir+Vim*Iim)/(Ir*Ir+Iim*Iim) |
| Zim | Imaginary part of the impedance | Ir, Iim, Vr, Vim | (Vim*Ir-Vr*Iim)/(Ir*Ir+Iim*Iim) |
| Zmagnitude | Impedance magnitude | Ir, Iim, Vr, Vim | sqrt(Zreal(Ir,Iim,Vr,Vim)*Zreal(Ir,Iim,Vr,Vim)+Zim(Ir,Iim,Vr,Vim)*Zim(Ir,Iim,Vr,Vim)) |
Step 2 - Create the geometry
Section titled “Step 2 - Create the geometry”In the Geometry section, create the model geometry by building three boxes:
| Name | Element type | Center point (m) | Size (m) | Rotation (deg) |
|---|---|---|---|---|
| substrate | Box | X: 0 | X: width | X: 0 |
Y: 0 | Y: thickness | Y: 0 | ||
Z: -subs_height/2 | Z: subs_height | Z: 0 |
| Name | Element type | Center point (m) | Size (m) | Rotation (deg) |
|---|---|---|---|---|
| electrode 1 | Box | X: -width/4 | X: width/4 | X: 0 |
Y: 0 | Y: thickness | Y: 0 | ||
Z: elec_height/2 | Z: elec_height | Z: 0 |
| Name | Element type | Center point (m) | Size (m) | Rotation (deg) |
|---|---|---|---|---|
| electrode 2 | Box | X: width/4 | X: width/4 | X: 0 |
Y: 0 | Y: thickness | Y: 0 | ||
Z: elec_height/2 | Z: elec_height | Z: 0 |
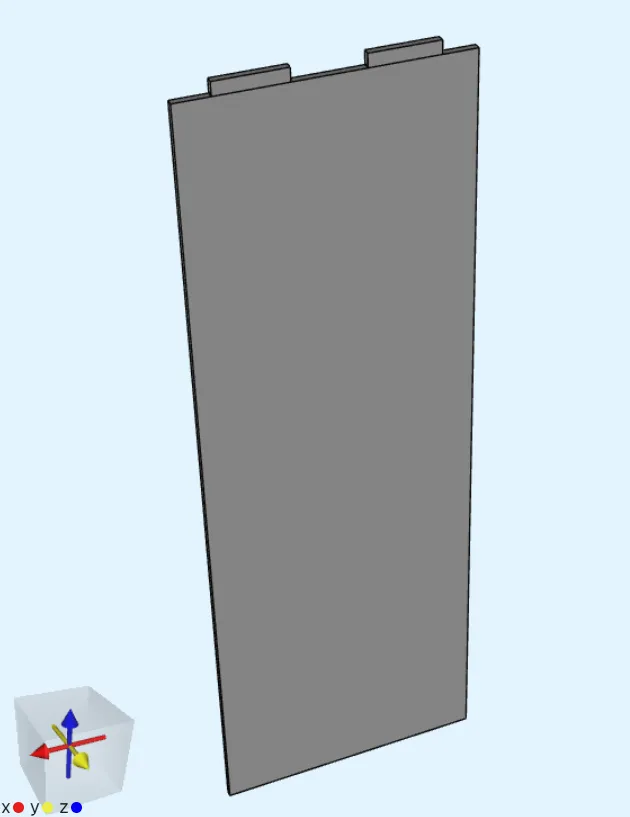
Your model geometry is now finished, and should look like in the image below:
Step 3 - Define the materials
Section titled “Step 3 - Define the materials”Go to the Physics section to define the model materials.
Material 1 - Aluminium
Section titled “Material 1 - Aluminium”Assign Aluminium to the pair of small electrode volumes on top of the substrate (13, 25).
Material 2 - Lithium Niobate
Section titled “Material 2 - Lithium Niobate”Create a new material with these general settings:
| Name | Abbreviation | Description | Color | Target |
|---|---|---|---|---|
| LiNbO3 | linbo3 | Lithium Niobate | green | Substrate volume (1) |
Apply the settings to save your work on Lithium Niobate so far.
Then, define the LiNbO3 material properties:
- Density
4647
- Elasticity matrix
- ☑️ Anisotropic
[2.424e11, 0.752e11, 0.752e11, 0, 0, 0; 0.752e11, 2.03e11, 0.573e11, 0, 0.085e11, 0; 0.752e11, 0.573e11, 2.03e11, 0, -0.085e11, 0; 0, 0, 0, 0.752e11, 0, 0.085e11; 0, 0.085e11, -0.085e11, 0, 0.595e11, 0; 0, 0, 0, 0.085e11, 0, 0.595e11]
- Electric permittivity
- ☑️ Anisotropic
[28.7 * epsilon0, 0, 0; 0, 85.2 * epsilon0, 0; 0, 0, 85.2 * epsilon0]
- Piezoelectric coupling matrix
- ☑️ Anisotropic
[1.33, 0, 0; 0.23, 0, -2.5; 0.23, 0, 2.5; 0, -2.5, 0; 0, 0, 3.7; 0, 3.7, 0]
All of your model materials are now defined.
Step 4 - Define the physics
Section titled “Step 4 - Define the physics”Go to the Physics section to define the physics.
First add the Solid mechanics and Electrostatics physics, and then move on to defining their interactions.
Physics 1 - Solid mechanics
Section titled “Physics 1 - Solid mechanics”-
Let solid mechanics target default to the whole geometry.
-
Add
Clamp:Name Interaction type Target Clamp Clampbottom surface of the substrate volume ( 23) -
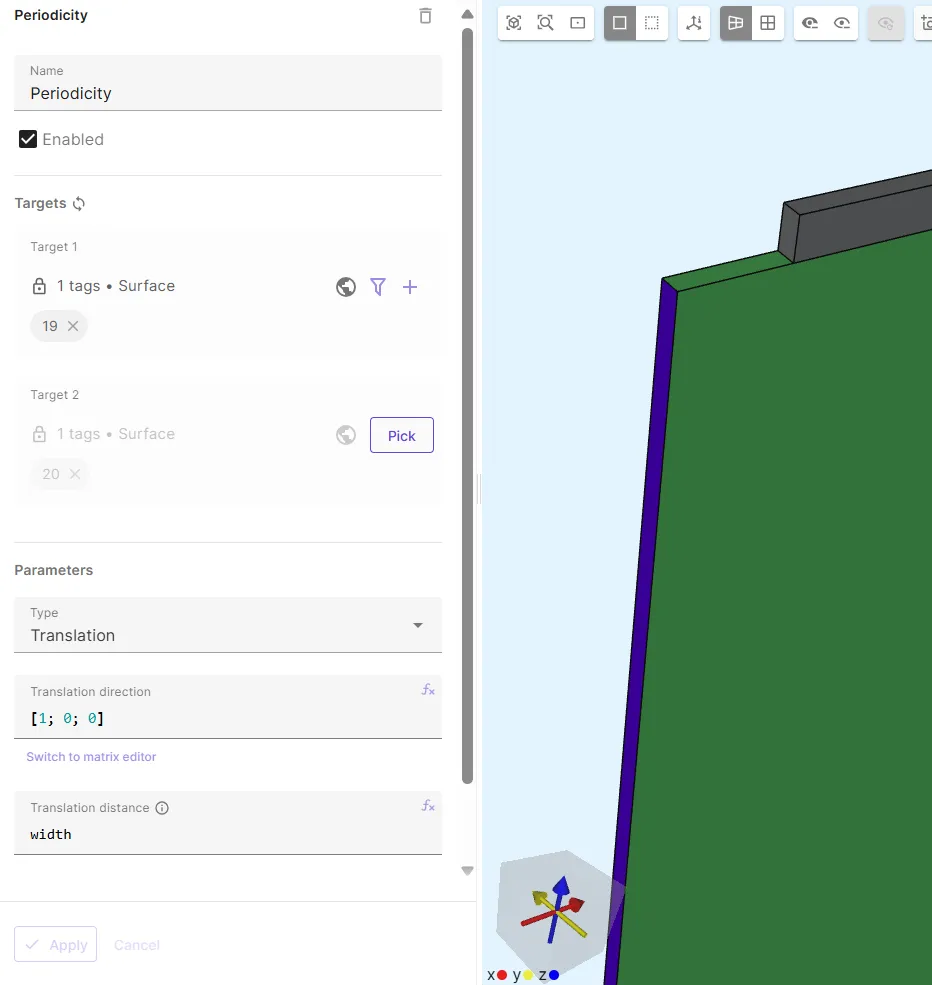
Add
Periodicity:- As Target 1, select the left side surface of the substrate volume in the negative X-direction (surface
19). - As Target 2, select the right side surface of the substrate volume in the positive X-direction (surface
20). - In Parameters:
- Set Type to
Translation. - Set Translation direction [X; Y; Z] to
[1; 0; 0]. - Set Translation distance to
width.
- Set Type to
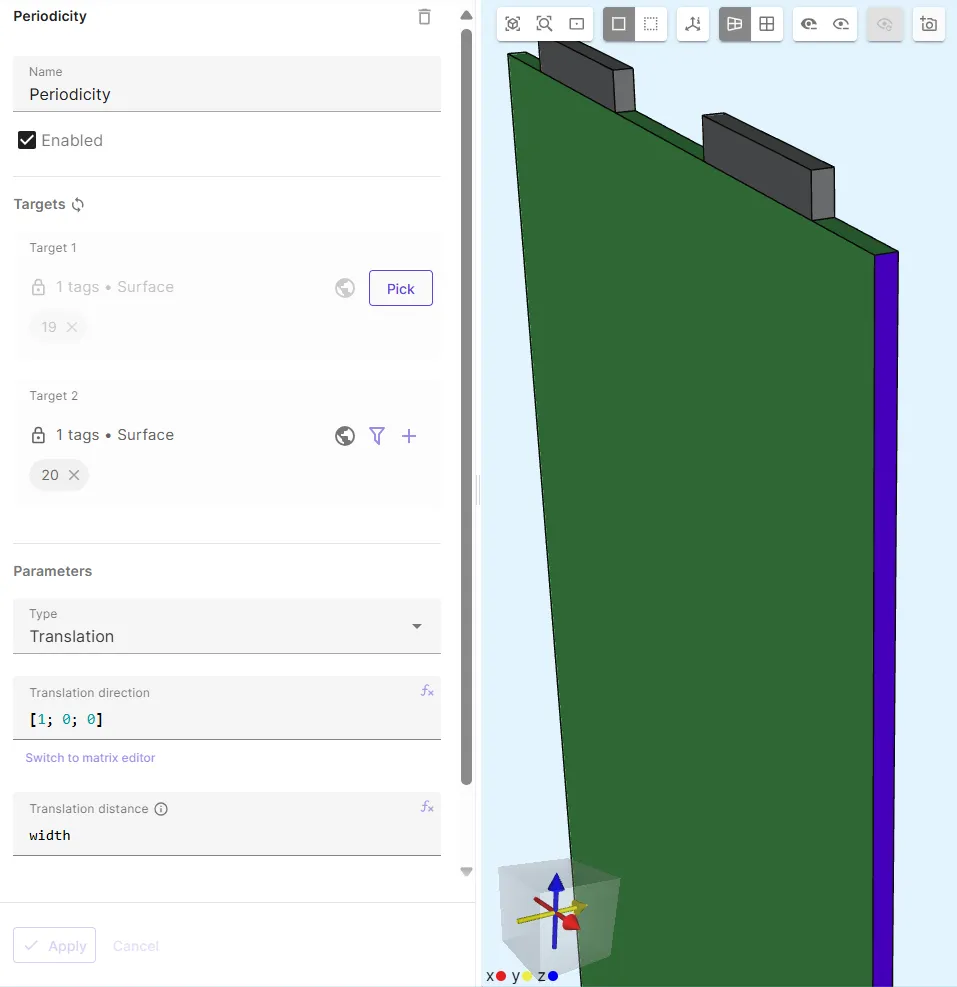
- As Target 1, select the left side surface of the substrate volume in the negative X-direction (surface
-
Add Plain strain:
Name Interaction type Target Value Plain strain ConstraintAll volumes ( 1, 13, 25)[0, 0; 1, 0; 0, 0]
Physics 2 - Electrostatics
Section titled “Physics 2 - Electrostatics”-
Let electrostatics target default to the whole geometry.
-
Add
Lump V/Q.- As lump V/Q target, select all surfaces on the left side (negative X-side) electrode (surfaces
7 - 12). - Set Actuation mode to
Voltage. - Set Voltage to
wavelet(freq, 1.0).
- As lump V/Q target, select all surfaces on the left side (negative X-side) electrode (surfaces
-
Add
Periodicity, same as in Solid mechanics:- As Target 1, select the left side surface of the substrate volume (surface
19). - As Target 2, select the right side surface of the substrate volume (surface
20). - In Parameters:
- Set Type as
Translation. - Set Translation direction [X; Y; Z] to
[1; 0; 0]. - Set Translation distance as
width.
- Set Type as
- As Target 1, select the left side surface of the substrate volume (surface
-
Add
Constraint, and name it asGround.- As Target, select the right side (positive X-side) electrode volume (
25). - Set constraint value to
0.
- As Target, select the right side (positive X-side) electrode volume (
-
Add
Piezoelectricityto couple electrostatics with Solid mechanics.- As Target, select the substrate volume (
1).
- As Target, select the substrate volume (
Your physics are now defined.
Step 5 - Generate the mesh
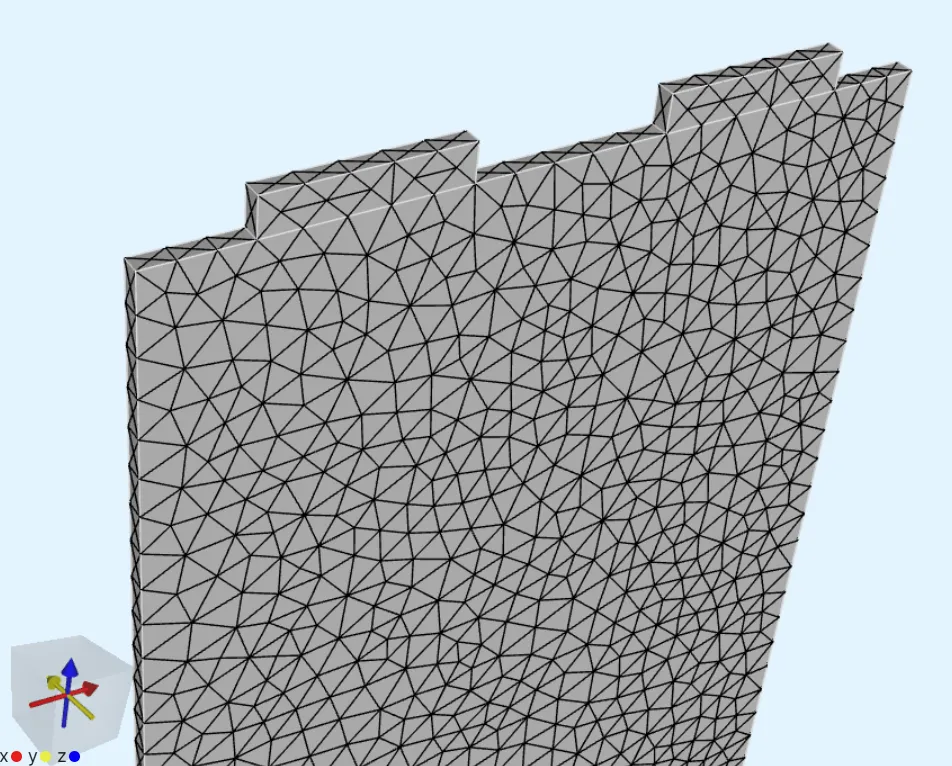
Section titled “Step 5 - Generate the mesh”Go to the Simulations section and create a new mesh:
- Set Mesh quality to
Expert settings. - Set Used mesher to
Basic. - Set Max size to
thickness*2.
Apply settings and mesh. Check the preview:
Step 6 - Simulate
Section titled “Step 6 - Simulate”In the Simulations section, create 2 simulations.
Simulation 1 - Transient
Section titled “Simulation 1 - Transient”Simulation settings:
-
Set Analysis type to
Transient. -
Select timestepping settings as below:
Timestep algorithm Start time [s] End time [s] Timestep size [s] Generalized alpha0100/freq0.05/freq -
Set Solver mode to
Direct solver. -
As Mesh, select the mesh you created.
-
Add Outputs:
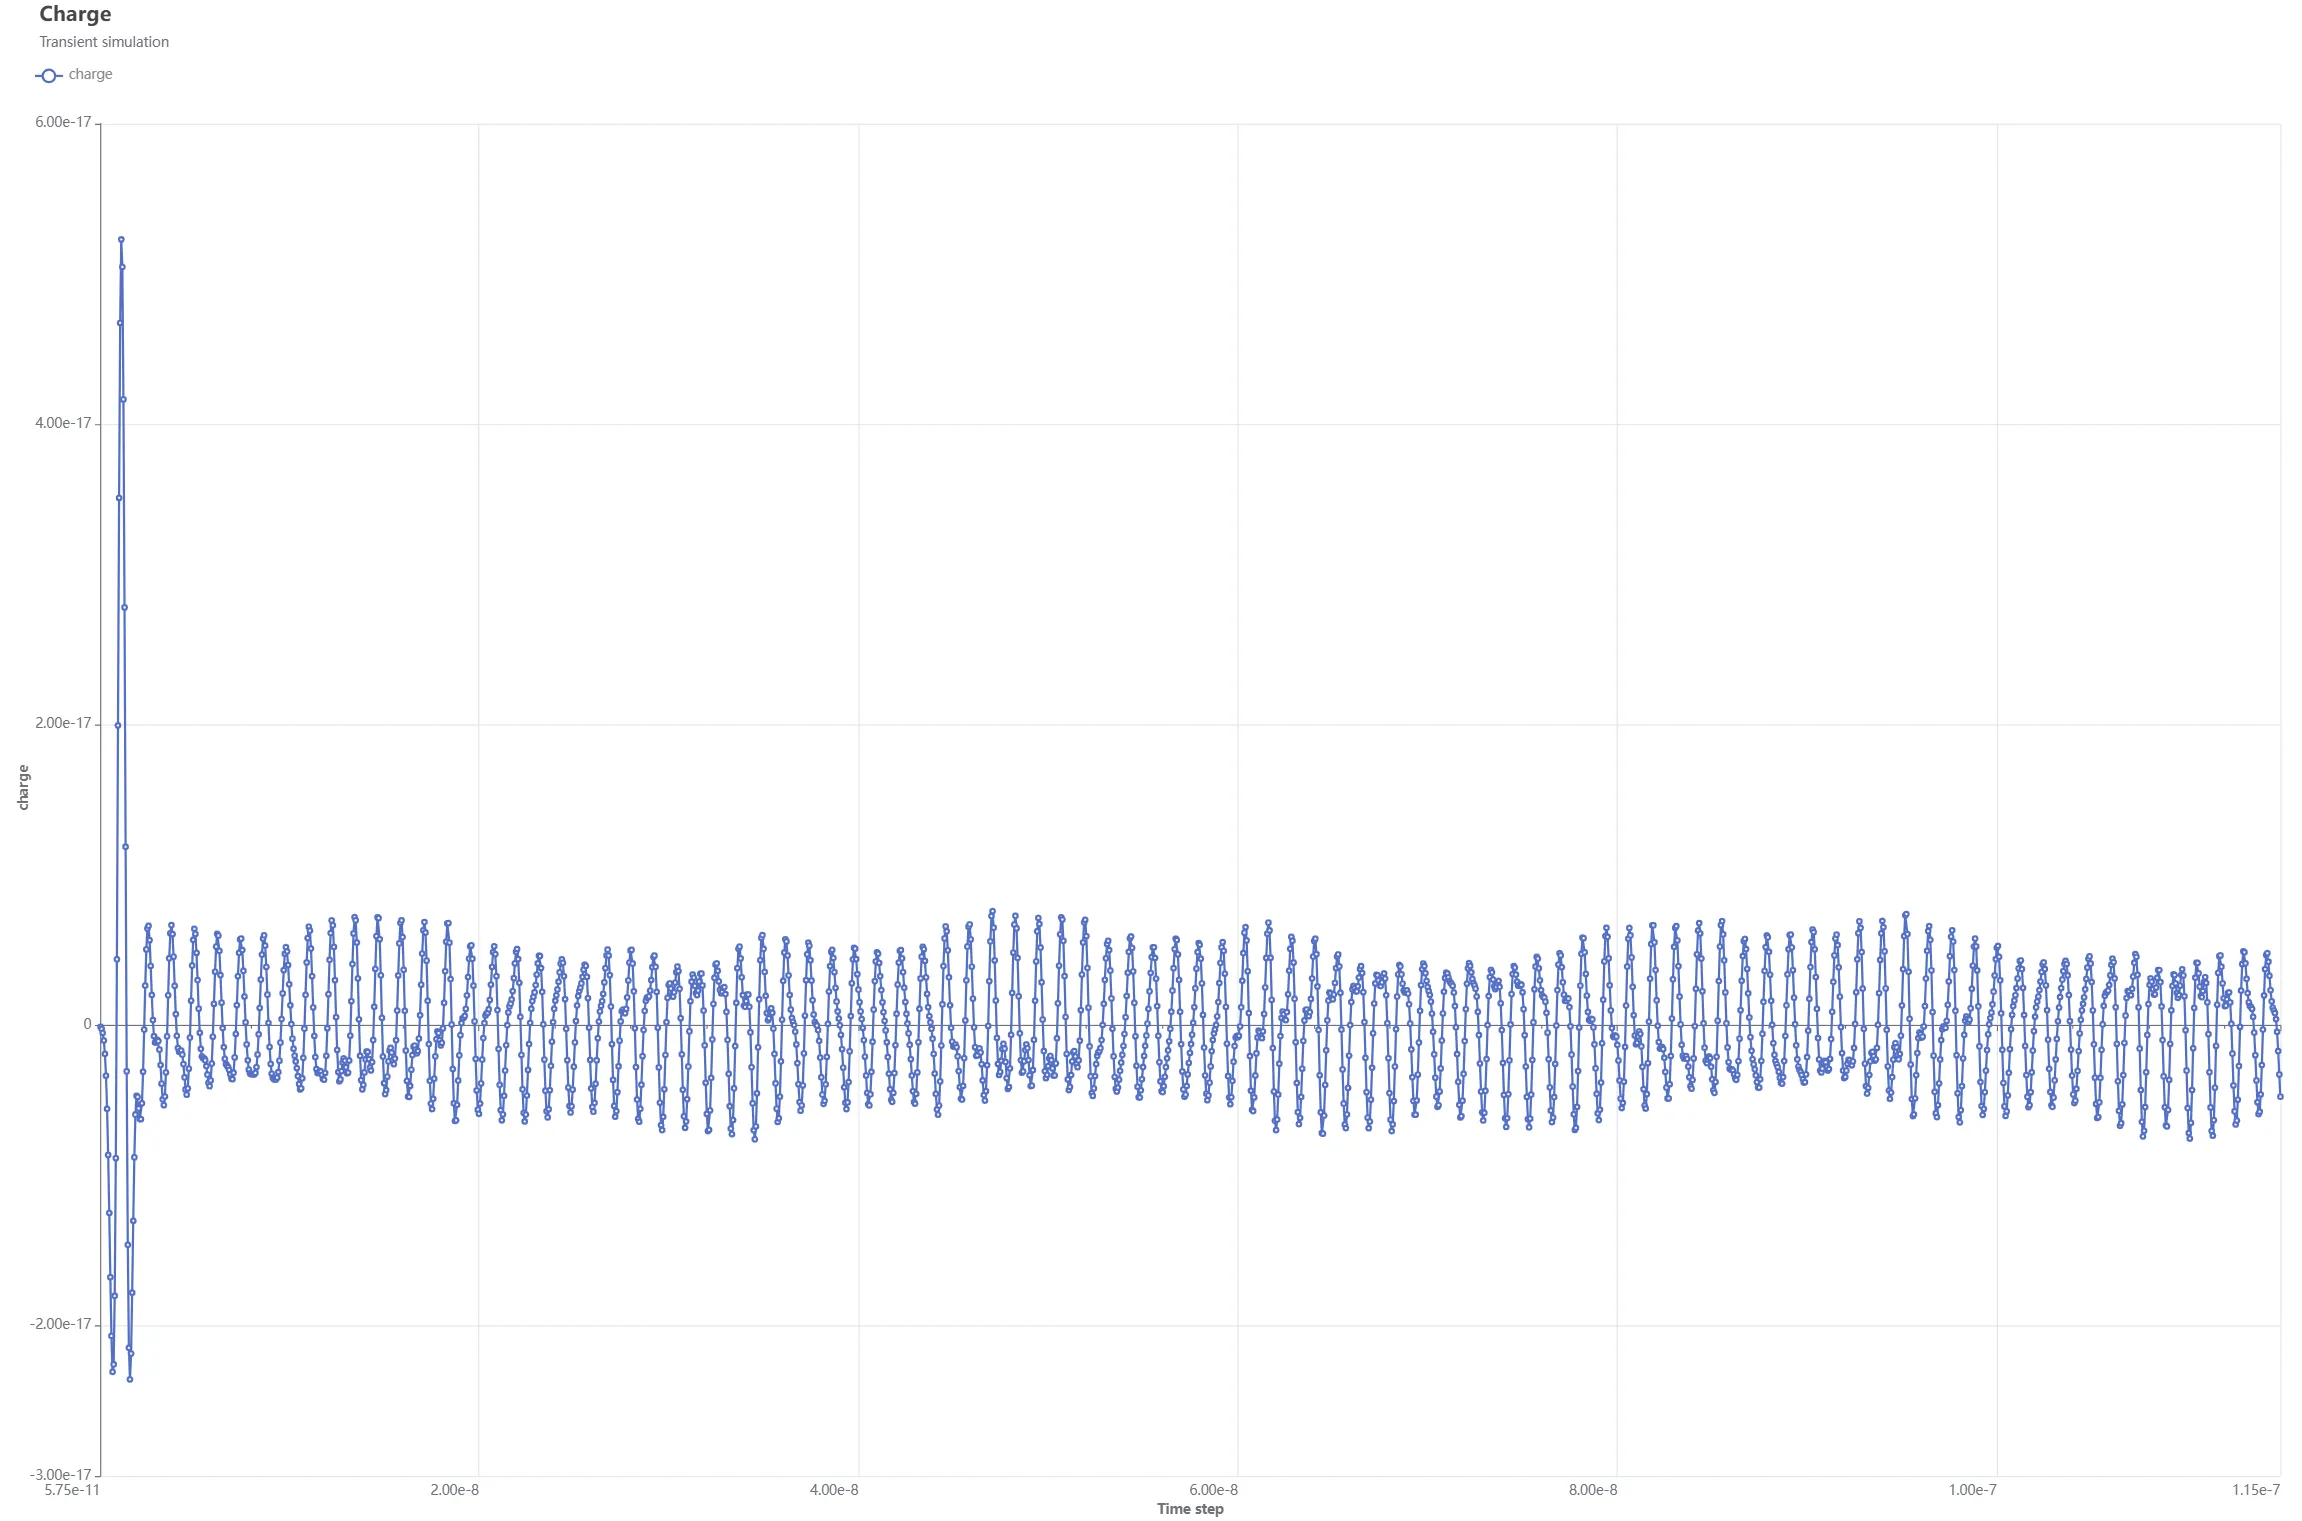
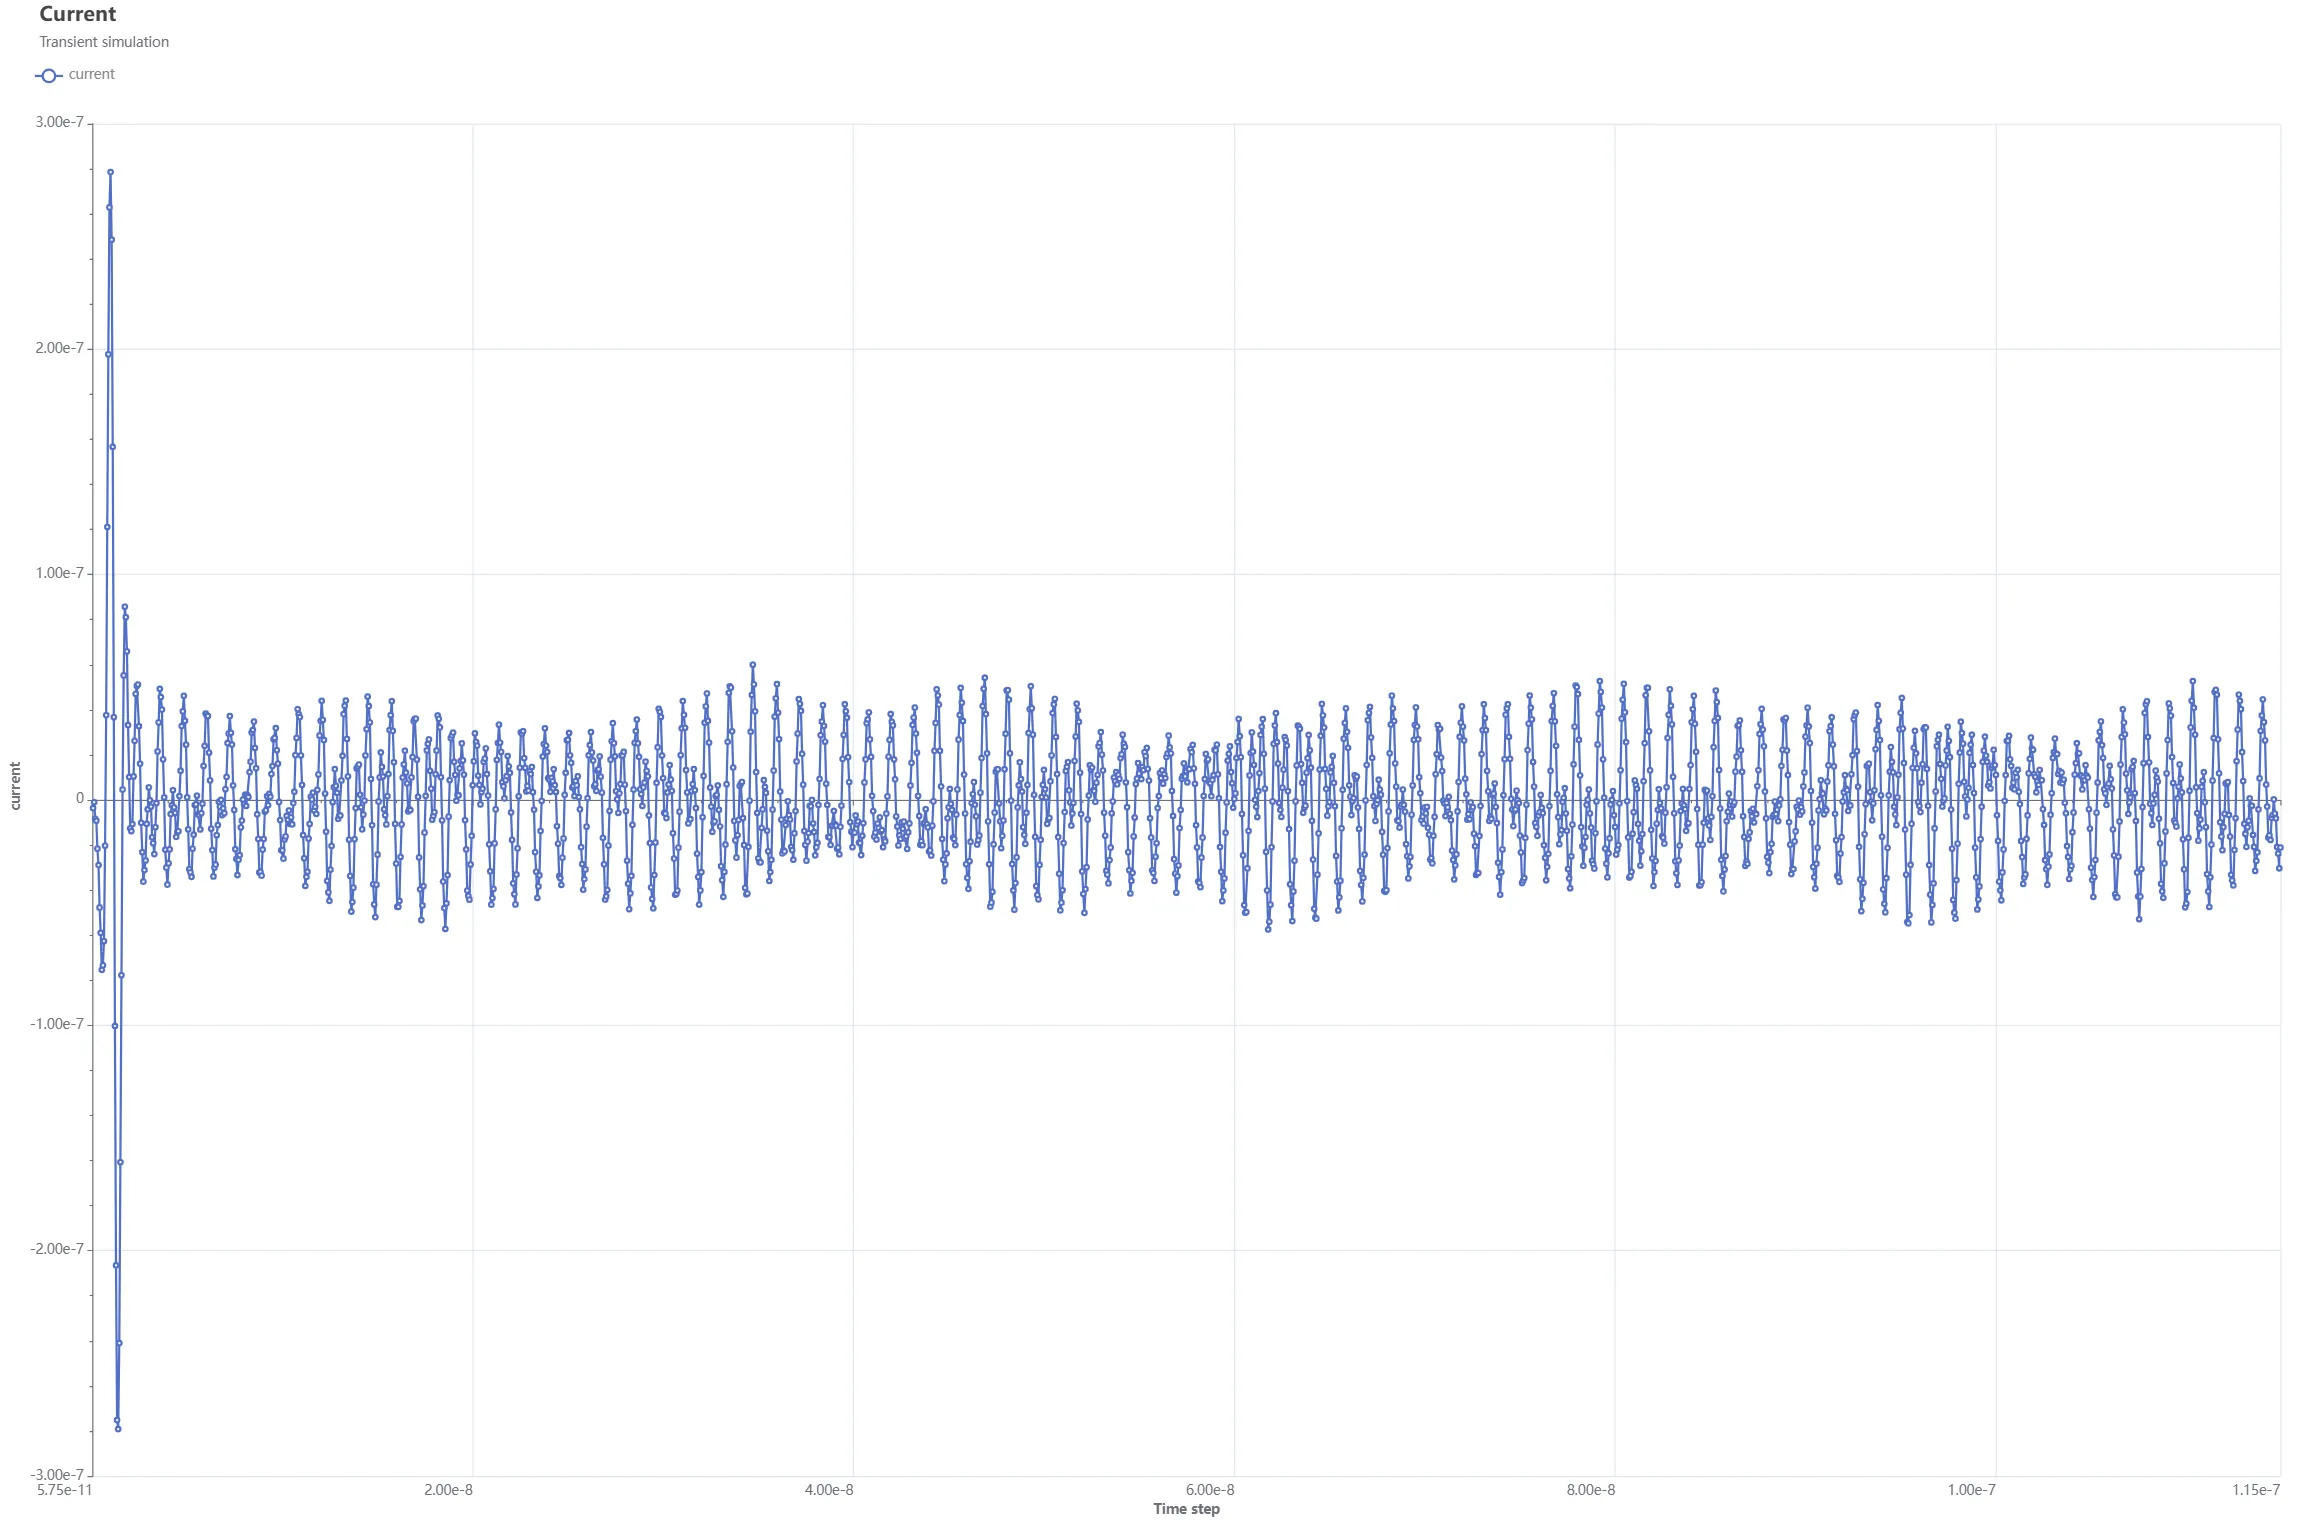
Name Output type Expression Voltage Custom value output lump.VCharge Custom value output lump.QCurrent Custom value output dt(lump.Q)
Simulation 2 - Harmonic
Section titled “Simulation 2 - Harmonic”Simulation settings:
-
Set Analysis type to
Harmonic. -
Set Fundamental frequency to
freq. -
Set Solver mode to
Direct solver. -
As Mesh, select the mesh you created.
-
Add Inputs:
Name Input type Expression freq sweep Sweep over shared expression freqlinspace(8.3e8, 8.6e8, 50) -
Add Outputs:
Name Output type Expression impedance magnitude Custom value output Zmagnitude(getharmonic(2,dt(lump.Q)),getharmonic(3,dt(lump.Q)), getharmonic(2,lump.V), getharmonic(3,lump.V))*thickness
Run your simulations.
Step 7 - Plot results
Section titled “Step 7 - Plot results”In the Simulations section, add plots to see value output results.
Some examples are given below.
Results 1 - Transient
Section titled “Results 1 - Transient”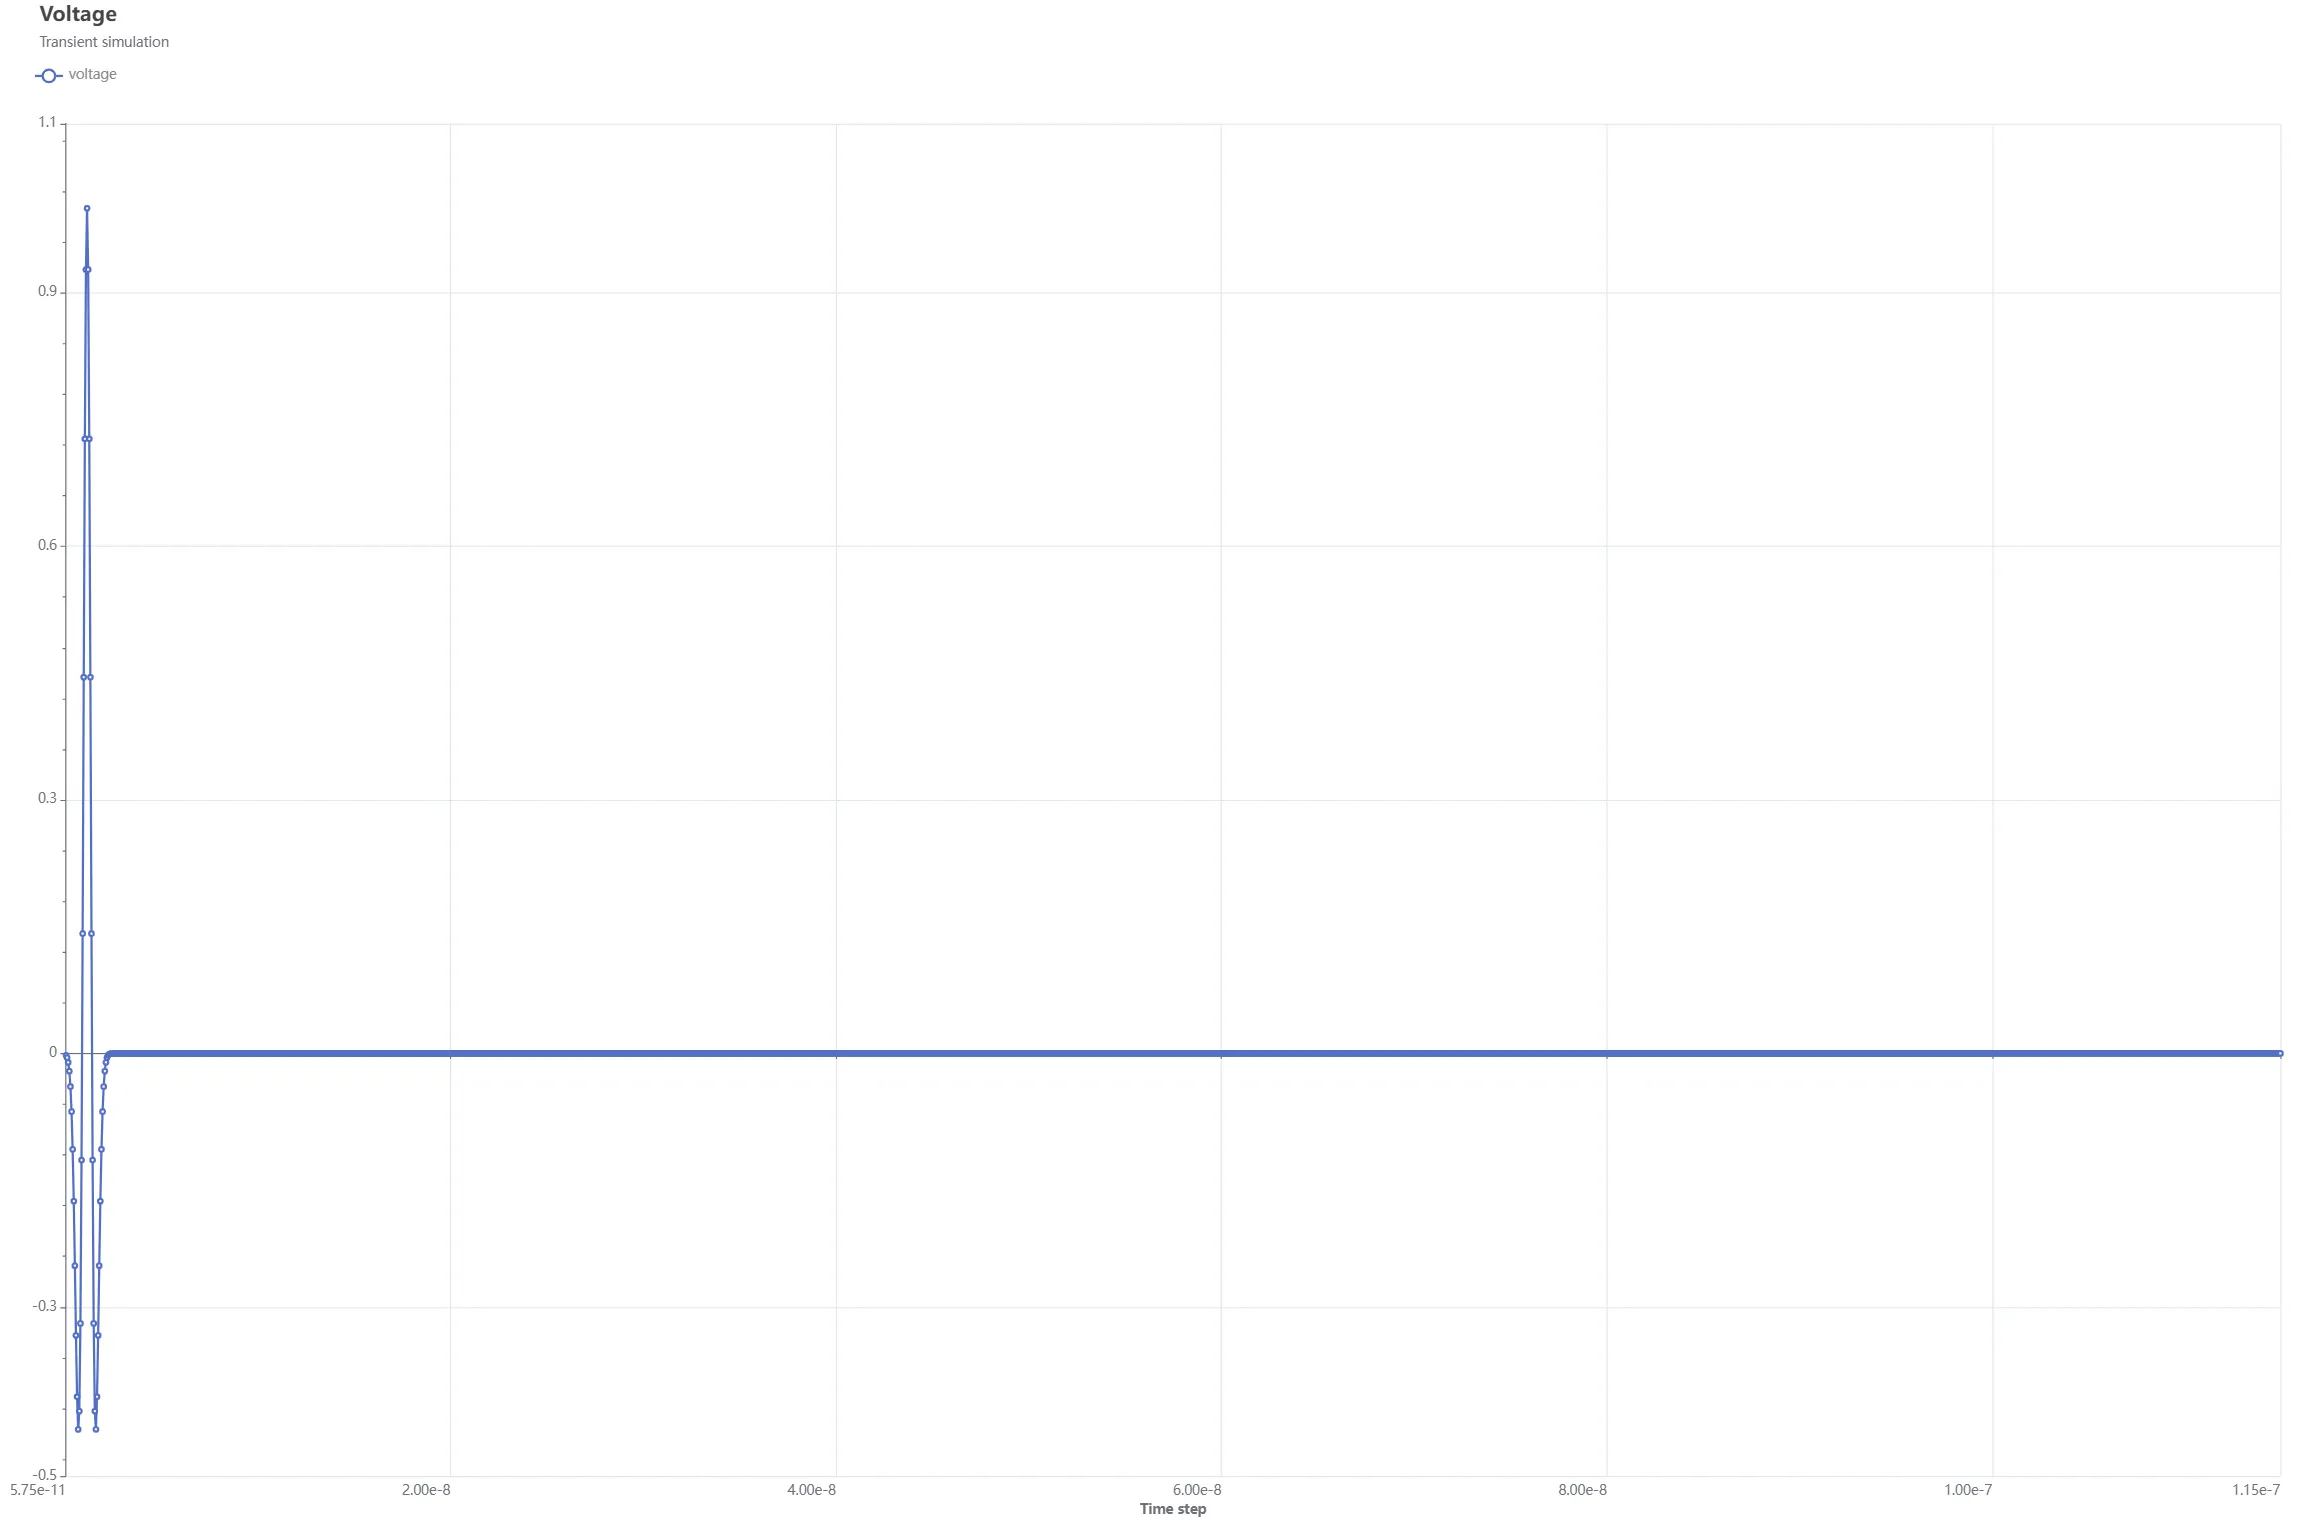
Results 2 - Harmonic
Section titled “Results 2 - Harmonic”