Getting started
Installing and running examples
Section titled “Installing and running examples”Installing on Linux / MacOS / WSL
Section titled “Installing on Linux / MacOS / WSL”On unix-like systems, you can unzip the SDK package to a location of your choice. To run an example, do the following:
cd example/<name_of_the_example># Check the README file, it has the instructions to run the example as well, mentioning links to# related Allsolve demo projects, which you might need to run the example.cat README.md
# Create a virtual environment, copy the allsolve-sdk package and install dependencies$ python3 -m venv venv$ cp <path_to_unzipped_package>/dist/allsolve_sdk-<version>-py3-none-any.whl .$ source venv/bin/activate(venv) $ pip install -U pip(venv) $ pip install -r requirements.txt
# Set the API key in environment variables:(venv) $ export QS_ACCESS_KEY=<your key id>(venv) $ export QS_SECRET_KEY=<your secret key>
# Run the example, assuming any other preparations, such as copying a demo project to yourself,# have been made:(venv) $ python main.py
Note that the example main module might be named differently, refer to the README to check.
Installing on Windows
Section titled “Installing on Windows”Prerequisities
- You have installed Python3 on your machine
- Access to the latest SDK package (for example
allsolve_sdk_examples-<version>-beta).
Step 1: Unzip SDK package and open Powershell
Unzip the Allsolve SDK package. In the unzipped SDK directory, you will find example/ folder containing a bunch example cases.
Open Windows Powershell and change the working directory to an example case of your choice.
PS > cd path\to\selected\example\caseAll the successive Powershell commands in the following steps assume the path\to\selected\example\case as the working directory.
Step 2: Copy the package-wheel to example folder
In the unzipped SDK folder, you will also find the Python package dist/allsolve_sdk-<version>-py3-none-any.whl.
Copy this package to the selected example folder.
PS > cp ..\..\dist\allsolve_sdk-<version>-py3-none-any.whl .Check the README file of the example case; it has the instructions to run the example as well as mentioning links to the related Allsolve demo projects, which you might need to run the example.
PS > cat .\README.mdStep 3: Create and activate Python virtual environment
Create a Python virtual environment named allsolve-venv using the following command:
PS > python -m venv allsolve-venvAfter the above command is executed, you should see a new folder named allsolve-venv in the selected example directory.
You can also directly check this in the Windows Powershell using ls command.
Activate the virtual environment allsolve-venv with the following command:
PS > .\allsolve-venv\Scripts\Activate.ps1Now, the command line should begin with (allsolve-venv) PS which confirms that the virtual environment is indeed activated.
Step 4: Install SDK package wheel
With below commands install the SDK package-wheel and dependencies required for running the example case:
(allsolve-venv) PS > python -m pip install -U pip(allsolve-venv) PS > pip install -r .\requirements.txtStep 5: Set up the API keys
The example case in SDK usually requires a corresponding project in the GUI. These two are connected using the API keys.
Read the Creating and using API keys instructions below on obtaining these keys.
One the API keys are created, set the environment variables QS_ACCESS_KEY and QS_SECRET_KEY in the Windows Powershell:
(allsolve-venv) PS > $env:QS_ACCESS_KEY="<your key id>"(allsolve-venv) PS > $env:QS_SECRET_KEY="<your secret key>"Step 6: Run the example
Assuming all other preparations mentioned in the README.md file, such as copying a demo project to your projects in UI, are completed, run the example case with the below command:
(allsolve-venv) python main.pyNote that depending on the example case, the main module might be named differently. Refer to the README to check.
Installing on Windows with Anaconda and Spyder
Section titled “Installing on Windows with Anaconda and Spyder”Prerequisities
- You have installed Anaconda on your machine
Setting up Anaconda and Spyder
- Creating a new environment in Anaconda
- Open the Anaconda Navigator.
- Navigate to Environments → Create.
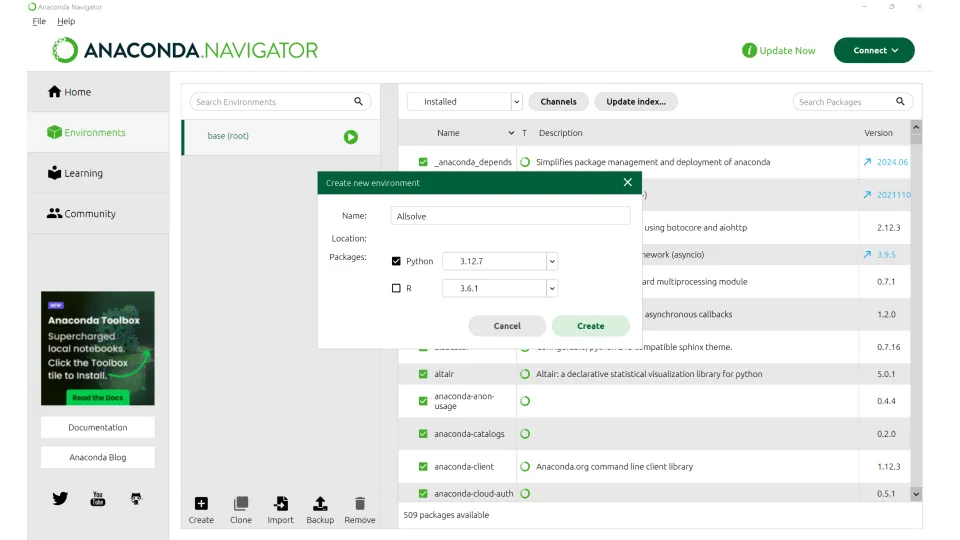
- Name the environment “Allsolve”. Make sure to enable the latest Python version under Packages before clicking Create.
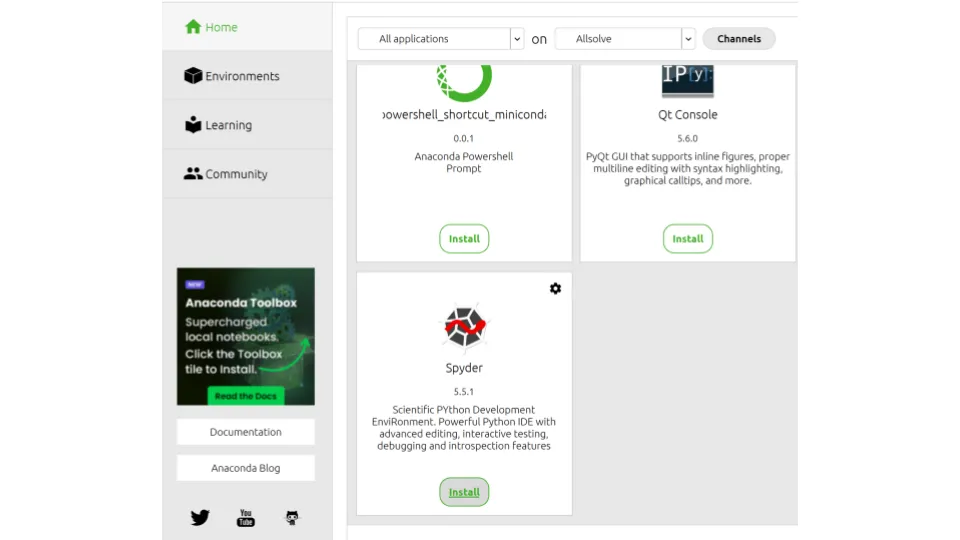
- Navigate to Home and install Spyder in the Allsolve environment (selected in the dropdown at the top).
Running an example
In the unzipped SDK folder, you will find the package wheel dist/allsolve_sdk-<version>-py3-none-any.whl. Copy this package wheel inside the
selected example folder.
Open an Anaconda prompt either:
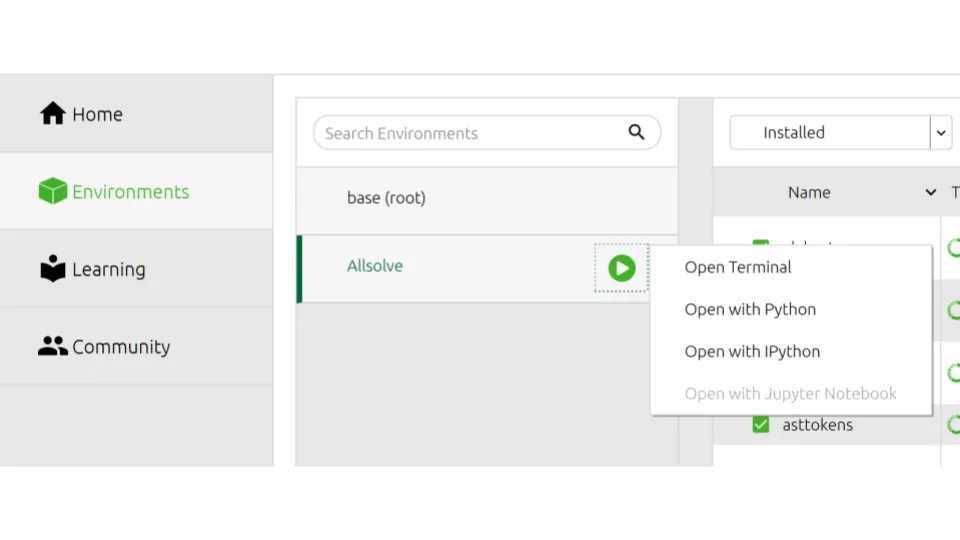
- from Anaconda Navigator, go to Environments → Allsolve → Open Terminal.
- Or from Start menu → open Anaconda Prompt and run
activate Allsolvecommand.
The prompt should indicate your anaconda environment name in parentheses on the left. Here we assume you named it “Allsolve”. Then run the following:
(Allsolve) $> cd <path_to_example>(Allsolve) $> pip install -r requirements.txtThen Launch the “Spyder (Allsolve)” either
- from Anaconda navigator, Home → on Allsolve → Spyder
- Or from the Windows Startup menu, search for “Spyder (Allsolve)”
In the Spyder interface, select the example folder as the working directory. Check the README file for any
additional preparation steps. Then set your API keys either directly to the example script
or set the environment variables QS_ACCESS_KEY and QS_SECRET_KEY.
General concepts
Section titled “General concepts”APIs in Allsolve
Section titled “APIs in Allsolve”There are three distinct APIs that all relate to running simulations programmatically in Allsolve.
- Project & simulation management:
- Public HTTP API: This API defines the basic data structures and higher level concepts in Allsolve, as well as how to communicate with the Allsolve platform.
- SDK: The software development kit is a convenience library for controlling Allsolve. It wraps the public API client and handles some routine processing of inputs and outputs, as well as offers a way to write readable scripts. Currently we offer implementation in Python.
- Detailed simulation control:
- Script API: This is the low-level simulation API in Python, with the most flexibility but also higher learning curve. Allows writing custom formulations for physics and control the small details of how the simulation is executed. The script generated in the GUI from the higher level concepts uses this API.
In almost all cases, you can use the SDK and the script API, and can ignore the public API and let the SDK handle it for you.
Basically, the SDK is programmatic version of the Allsolve GUI. Not all of the GUI functionality is available though, for example the physics and interactions are not included in the SDK (yet).
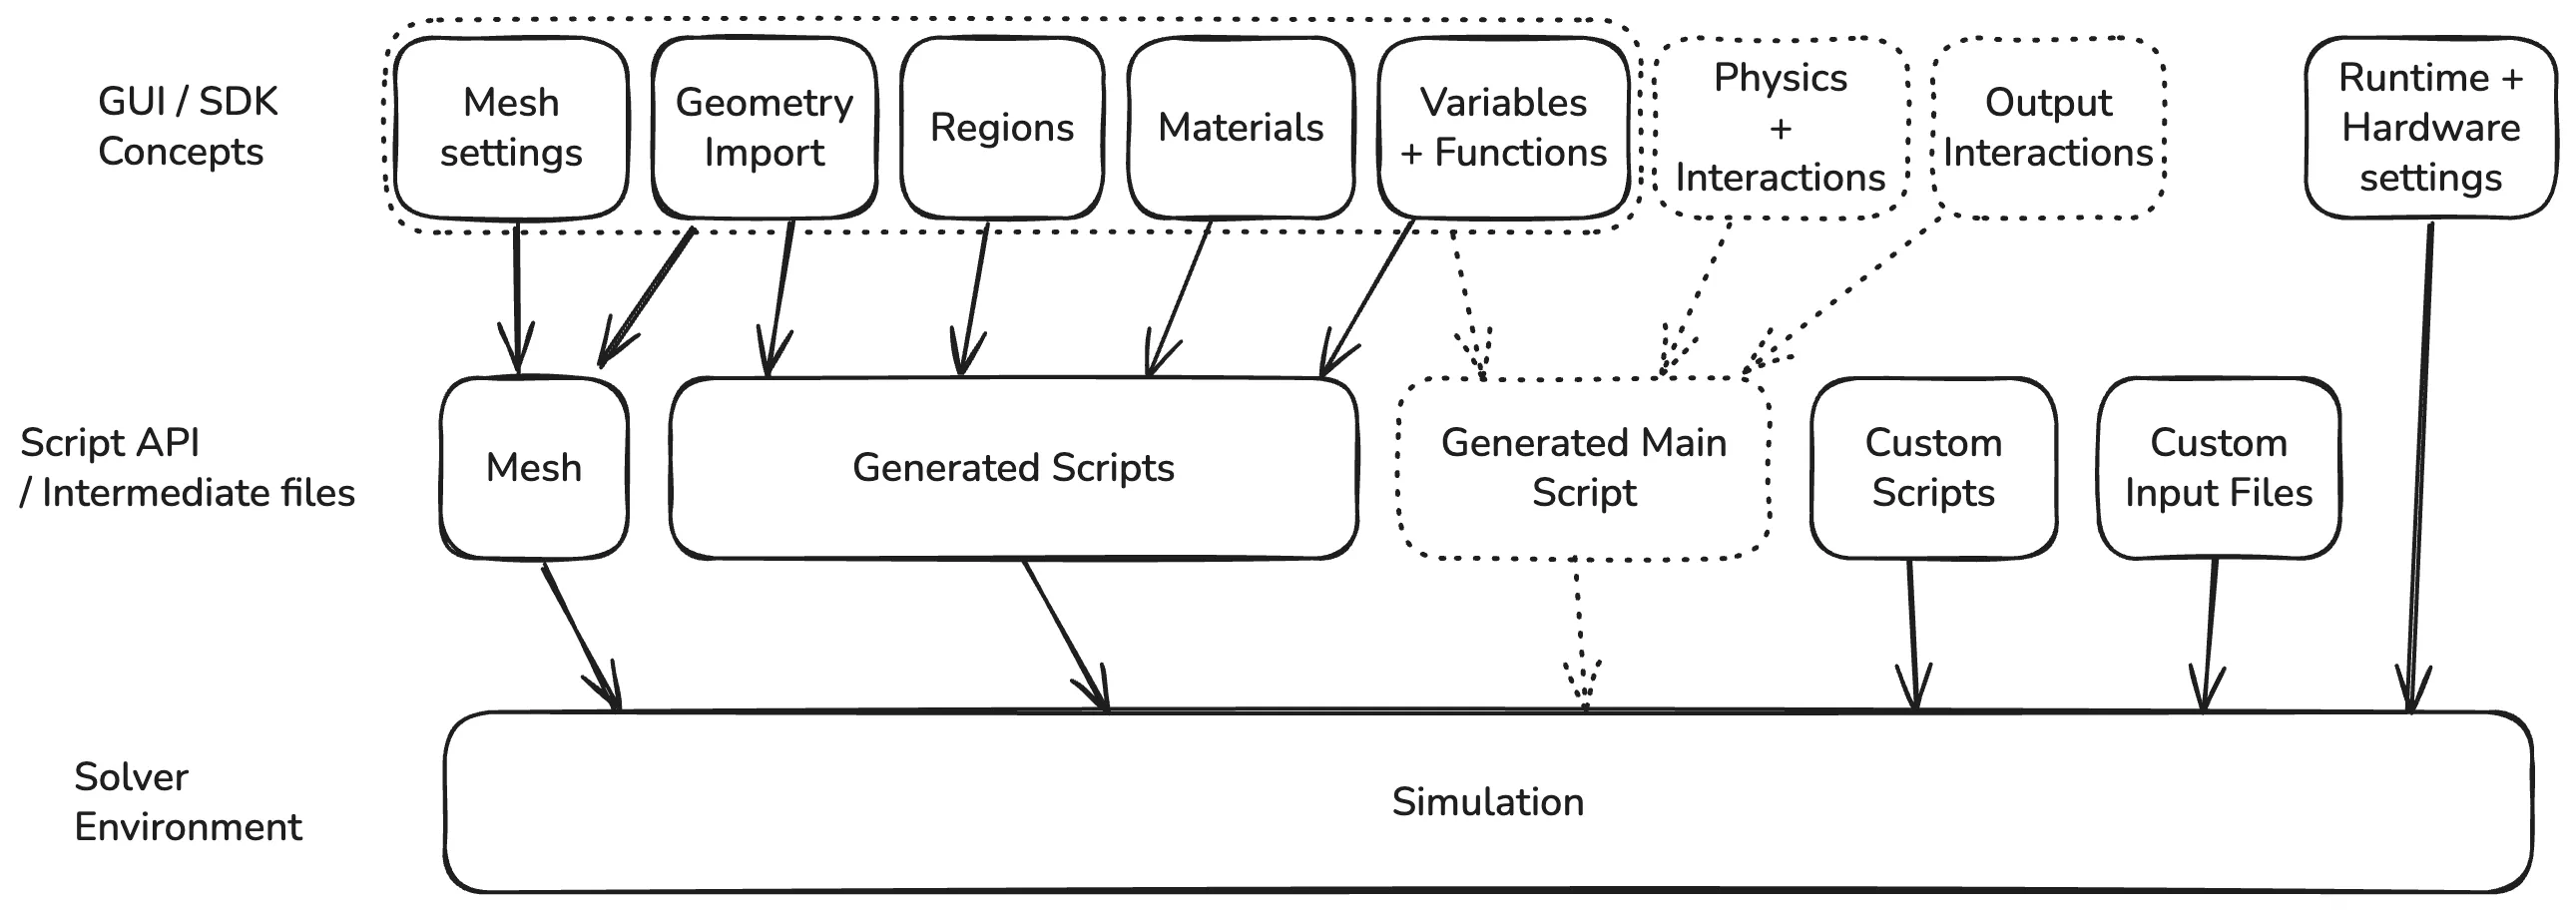
Therefore, the physics setup is given as a script. Here’s a typical file structure for an Allsolve SDK project:
.├── main.py # The main SDK script, that manages projects, geometries, meshes, regions and simulations.| # This runs on your machine.├── requirements.txt # Python dependencies file.└── sim └── simulation.py # The main simulation script, containing the final description of what is going to be # simulated, solved and which outputs are going to be written. This is what gets executed # when the simulation is run. # This runs on a machine / cluster reserved by Allsolve. This script is given via the SDK # calls for each simulation.So there is a local and remote side to the script. Via the SDK calls, the user can give several inputs that are made available to the environment where the remote script is executed, including CSV and JSON files.
Creating and using API keys
Section titled “Creating and using API keys”The SDK supports two authentication methods:
- Project API keys: For working only within a specific project, no access rights to anything else.
- Organization API keys: For managing multiple projects within your organization. These are always bound to a certain user.
Project API keys
Section titled “Project API keys”A project API key gives access to a single project, allowing the holder of the key to modify and run simulations within the project via the SDK.
-
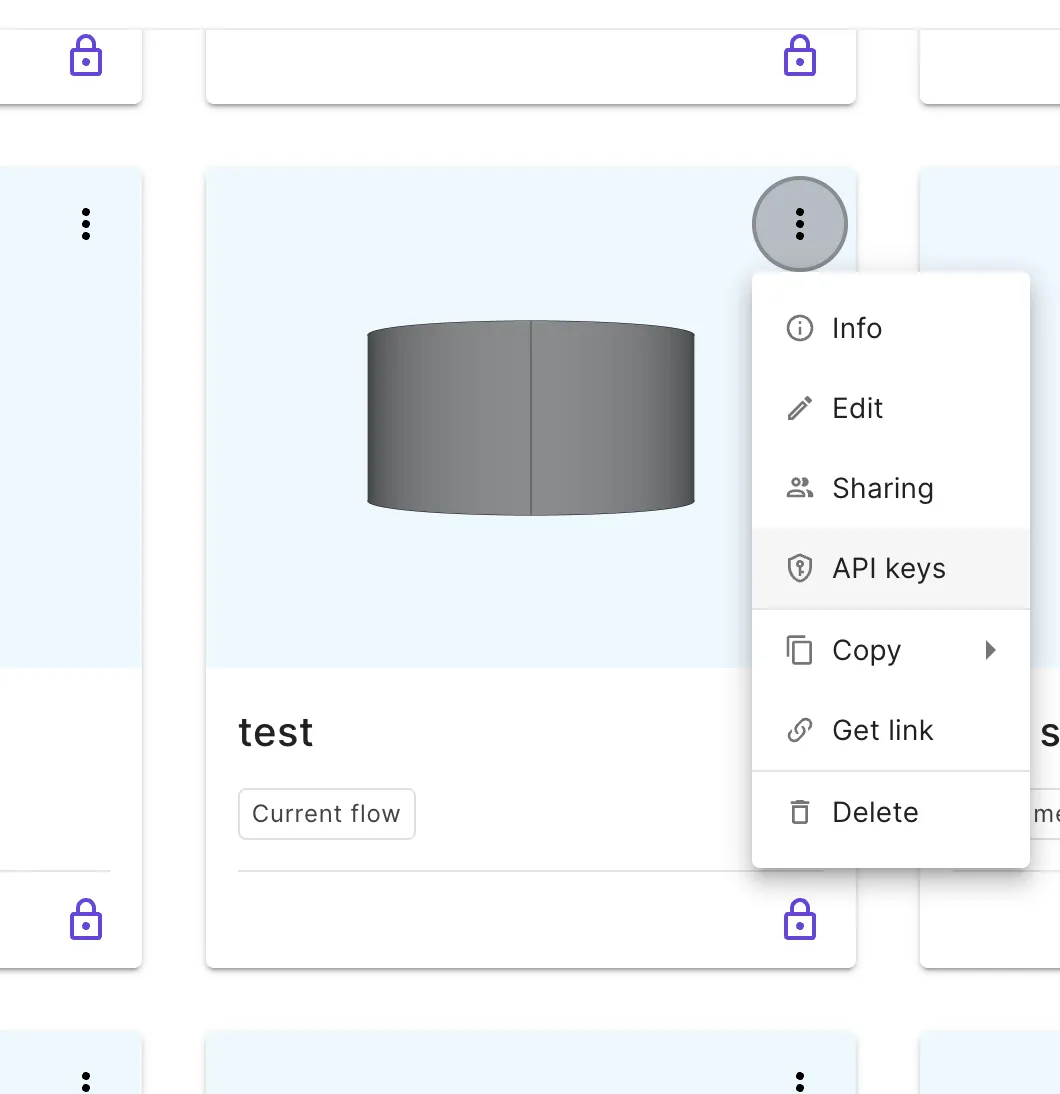
To create a new project API key, navigate to the Allsolve projects overview page, and select the “API keys” in the project context menu.
-
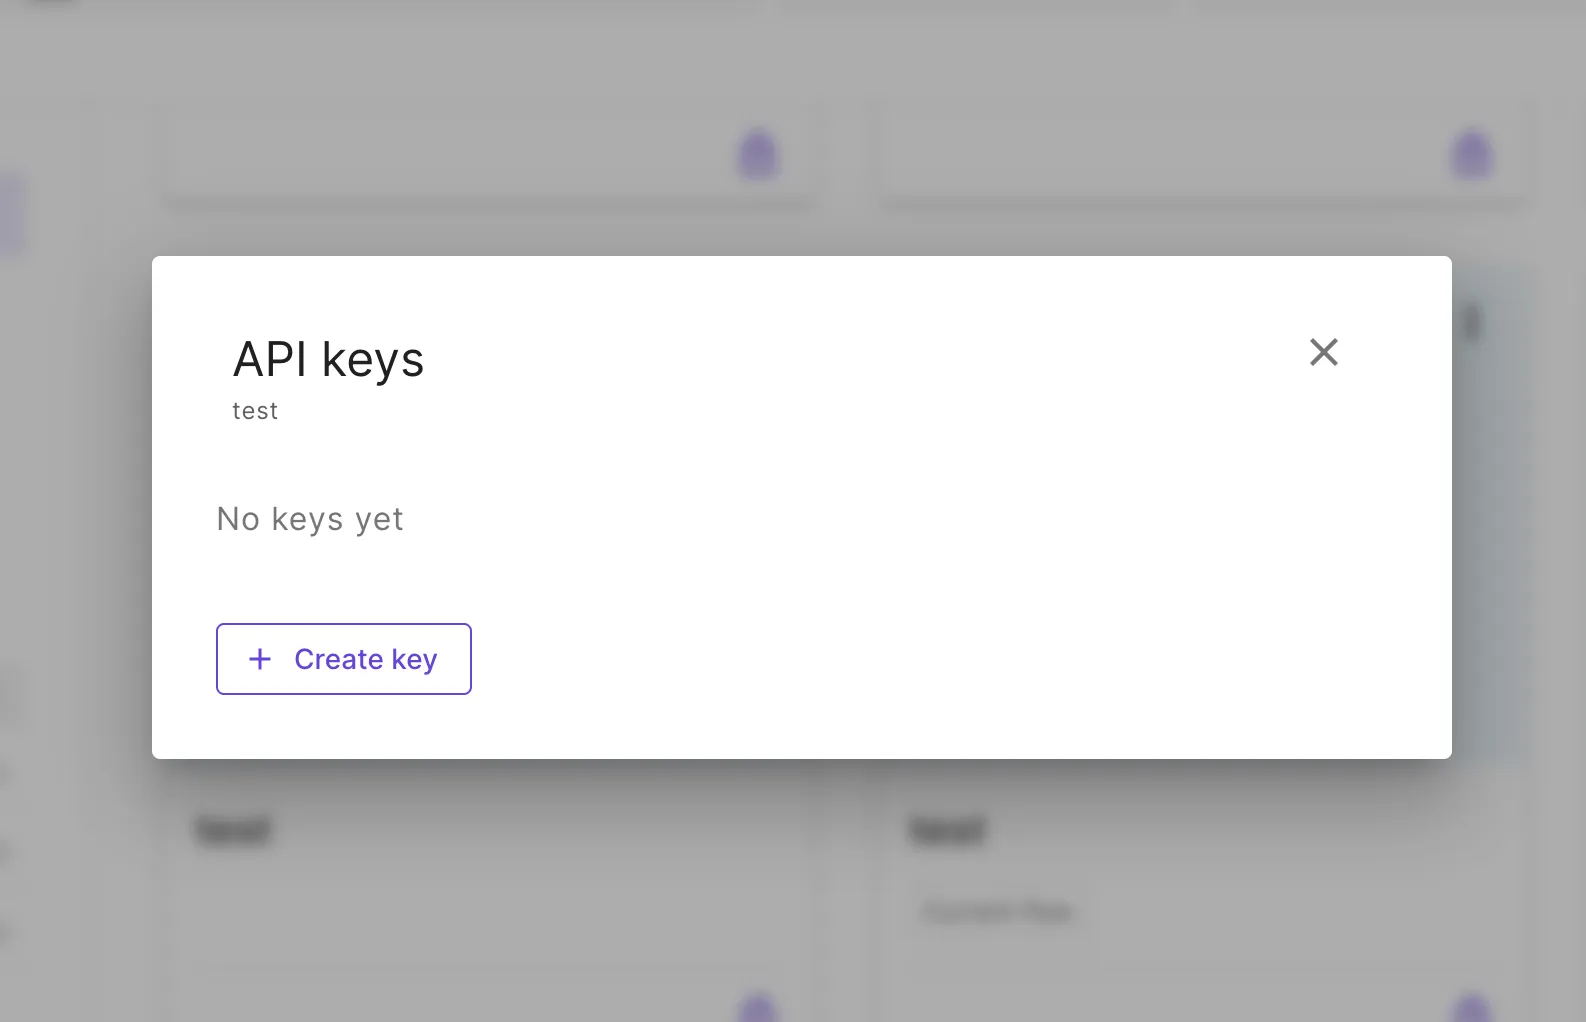
Then create a new API key
-
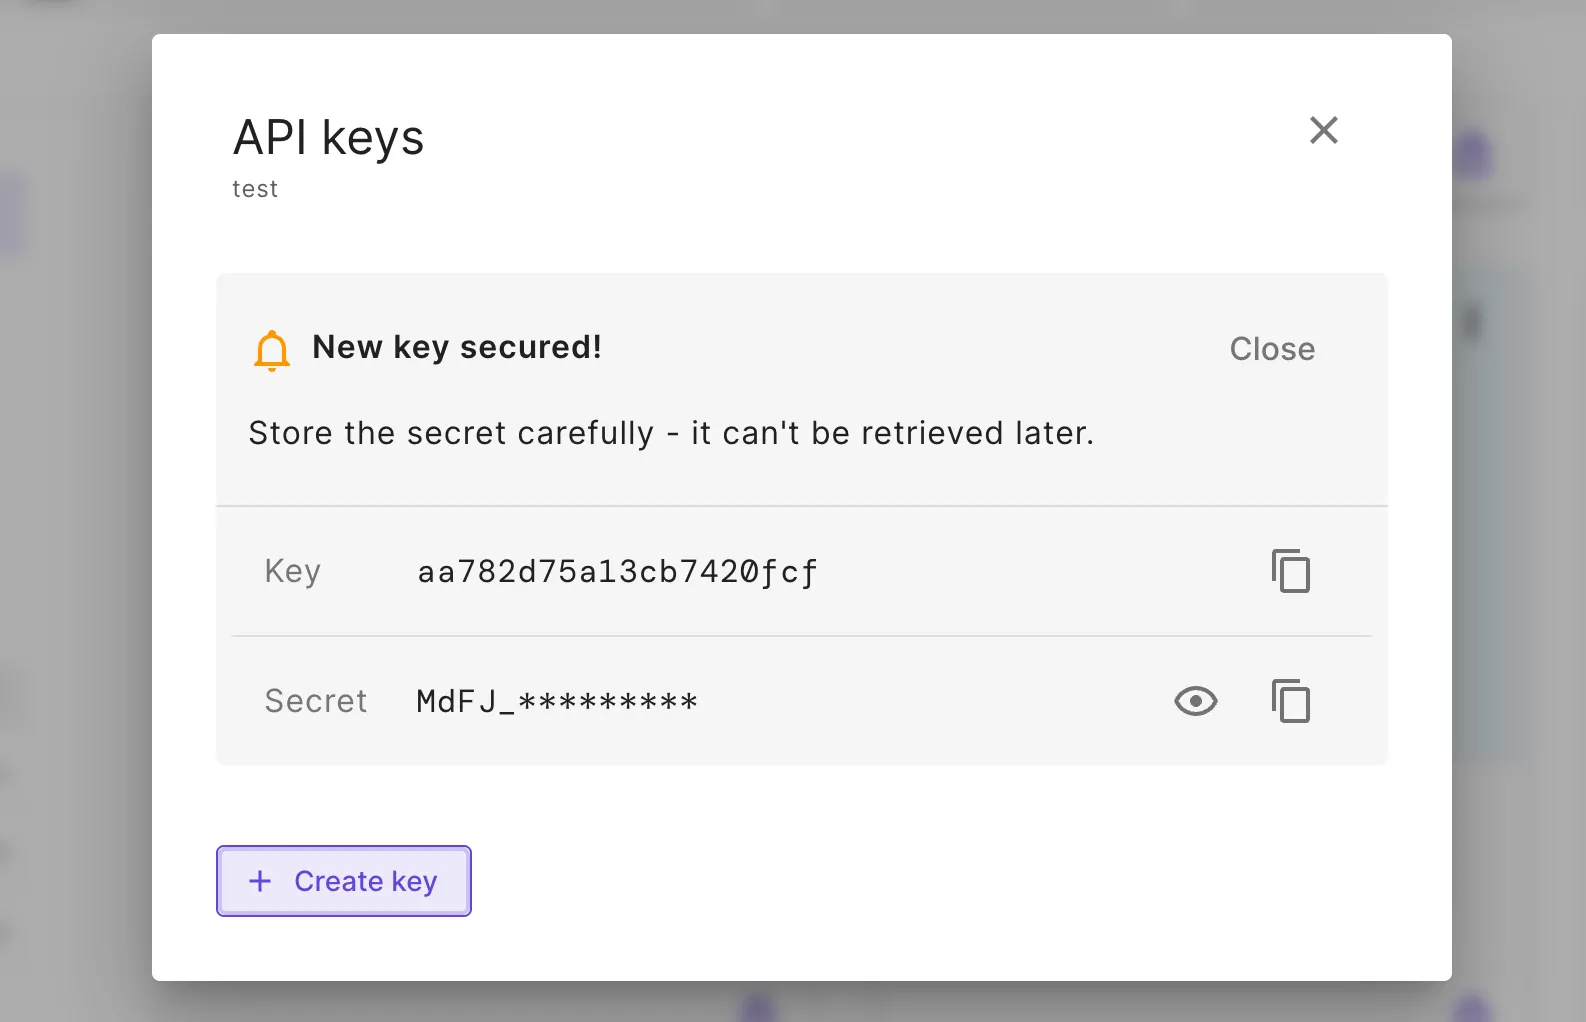
After creating the API key, copy the information and store it carefully. The secret cannot be fully viewed after closing the window, and if lost, a new key should be created.
Organization API keys
Section titled “Organization API keys”An organization API key differs from a project API key by the permissions. With an organization API key, you can manage multiple projects by creating, listing and deleting them. Therefore, an organization API key always has a user associated to it, and the permissions are derived from that associated user.
Currently the projects created via the API are not visible in the projects overview, and can only be managed via the SDK.
-
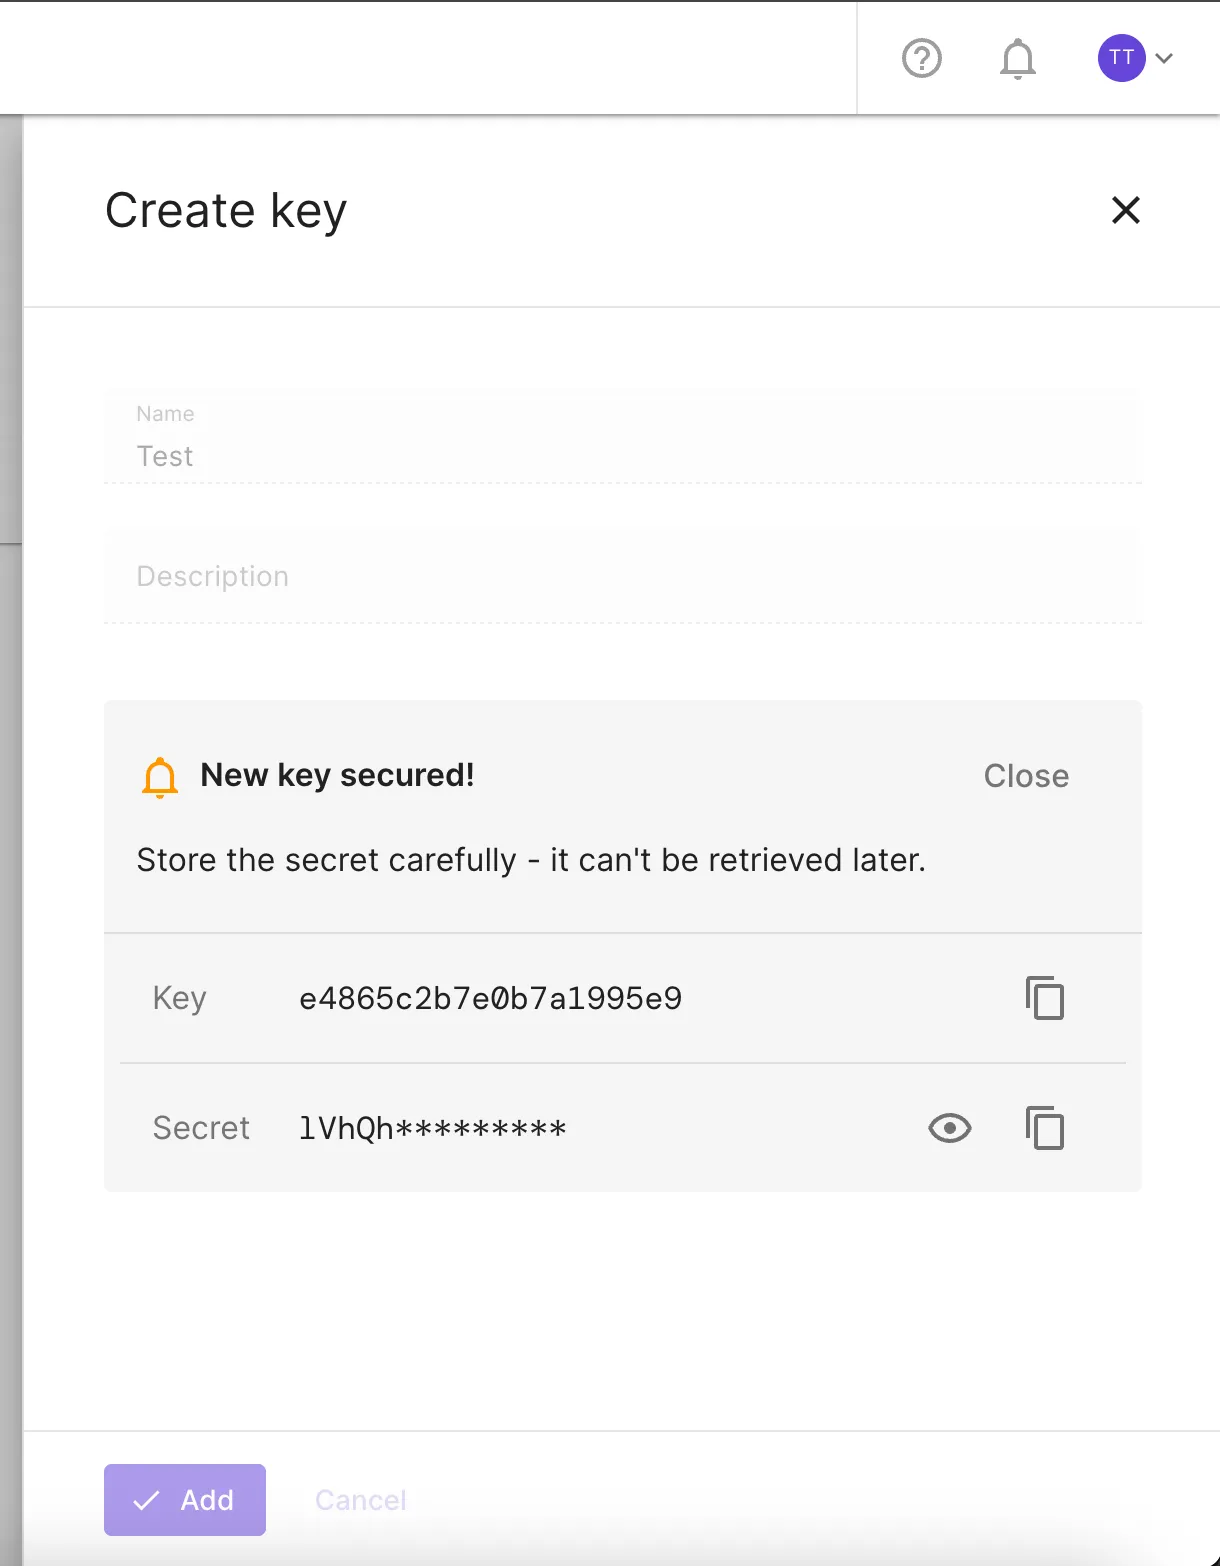
To create a new organization key, go to the Allsolve settings, and find “API keys” section on the left. For organization admins, it is listed under the “organization” -section.

-
After creating the API key, copy the information and store it carefully. The secret cannot be fully viewed after closing the window, and if lost, a new key should be created.
Applications / Machine users
Section titled “Applications / Machine users”For organization API keys, an associated user is always required. This might not make sense for example if building an integration or application that uses Allsolve, potentially used by many different users.
For this use-case, an organization admin can create an application, or a machine user. These can be used to create API keys for certain applications or integrations, while managing resource sharing just like with any regular user.
Initializing the SDK
Section titled “Initializing the SDK”After storing the API access key and secret, for example to environment variables QS_ACCESS_KEY and QS_SECRET_KEY,
you can setup the SDK like this:
import allsolve
# Using environment variablesapi_key = os.environ["QS_ACCESS_KEY"]api_secret = os.environ["QS_SECRET_KEY"]allsolve.setup(    api_key=api_key,    api_secret=api_secret,    host="https://allsolve.quanscient.com",)
Note that the host can be different depending on your region and plan type. Check the root URL where you normally
access Allsolve and use that.
Example of a basic script with the SDK
Section titled “Example of a basic script with the SDK”Assuming that the authentication introduced above is done using a project API key, you can run the following:
# Get the project associated with the API keyproject = allsolve.Project.get()
# Import geometrygeometry = project.import_step("path/to/your/model.step")geometry.run() # Process the geometry
# The created regions will be available to the simulation script# via "regions" module.air = project.create_region_basic(    "air",    allsolve.Region.VOLUME,    [1], # The basic regions take lists of entity tags.         # There are more advanced ways to define regions as well,         # see the examples.)
project.create_region_basic(    "constraint1",    allsolve.Region.SURFACE,    [5],)project.create_region_basic(    "constraint2",    allsolve.Region.SURFACE,    [6],)
project.create_material(    "air",    region=air,    electric_permittivity="4 * epsilon0" # Expression can be used here)
# Create and configure a meshmesh = project.create_mesh(allsolve.MeshSettings(    quality=allsolve.MeshQuality.DEFAULT,))mesh.run()  # Generate the mesh
# Create and run a simulationsimulation = allsolve.Simulation.create(    name="My Simulation",    description="Automated simulation via SDK",    max_run_time_minutes=60,    mesh_id=mesh.id)
# Set the script that defines the simulation in a format# understandable for the simulation core (script API).simulation.set_scripts(    [        allsolve.Script("sim/simulation.py", is_main=True),        # allsolve.Script("sim/other.py"), # Other modules can be added as well.    ])
# Select the hardware to use.simulation.set_runtime(    allsolve.Runtime(        node_count=4,        node_type=allsolve.CPU.CORES_1_16GB,    ))
# Start the simulationsimulation.start()
# Monitor progress and get resultswhile simulation.is_running(refresh_delay_s=1):    simulation.print_new_loglines()
# Print the last remaining logssimulation.print_new_loglines()
if simulation.get_status() != allsolve.Job.SUCCESS    raise Exception("Simulation failed")
simulation.save_output_field("v") # Saves the potential field "v" to a VTU file                                  # which can be visualized in Paraview.
And the accompanying sim/simulation.py would look like this:
import mathimport csvimport jsonimport quanscient as qsfrom utils import Mesh, Variables, Empty, Fields, DerivedFieldsfrom expressions import exprfrom materials import matfrom regions import regfrom parameters import par
var = Variables()mesh = Mesh()fld = Fields()df = DerivedFields()
# Load the meshmesh.mesh = qs.mesh()mesh.mesh.setphysicalregions(*reg.get_region_data())mesh.skin = reg.get_next_free()mesh.mesh.selectskin(mesh.skin)mesh.mesh.partition()mesh.mesh.load("gmsh:simulation.msh", mesh.skin, 1, 1)
# Electric potential fieldfld.v = qs.field("h1", [1])fld.v.setorder(reg.all, 2)
df.E = qs.parameter(3, 1)
# Electric fielddf.E.addvalue(reg.all, -qs.grad(fld.v))
# Constraint interactionfld.v.setconstraint(reg.constraint_target, 1.0)
# Constraint interaction: Constraint 2fld.v.setconstraint(reg.constraint_2_target, 0.0)
form = qs.formulation()
# Electrostaticsform += qs.integral(reg.all, -(par.epsilon() * qs.grad(qs.dof(fld.v))) * qs.grad(qs.tf(fld.v)))
form.allsolve(relrestol=1e-06, maxnumit=1000, nltol=1e-05, maxnumnlit=1000, relaxvalue=-1)
# Field output: vqs.setoutputfield("v", reg.all, fld.v, 2)